
Most people think a beautiful front yard requires a professional landscaper’s bill. It doesn’t.
The truth? You can transform your curb appeal for under $300, sometimes for under $150. The difference between a front yard that looks like you spent thousands and one that actually did cost thousands isn’t the plants-it’s the design.
I’ve seen homeowners drop $5,000 on landscaping contractors only to end up with something that looks worse than a $200 DIY project done the right way. The secret isn’t budget. It’s strategy.
Here’s what separates cheap-looking landscapes from budget-friendly ones that look expensive: focal points, repetition, clean edges, and the right plant choices. None of those cost more money. They cost more thinking.
In this guide, I’m sharing 17 front yard landscaping ideas on a budget-everything from hardscape hacks (mulch beds, edging, pathways) to smart plant choices that deliver maximum visual impact without the price tag. Some of these you can implement this weekend. Others are seasonal opportunities to grab plants on sale or score free materials from local salvage yards.
Whether you’re working with $50, $150, or $300, you’ll find actionable ideas here that actually look expensive. Let’s dig in.
Budget Landscaping Principles That Work
Before we get to specific hardscape ideas, you need to understand why some $200 front yards look like $2,000 projects.
Professional landscapers use four design principles that have nothing to do with money:
Focal Points – Your eye should land somewhere intentional when you pull up to the house. That’s usually the front door, an arbor, or a feature plant. Without a focal point, even an expensive yard looks scattered. With one, a cheap yard looks designed. Cost to create: $0-50.
Repetition – Plant the same thing in odd numbers (3, 5, or 7) rather than one of everything. Three boxwoods planted in a line cost the same as three different shrubs, but they look 10x more intentional. Repetition is what separates “I planted random stuff” from “I have a plan.” This alone transforms a budget yard.
Hardscape Over Softscape – Hardscape (mulch, gravel, pavers, edging) is cheaper than plants and lasts longer. A freshly mulched, cleanly edged bed with three shrubs looks better than a crowded bed with 12 cheap plants fighting for space. Invest in structure first, fill with plants second.
Color Blocking – Group similar colors together instead of scattering them. Five yellow flowers clustered in one spot create drama. The same five flowers spread across the yard look like accidents. This costs nothing-it’s just intentional placement.
Now let’s use these principles with actual hardscape projects.
1. Mulch Beds with Clean Edges
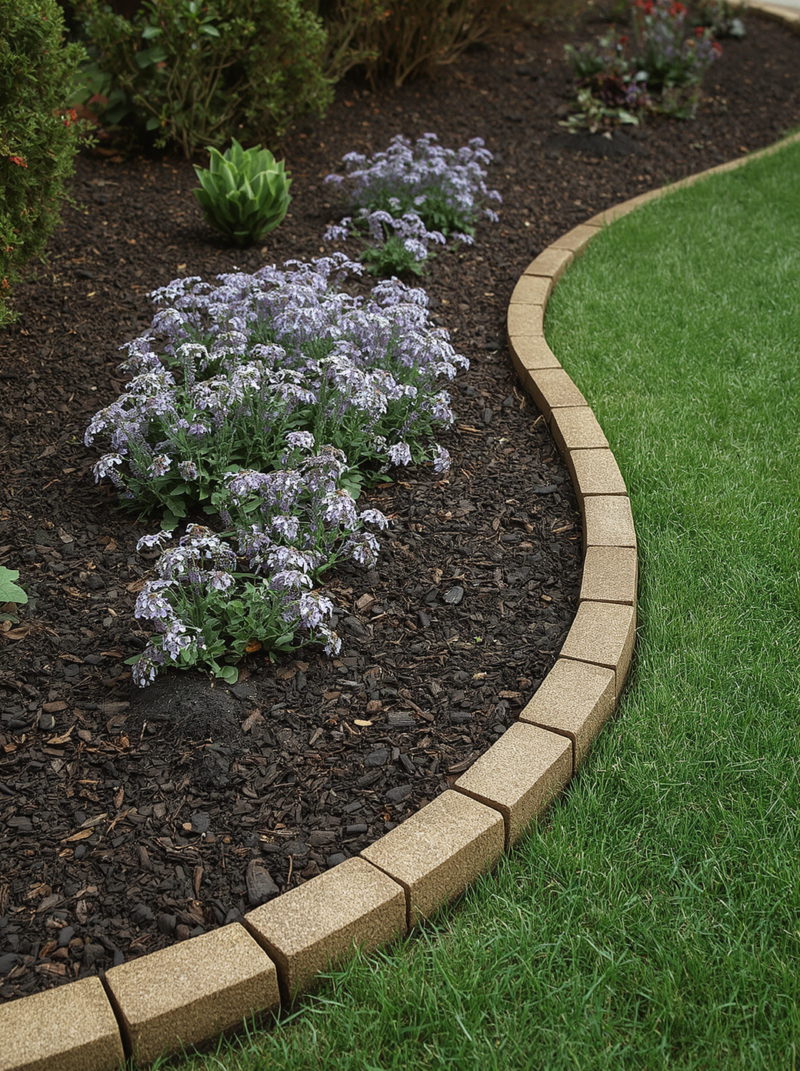
This is the fastest, cheapest way to look like you have your life together.
A fresh mulch bed-even an empty one with no plants-signals “this yard is maintained.” A mulched bed with ragged, blurry edges signals “I gave up halfway.”
The cost: $20-40 per bed (depending on size). Dark mulch ($2-4 per bag) looks more expensive than light mulch, so go dark.
The process:
- Define your bed edge with a spade or garden edging ($1-3 per 10 feet)
- Add 2-3 inches of mulch
- Keep the edge crisp-that’s the whole game
Pro move: Recycled materials work great for edging. Check local salvage yards or Facebook Marketplace for:
- Old wood planks (free-$10)
- Metal garden edging (cheap, lasts forever)
- Bricks or pavers (pull them from a neglected part of your yard)
Why it works: A clean mulch bed frames your plants and makes the whole yard look intentional, even if there’s nothing planted yet. You can add plants later as budget allows.
2. Gravel or Pea Gravel Pathways
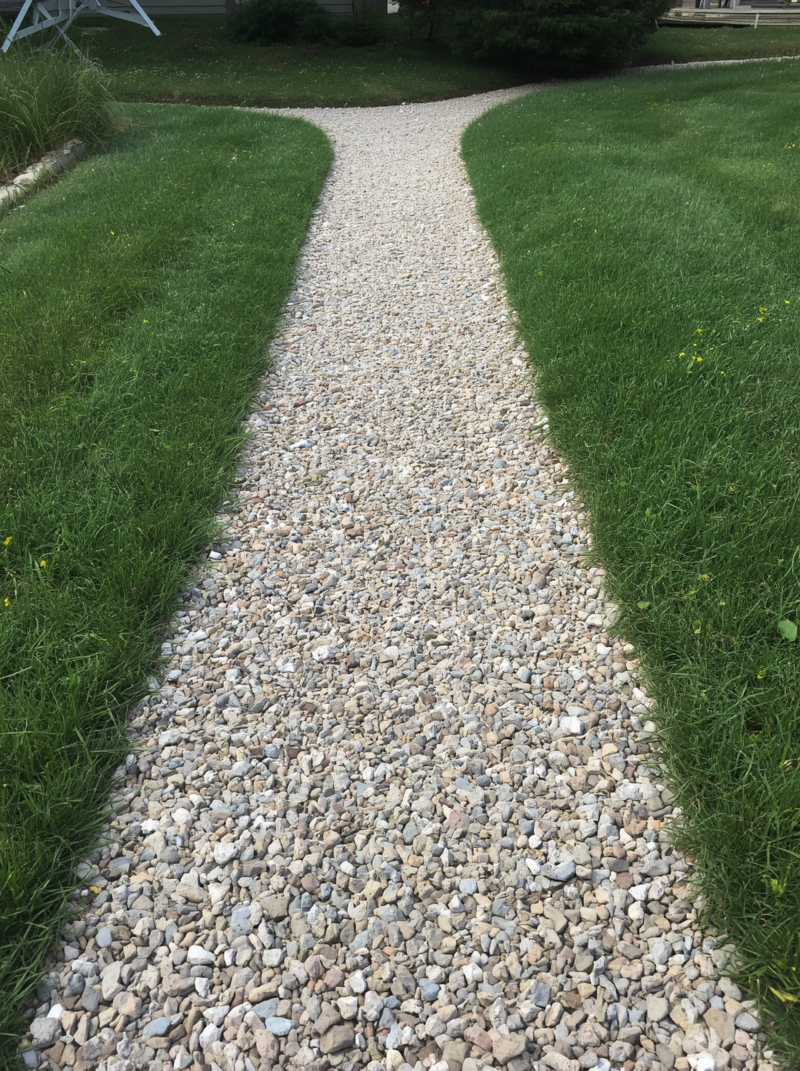
Gravel creates movement and visual interest while costing almost nothing.
The cost: $1-3 per square foot. A 3-foot-wide pathway running 10 feet costs $30-90.
Why it works:
- Defines spaces (separates planting areas from lawn)
- Adds texture and visual depth
- Drains well (no puddles or mud)
- You can change it later without major work
How to install:
- Mark the pathway with chalk or spray paint
- Remove grass/weeds with a spade
- Lay landscape fabric (prevents weeds, $10-20)
- Pour gravel 2-3 inches deep
- Rake and done
Best with: Rock gardens, succulent beds, or as an edging around planting areas. Works especially well if you’re going for a low-maintenance, modern aesthetic.
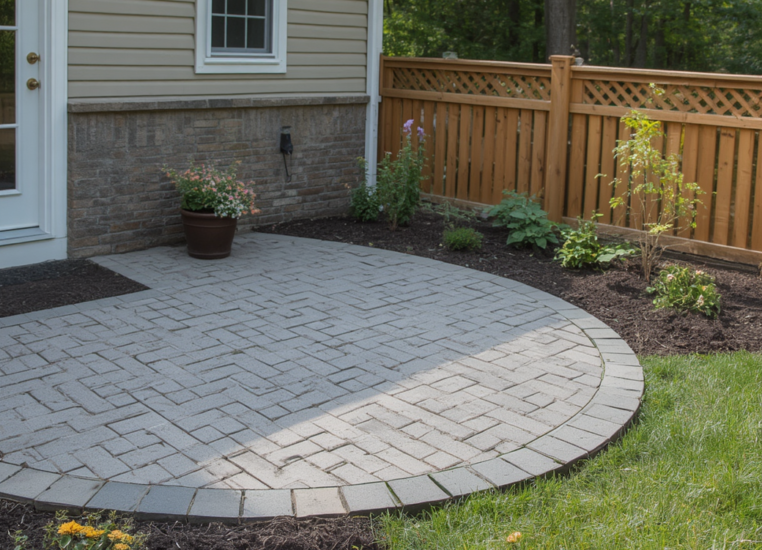
3. Concrete or Paver Patio
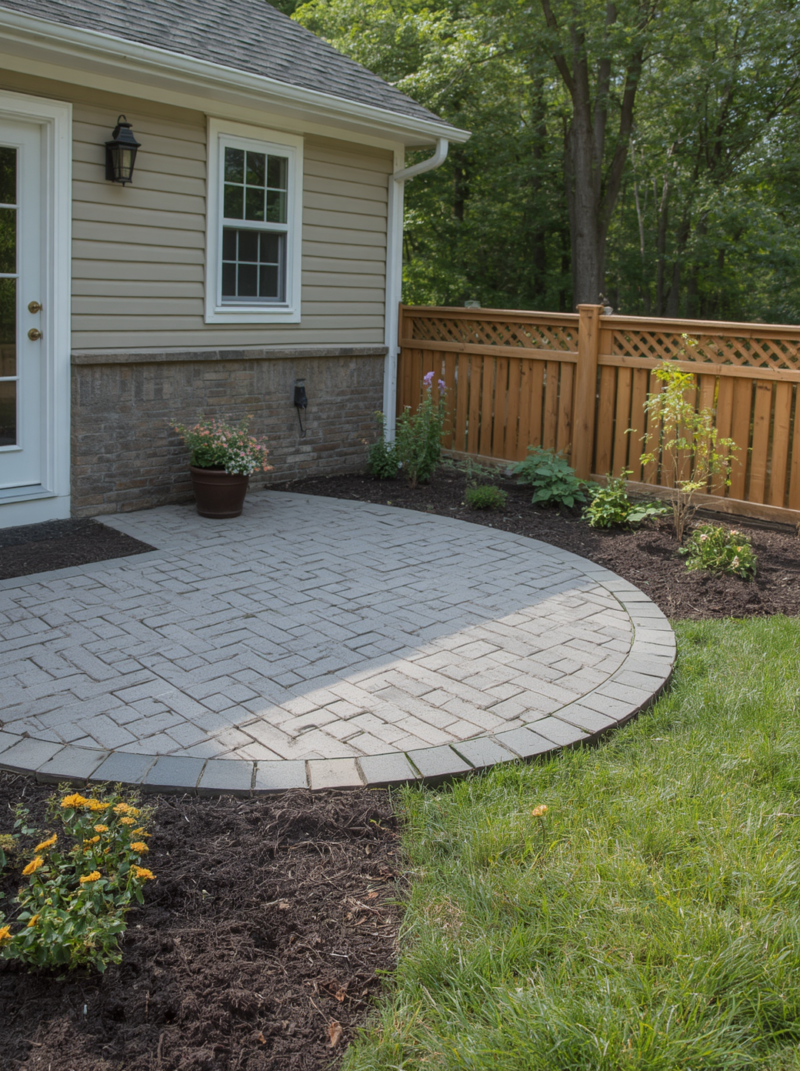
If gravel feels temporary, a small patio anchors your front yard and adds function.
The cost: $50-300 depending on size. A 4×6-foot patio is totally doable.
Two budget routes:
Poured concrete (~$2-4 per sq ft):
- Cheapest option
- You can stamp or stain it for visual interest (+$5-15 per sq ft)
- Hire a pro for this one-it’s not a weekend DIY
DIY pavers (no mortar):
- Lay pavers directly on leveled soil ($3-10 per paver)
- No grout needed, no mess
- Takes 4-6 hours for a small patio
- Easy to remove later if you change your mind
Why it works: A small patio near your front door instantly looks intentional. Add a potted plant or a small seating area, and suddenly your front yard is functional, not just decorative.
4. DIY Stone or Brick Edging
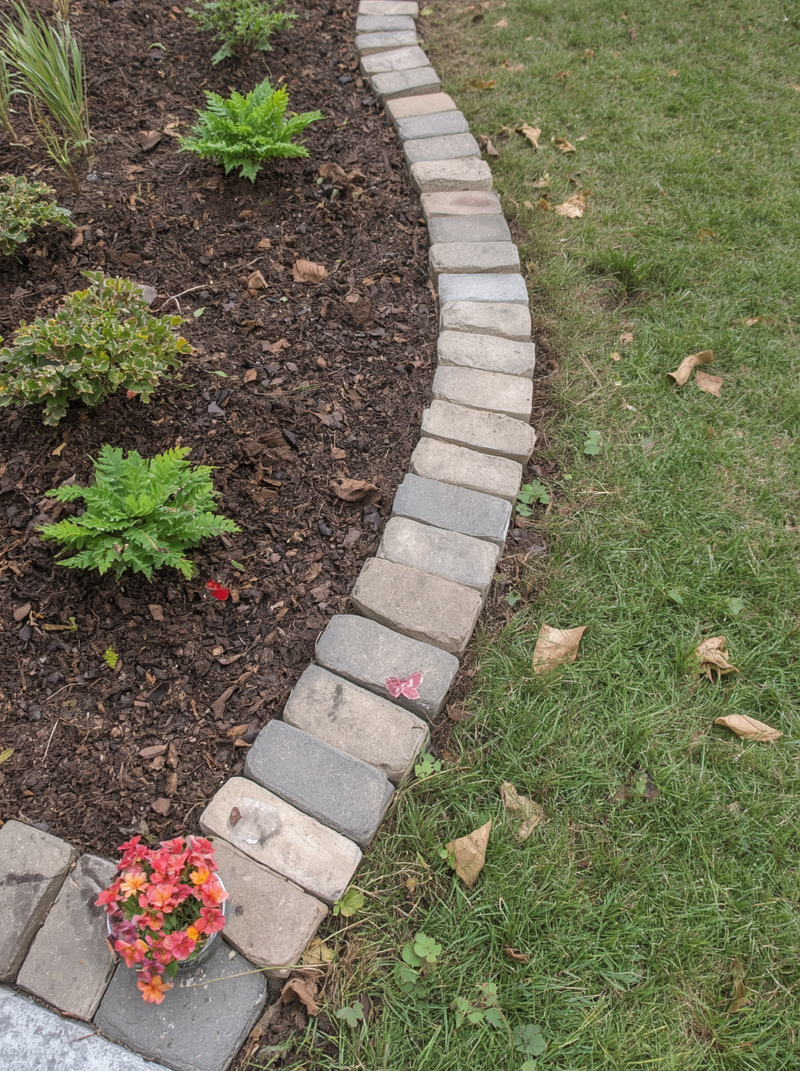
This is the detail that separates “finished” from “incomplete.”
Good edging creates clean lines between beds and lawn. Bad edging makes everything look fuzzy and unintentional.
The cost: $0-30 depending on where you source materials.
Budget sources:
- Local salvage yards (often free or $0.50 each for old bricks)
- Craigslist or Facebook Marketplace (free, you haul)
- New pavers from a big-box store ($1-3 each)
How to install:
- Mark your bed edge with chalk
- Dig a shallow trench (2-3 inches deep)
- Lay bricks or stones edge-to-edge, slightly angled inward
- Backfill with soil
- Done-takes 2-3 hours for a typical front bed
Pro move: Angle the edging slightly inward (toward the bed). This prevents mulch from spilling onto the lawn and keeps everything looking crisp.
Why it works: Edging is invisible when it’s done right, but it’s VERY visible when it’s missing. It’s the difference between “landscaping” and “plants in the yard.”
Why Hardscape First?
Here’s the order: hardscape → mulch → plants.
If you start with plants and skip the hardscape, you’ll end up replanting them as you add structure later. Start with mulch beds, edging, and pathways. Then add plants. Your plants will look better, last longer, and your yard will look intentional from day one.
A well-designed hardscape with zero plants beats a messy planting with expensive plants every single time.
Cheap Plant Ideas That Pack Visual Impact
Hardscape gives your yard structure. Plants give it life. But here’s the key: cheap plants look cheap only when they’re planted wrong. The right plants, planted with intention, look like a professional designer had a hand in it.
This section breaks down the smartest plant choices for a budget front yard-things that are genuinely inexpensive at the nursery AND deliver the visual drama that makes people think you spent real money.
5. Bulk Landscaping Shrubs (Boxwood, Privet, Junipers)
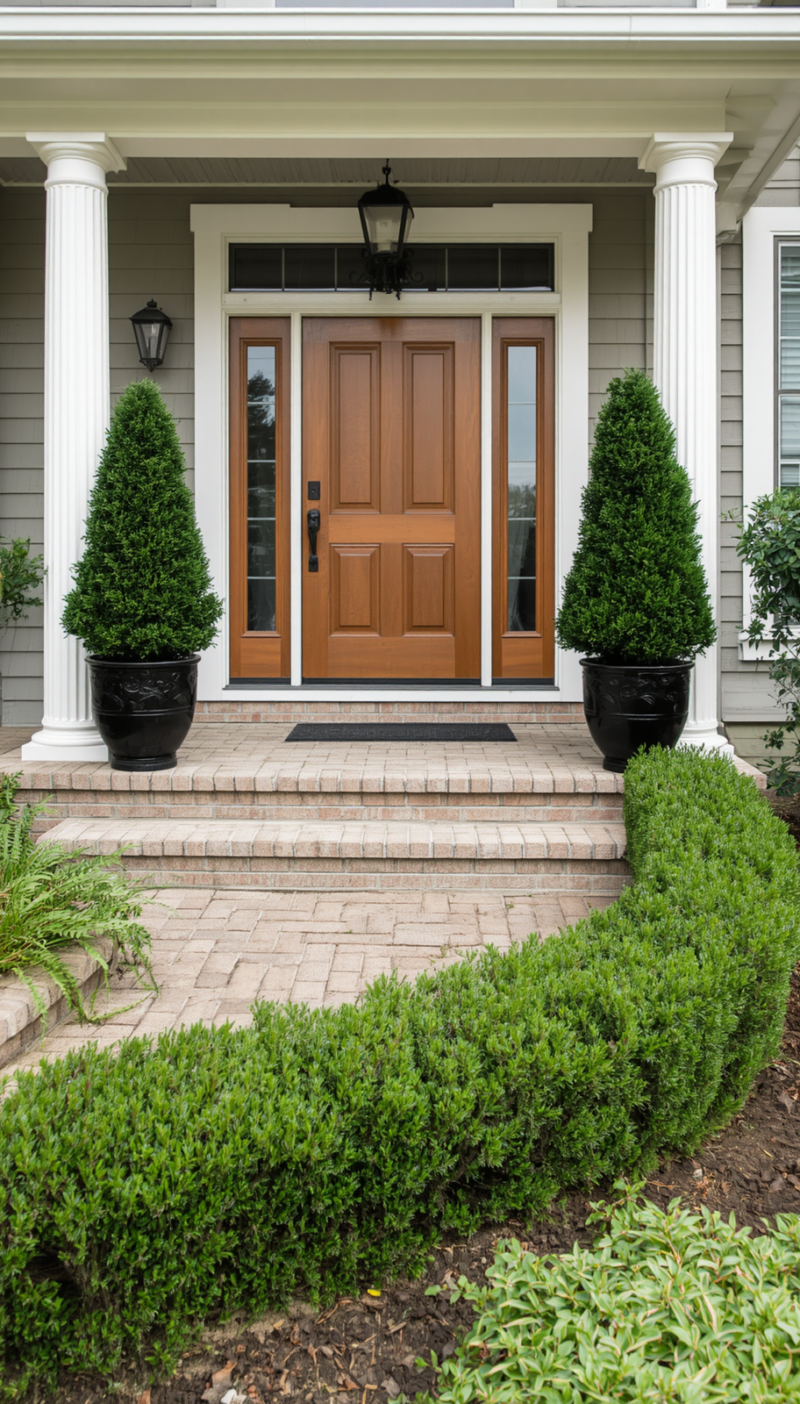
This is the secret weapon that professional landscapers use on budget projects.
These shrubs are cheap ($5-15 each at most nurseries) because they’re common, hardy, and widely available. But that commonness is exactly why they work-they’re used in million-dollar landscape designs because they anchor a space.
Why they’re budget-friendly:
- Mass-produced, so nurseries price them low
- No fancy variegation or rare cultivars = cheap
- They’re hardy in almost any climate
Why they look expensive:
- Three boxwoods planted in a line look architectural and intentional
- They frame your entry and draw the eye to your front door
- They work year-round (even in winter, when annuals die)
How to use them:
- Plant 3 boxwoods in a line flanking your front door ($15-45 total)
- Or plant 5 junipers in a curved row along the foundation ($25-75 total)
- Space them 3-4 feet apart so they have room to mature
Pro move: Buy slightly smaller plants (8-12 inches) instead of the pre-grown ones. They cost 40% less and catch up in size within 2 seasons. Your patience = your savings.
Care: Water weekly the first season, then they’re basically self-sufficient. Prune once a year in spring if you want them shaped. Otherwise, let them do their thing.
Why it works: Shrubs create the “bones” of your landscape. Everything else is accessory. Three well-placed shrubs make a front yard look designed.
6. Ornamental Grasses
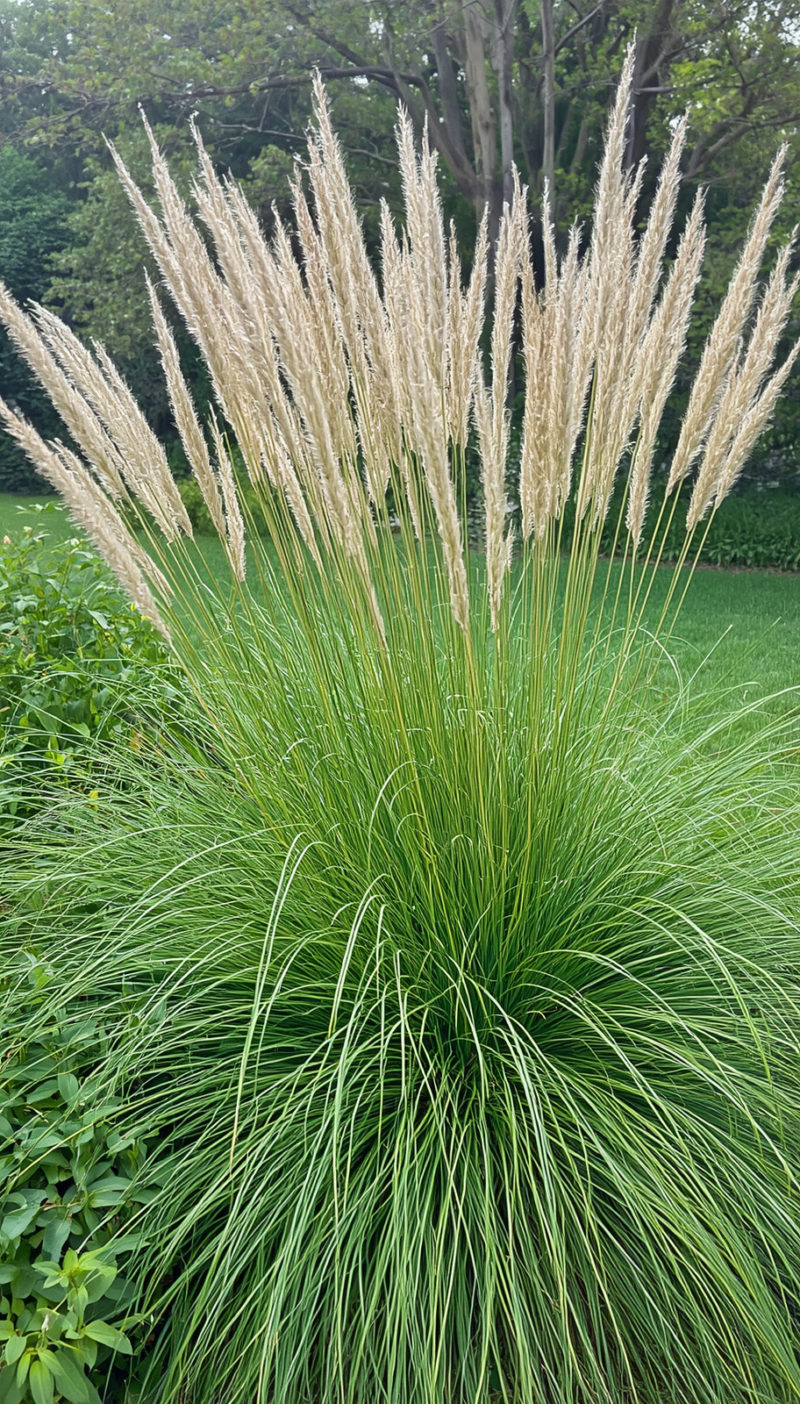
If you want visual drama without the price tag, ornamental grasses are your answer.
They’re cheap ($5-10 each), they grow fast, and they provide texture, movement, and year-round interest. A single ornamental grass can fill a space that would cost $50+ in flowering plants.
Best budget grasses:
- Muhly Grass – feathery pink plumes in fall, handles heat, looks exotic for $7
- Blue Oat Grass – silvery-blue foliage, compact, works in small spaces
- Fountain Grass – tall, dramatic, arching form, $5-8
How to use them:
- Plant one as a focal point (center of a bed)
- Group three in varying heights for layered interest
- Use as a backdrop to flowering plants in front
Pro move: Plant grasses in spring or early fall when they’re on sale. Nurseries often discount perennials at season transitions.
Care: Cut back to 6 inches in late winter. Water during the first season, then drought-tolerant. That’s it.
Why it works: Ornamental grasses provide movement and texture that static shrubs don’t. They’re the difference between a boring planting and one that feels alive.
7. Perennials in Groups of 3 or 5
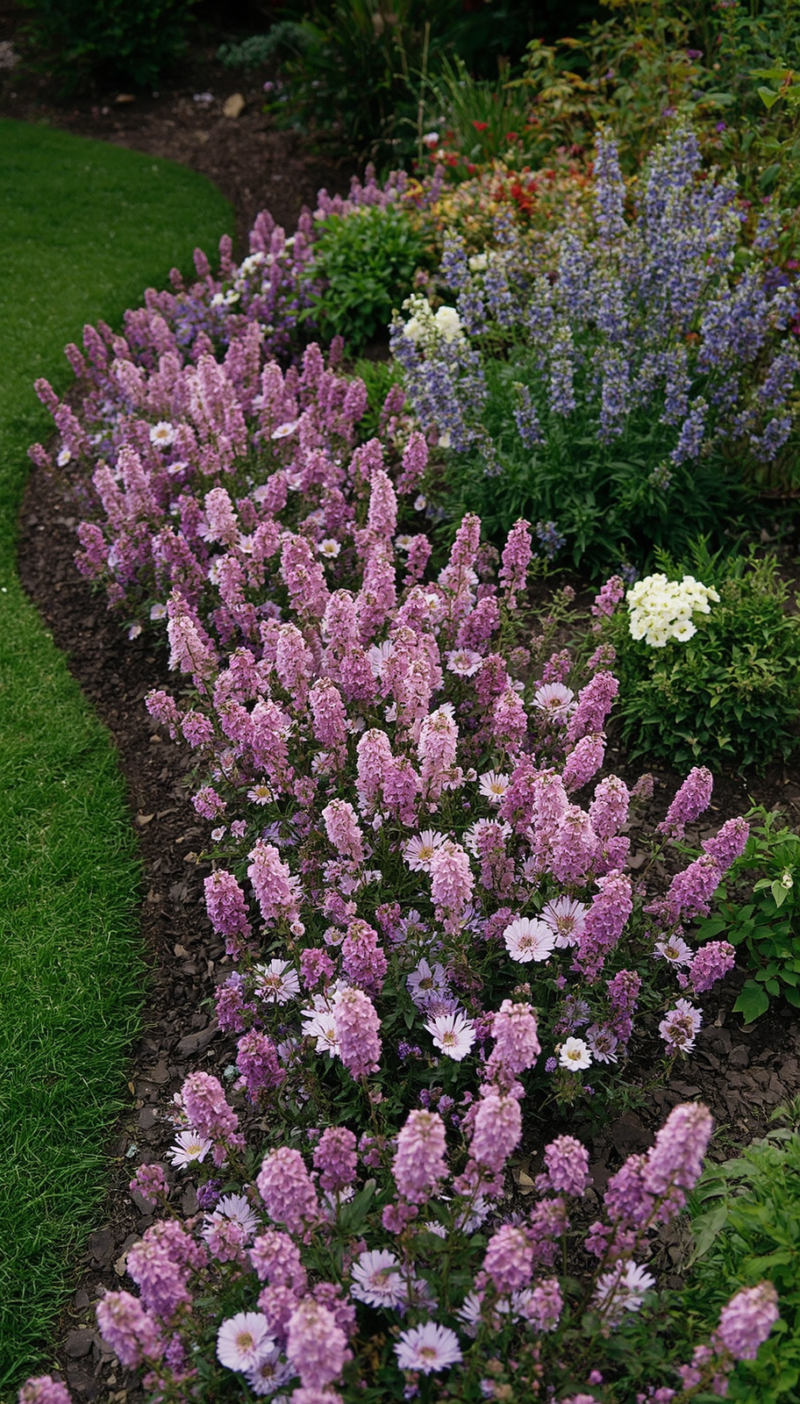
Perennials come back every year, which makes them the smartest long-term investment for a budget yard.
An annual costs $2-4 and dies in winter. A perennial costs $3-8 and returns for 5+ years. The math is obvious.
Budget perennials that look expensive:
- Daylilies – $3-5, bloom for weeks, come in dozens of colors
- Coreopsis (Tickseed) – $3-5, blooms all summer, drought-tolerant
- Black-eyed Susan – $2-4, tough as nails, bright yellow (pairs great with your existing yellow flowers post ✅)
- Salvia – $4-6, tall spikes of color, attracts hummingbirds
How to plant for impact:
- Plant 3 of the same perennial in a triangle (cheap, impactful)
- Plant 5 in a curved line along a bed edge (professional-looking)
- Mix 3 types in varying heights for layered interest
Pro move: Divide perennials in spring. One plant becomes three within a year, for free. This is how pros get lush gardens without spending much.
Care: Plant in spring, water regularly the first season, deadhead spent flowers (pinch them off) to encourage more blooms. Minimal maintenance after year one.
Why it works: Perennials are the backbone of a professional landscape because they’re reliable and they improve every year. A budget yard filled with perennials beats an expensive yard filled with annuals.
8. Succulents for Year-Round Color
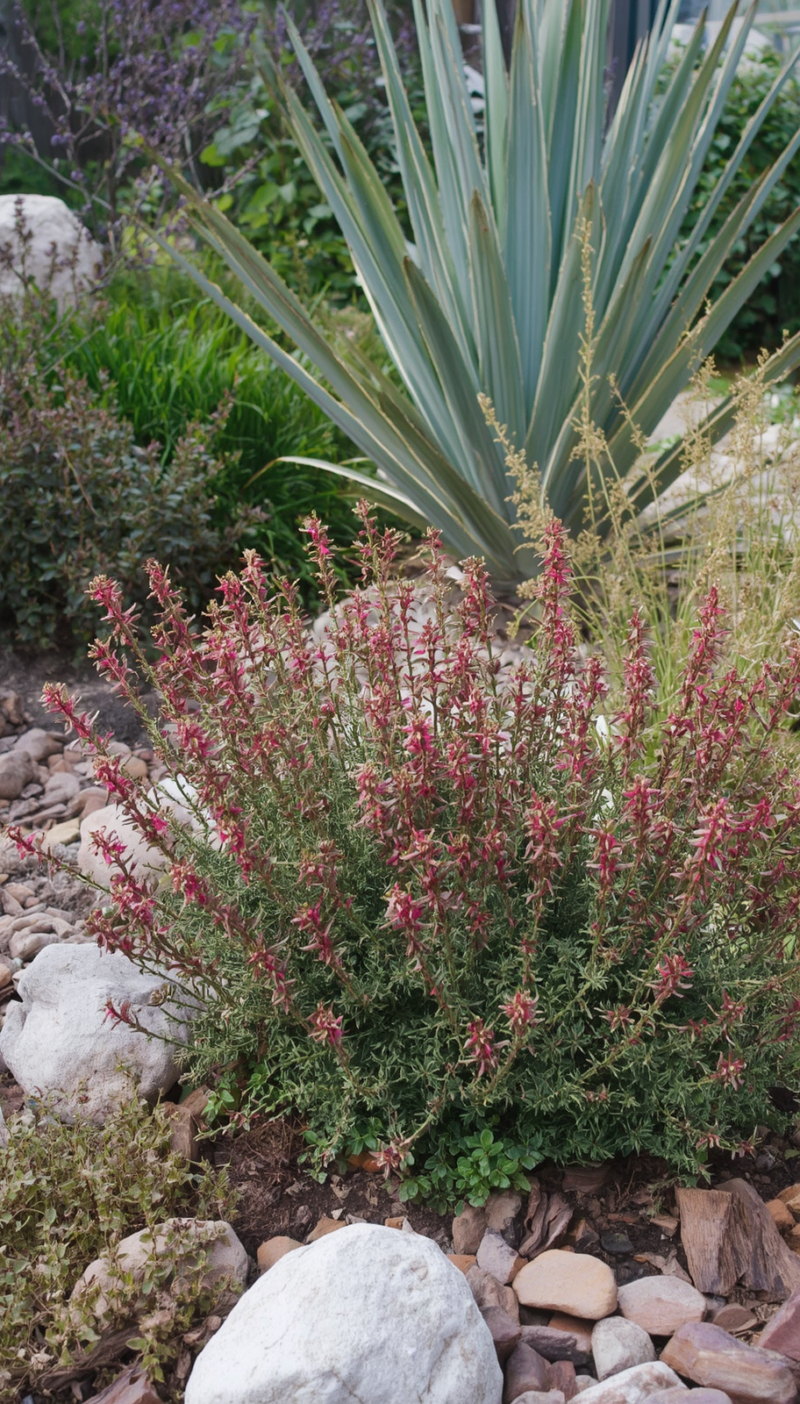
Succulents are the budget landscaper’s best friend: they’re cheap ($2-5 each), require almost zero care, and they look intentional planted in groups.
Why they’re perfect for a front yard:
- Thrive in poor soil (no amendments needed)
- Drought-tolerant (water maybe twice a month in summer)
- Come in wild colors (grays, purples, reds, blues)
- Work in sun or part shade depending on the variety
Best budget succulents:
- Sedum – groundcover, spreads fast, $2-3
- Echeveria – rosette form, colorful, $2-5
- Jade plants – structural, long-lived, $3-8
- Aloe vera – functional (burns, cuts) + pretty, $2-4
How to use them:
- Plant 5-7 in a rock garden or gravel bed
- Use as edging along a pathway
- Cluster in containers near your front door
- Mix with ornamental grasses for contrast
Pro move: Propagate succulents for free. A single leaf dropped on soil will grow roots and become a new plant in 3-4 weeks. (My Huernia post covers this in detail).
Care: Plant in well-draining soil (add sand if needed). Water once a month. Done.
Why it works: Succulents look deliberately chosen and curated. A small grouping of 5 different succulents looks more interesting than 5 of the same flowering plant. Plus, they look good in winter when everything else is dead.
9. Native Plants (Free or Cheap Seeds)
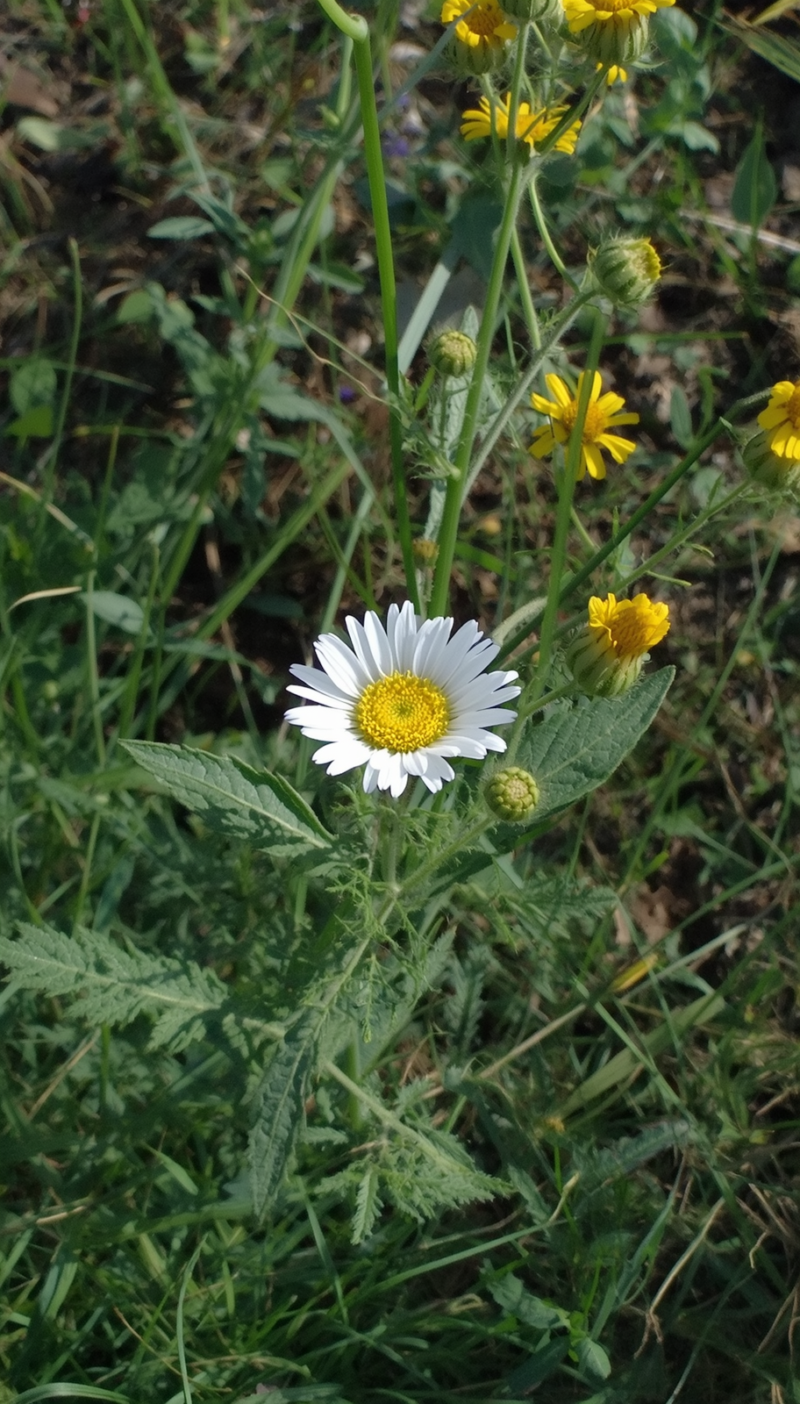
Native plants are adapted to your climate, which means they’re naturally drought-tolerant, pest-resistant, and low-maintenance.
Many native plants are available as seeds ($2-5 per packet) or tiny plugs ($1-2 each), making them the cheapest way to fill space.
Why they matter:
- Already adapted to your local conditions (less water, less fertilizer)
- Attract pollinators and wildlife (free ecosystem benefit)
- Often overlooked, so cheaper at nurseries than ornamental plants
How to start from seed:
- Buy native wildflower seed packets ($3-5)
- Scarify the seed packet instructions (some need cold stratification)
- Sow directly in fall or spring, depending on type
- Wait 6-8 weeks for germination
Pro move: Contact your local native plant society-they often have seed swaps or free divisions. Seriously, free plants.
Why it works: Native plant landscapes look natural and mature faster than traditional ornamental gardens. They’re also the most sustainable choice for your climate.
10. Flowering Vines on Arbors or Trellises
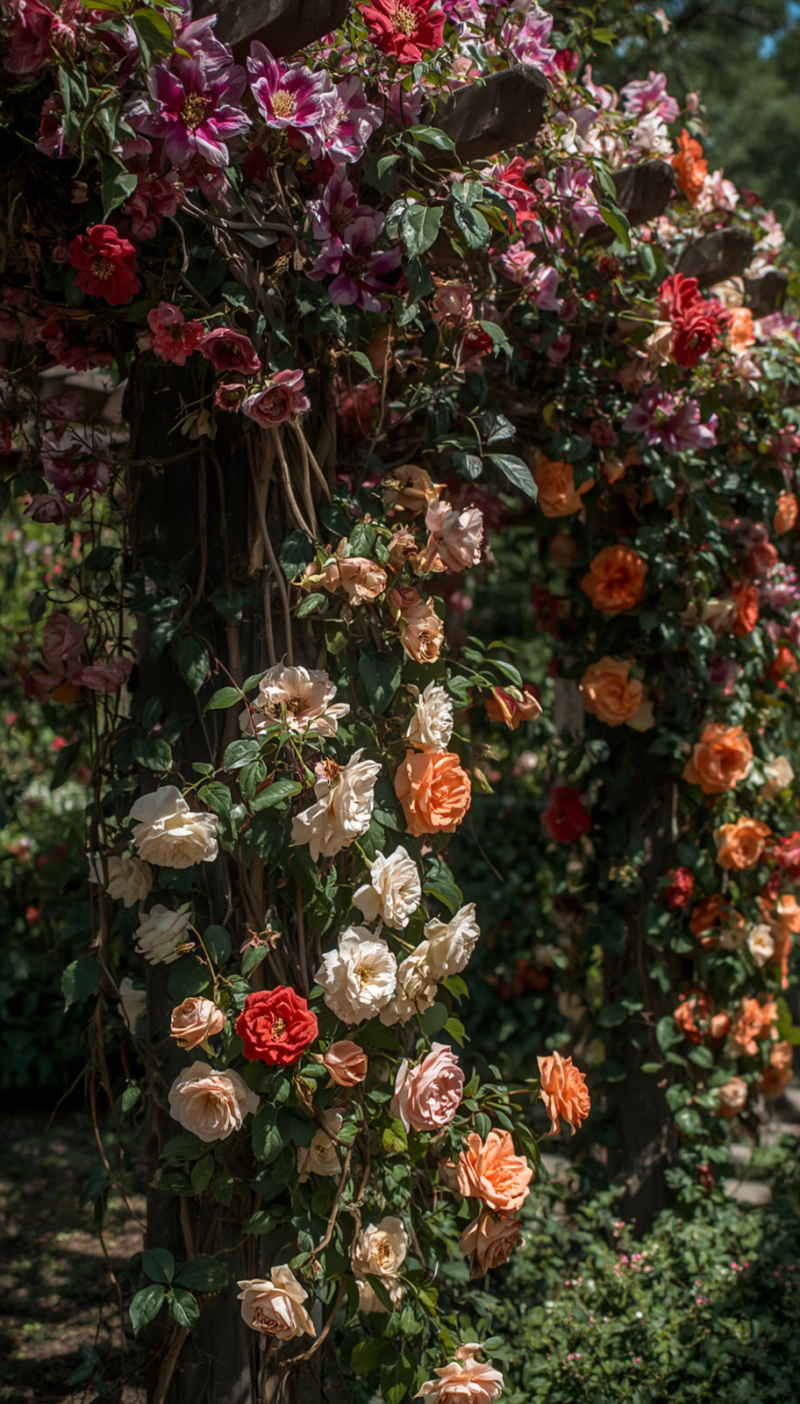
A single vine on an arbor covers a huge space and adds instant vertical interest-something most budget yards lack.
Best budget vines:
- Clematis – showy flowers, $8-15
- Honeysuckle – fragrant, fast-growing, $5-10
- Climbing roses – classic, varied colors, $10-20
How to use them:
- Plant over a DIY or store-bought arbor at your entry
- Train up a trellis on a bare fence (instant greenery)
- Use as a focal point in a corner bed
Cost breakdown:
- Arbor: $30-80 (or DIY with wood for $15)
- Vine: $8-15
- Total: $40-100 for a stunning focal point
Pro move: Plant in early spring when vines are on sale. They grow like crazy in their first year with weekly watering, then they’re self-sufficient.
Care: Water weekly the first season. Prune after flowering to shape. Some vines are aggressive (honeysuckle), so be ready to trim back if needed.
Why it works: Vertical elements make small yards feel bigger and more designed. A simple arbor with a flowering vine becomes your yard’s centerpiece.
11. Volunteer or Propagated Plants (Free)
Here’s the hack that professionals don’t advertise: much of a budget landscape is actually free.
Free sources:
- Friends and neighbors – ask for cuttings of their plants. Most people are thrilled to share. Rooting cuttings in water takes 3-4 weeks.
- Plant divisions – split perennials in spring (one becomes 2-3) or fall. Free plants, instant density.
- Succulent leaves – pick a leaf off a succulent, lay it on soil, wait 3-4 weeks for roots (covered in Huernia post)
- Seed collection – collect seeds from flowering plants in late summer, dry them over winter, plant in spring
Why it works: Gardeners LOVE sharing plants. You’re building community while building your landscape for free. Plus, plants you’ve grown from cuttings or divisions feel more personal and successful.
Pro move: Start a “propagation station” on a sunny windowsill now (July). Root cuttings in water, let them sit for 3-4 weeks, then plant them out in fall when the heat breaks.
The Plant Pecking Order
When you’re shopping on a budget, buy in this order:
- Shrubs first (hardscape of your planting)
- Ornamental grasses second (texture, fill, visual interest)
- Perennials third (long-term value, seasonal color)
- Succulents fourth (details, containers, edging)
- Annuals last (fill gaps in year one while perennials establish)
If you run out of budget before annuals, stop. Shrubs + grasses + perennials + one or two vines = a complete, professional-looking landscape. Annuals are just icing.
Before & After Budget Projects
Theory is great. But nothing sells a budget landscape like seeing the actual transformation.
Here are three real front yard projects-the before, what changed, the cost, and the result. Use these as templates for your own yard.
Project 1: The $150 Front Entry
The Before:
Plain mulch beds with no edging. Two sad shrubs planted too close together. A bare lawn with zero focal point. The kind of front yard that says “we moved in and then gave up.”
What Changed:
- Added clean edging around both beds ($20 in metal landscape edging)
- Fresh dark mulch ($30 for two bags)
- Removed the two sad shrubs, replaced with three boxwoods in a line flanking the entry ($45)
- Added a flowering vine (clematis) on a simple wooden arbor ($35 for vine + DIY arbor made from scrap wood)
- Five solar path lights leading to the entry ($15)
Timeline: One weekend (Saturday for hardscape, Sunday for planting)
Total Cost: $145
The After:
Suddenly the entry looks intentional. The boxwoods frame the door, the clematis gives vertical interest, the edging makes everything look finished, and the solar lights add dimension. It looks like a $1,500 professional job.
Why it worked:
- Focal point (boxwoods + arbor at entry)
- Repetition (three identical boxwoods)
- Clean edges (defined beds)
- Vertical interest (vine on arbor)
The secret: 70% of this transformation was design, not money. The boxwoods could have been cheaper shrubs. The arbor could have been store-bought. But the placement is what made it look expensive.
Project 2: The $200 Side Yard Revival
The Before:
A narrow side yard with a concrete pathway and overgrown weeds. Nobody ever looked at it. It was basically abandoned space between the house and fence.
What Changed:
- Pulled weeds and leveled the ground ($0, elbow grease)
- Defined a 3-foot-wide gravel pathway down the center ($40 for landscape fabric + gravel)
- Planted ornamental grass on one side (Muhly grass, $7)
- Planted a cluster of 5 succulents on the other side ($12 total)
- Added stepping stones through the succulent bed ($25)
- Edged the beds with salvaged brick from Craigslist ($0, free haul)
Timeline: One afternoon
Total Cost: $84
The After:
The side yard is now a functional, attractive passage. You want to walk through it. The gravel defines the space, the ornamental grass adds movement, the succulents add texture and color, and the stepping stones make it feel intentional.
Why it worked:
- Hardscape first (gravel pathway + edging)
- Plants second (grass + succulents for visual interest)
- Repetition (five succulents in a cluster)
- Verticality (grass height creates depth)
The secret: This yard was transformed by removing what didn’t work (weeds, confusion) and adding structure (pathway, edging). The plants were almost secondary.
Project 3: The $300 Complete Front Yard Overhaul
The Before:
A typical suburban front yard: large lawn, a few random plants planted at different times by different people, no cohesion, no focal point. Nice plants individually, but they looked like accidents scattered across the yard.
What Changed:
- Defined two planting beds with clean edging ($40)
- Fresh mulch in both beds ($50)
- Removed 4 random plants, kept 2 good ones, added 3 boxwoods for structure and repetition ($50 total for boxwoods)
- Added a cluster of 7 ornamental grasses in varying heights ($35 for grasses)
- Planted 5 perennials (black-eyed Susan, coreopsis, daylilies) in front of the grasses ($20 total)
- Created a small gravel pathway from driveway to entry ($40)
- Added 5-7 succulents in a container cluster near the entry ($15)
- Two small solar uplights on focal plantings ($10)
Timeline: Two weekends (hardscape first, then planting)
Total Cost: $260
The After:
The front yard is now organized. There’s a clear focal point (entry with boxwoods + container planting). There’s layering (grasses in back, perennials in middle, edging in front). There’s repetition (three boxwoods, seven grasses in odd numbers, five succulents). There’s movement (pathway from driveway to entry). It looks like a professional designer spent money.
Why it worked:
- Hardscape anchors everything (edging + pathway create structure)
- Repetition in odd numbers (3 boxwoods, 7 grasses, 5 perennials)
- Layering by height (back to front: grasses → perennials → edging)
- Focal point at entry (draws the eye, says “this is intentional”)
The secret: This yard succeeded because it was simplified. Instead of 8 random plants, there are 4 types planted with intention. Simplicity = professional.
What Made These Work
Look at all three projects. Here’s the pattern:
| Element | Why It Matters |
|---|---|
| Clean edging | Separates beds from lawn, signals “maintained” |
| Fresh mulch | Instant curb appeal, cheapest visual upgrade |
| Repetition (odd numbers) | 3, 5, 7 of the same plant = professional look |
| Focal point | Eye knows where to land, yard feels designed |
| Vertical interest | Grasses, vines, arbors prevent flatness |
| Hardscape first | Structure before plants, always |
| Simplicity | Fewer plant types, more of each = cleaner look |
None of these yards spent more than $300. None required special plants or rare varieties. All of them look like they cost $1,500+.
The difference? Design, not budget.
How to Apply This to Your Yard
Pick the project that looks most like your situation:
- Project 1 if your entry is your biggest eyesore (do this first, it’s visible from the street)
- Project 2 if you have unused side yards or awkward spaces
- Project 3 if your whole front yard needs a reset
Start with hardscape (edging + mulch + pathways). That’s your foundation. Then add plants with intention-shrubs first, then grasses/perennials, then succulents/annuals to fill gaps.
Don’t try to do everything at once. Do hardscape one weekend, planting the next. Your back will thank you, and you’ll make fewer mistakes.
Mistakes to Avoid When Budgeting
Budget landscaping fails for the same reasons every time. Here are the mistakes that turn a cheap yard into a cheap-looking yard-and how to avoid them.
Mistake 1: Too Many Different Plants
This is the #1 budget landscaping killer.
You walk into a nursery with $200 and think, “I’ll grab a little of everything-a shrub, a perennial, some groundcover, a vine, an ornamental grass.” Suddenly you’ve got 8 different plants scattered across your beds.
Why it fails:
- Eight different plants look chaotic, not designed
- No repetition = no focal points
- Your eye doesn’t know where to land
- It reads as “I planted random stuff”
The fix:
Stick to 3-4 plant types maximum for a small front yard (under 500 sq ft).
Example winning combo:
- 3 boxwoods (structure)
- 5 ornamental grasses (texture)
- 7 perennials (color)
- 1 vine on an arbor (vertical interest)
That’s 4 types. Boom. Done. Professional.
The math:
- 8 different plants @ $5 each = $40, looks cheap
- 3 boxwoods + 5 grasses + 7 perennials @ $5 each = $75, looks expensive
Same budget, better design. It’s all about repetition and intention.
Mistake 2: Planting Too Close Together
“If I space them further apart, they look lonely. I’ll plant them close so they look full right away.”
Then two years later, your shrubs are suffocating each other, your perennials are leggy and weak, and you’re spending $200 removing plants you just paid $100 for.
Why it fails:
- Crowded plants fight for water, nutrients, and light
- They get diseased and pest-infested faster
- You spend more money later removing and replanting
- Mature plants look like a tangled mess
The spacing rule:
Plant at the mature width of the plant, not the current size.
- Boxwoods: 3-4 feet apart (they grow 3-4 feet wide)
- Ornamental grasses: 2-3 feet apart
- Perennials: 18-24 inches apart depending on type
- Shrubs: 4-6 feet apart for most varieties
Yes, they’ll look sparse the first year. That’s fine. They’ll fill in by year two, and you’ll have healthy, strong plants instead of weak, overcrowded ones.
The short-term fix:
If you can’t stand the sparse look year one, plant cheap annuals between the permanent plants. Remove them year two when the perennials have filled in.
Mistake 3: Ignoring Soil Prep
“I’ll just dig a hole and plant it. How hard can it be?”
Hard plants to grow in bad soil. That’s how hard.
Why it fails:
- Poor soil = weak plants
- Weak plants die, and you’ve wasted money
- You replant, spend more money, and the cycle repeats
- A $10 plant dies in bad soil; the same plant thrives in good soil
The fix:
Spend 30 minutes prepping soil:
- Test your soil (free at most county extension offices). Know what you’re working with.
- Add compost or aged manure (2-3 inches worked into the top 6-8 inches). Costs $5-10 per bag, worth every penny.
- Add sand if you have clay (clay doesn’t drain, plants hate it). Mix 1 part sand to 3 parts soil.
- Add peat moss or coco coir if you have sandy soil (sand doesn’t hold water, plants dry out). Mix in lightly.
This takes 1-2 hours for a typical front yard and costs $20-30. It’s the cheapest insurance you can buy.
The result:
A $10 perennial thrives in good soil and lasts 5+ years. A $10 perennial dies in bad soil after 6 months. Soil prep is free money.
Mistake 4: Buying Cheap Tools Instead of Good Ones
“I need a shovel, a rake, and a hoe. I’ll grab the $5 ones.”
Then the handle breaks on the third dig, and you’re back at the store.
Why it fails:
- Cheap tools break, cost you money replacing them
- Poor tools make the work harder and slower
- You’re more likely to quit halfway through
The fix:
Buy one or two good tools instead of five cheap ones.
Your essential front-yard toolkit:
- A sharp spade ($30-40) – this is your workhorse. It’ll last 10 years.
- A quality rake ($20-30) – metal head, not plastic
- Work gloves ($10-15) – your hands will thank you
Skip the cheap hoe, the fancy cultivator, the gadget tools. You need a spade and a rake. That’s it.
The math:
- $5 shovel that breaks after 3 uses = $5 wasted
- $35 shovel that lasts 10 years = $3.50 per year
Good tools aren’t an expense. They’re an investment.
Mistake 5: Not Planning for Maintenance
“I’ll plant it and let it go wild. Low-maintenance is the goal.”
Low-maintenance doesn’t mean no-maintenance. And plants that are truly neglected look neglected.
Why it fails:
- Weeds take over
- Mulch erodes and disappears
- Plants get leggy or overgrown
- Your beautiful $200 landscape looks abandoned by year two
The fix:
Budget 30 minutes per month for maintenance:
- Spring: Pull weeds, refresh mulch, prune dead branches
- Summer: Deadhead perennials (pinch off spent flowers), water during heat waves
- Fall: Plant perennials, collect seeds, cut back grasses
- Winter: Plan next year’s changes, order seeds
That’s it. Four 30-minute sessions per year keeps a small front yard looking great.
Pro move: Mulch heavily (2-3 inches) in spring. It suppresses weeds and keeps soil cool, cutting your maintenance by 50%.
Mistake 6: Mixing Too Many Colors
“I’ll get red flowers, yellow flowers, purple flowers-lots of color!”
Then your front yard looks like a confused garden center.
Why it fails:
- Too many colors compete for attention
- Your eye doesn’t know where to land
- It reads as chaotic instead of intentional
- Colors fight each other instead of complementing
The fix:
Pick 2-3 color families and stick with them.
Color-blocking examples:
Option A: Cool & Serene
- Purple perennials (salvia, coneflower)
- Silver foliage (dusty miller, ornamental grass)
- White accents (white perennials for contrast)
Option B: Warm & Energetic
- Yellow flowers (coreopsis, black-eyed Susan)
- Orange/coral accents (zinnias, marigolds)
- Green foliage (boxwoods, grasses)
Option C: Mixed Pastels
- Pink (peonies, roses)
- Lavender (Russian sage)
- White (statice, baby’s breath)
- Silver foliage to tie it together
Pick one and commit to it. You’ll look more sophisticated, even on a budget.
Mistake 7: Forgetting the Focal Point
“I’ll just scatter plants around and see what happens.”
What happens is nothing. Your eye lands nowhere, and the yard feels directionless.
Why it fails:
- Without a focal point, a landscape feels unintentional
- Viewers don’t know what to look at
- Even expensive plants look cheap without direction
The fix:
Every landscape needs one main focal point:
- Front entry (boxwoods framing the door, lighting on the entry)
- Arbor or trellis (flowering vine, clear visual anchor)
- Feature plant (a statement shrub, ornamental grass, or specimen tree)
- Pathway (draws the eye and creates movement)
Make it obvious. Don’t be subtle. The focal point should be the first thing people notice when they pull up.
Quick focal point ideas:
- 3 boxwoods in a line at your entry ($45)
- A clematis-covered arbor ($40)
- A single large ornamental grass ($8)
- A small seating area with a bench ($50)
Pick one. Make it look intentional. Build everything else around it.
Conclusion: Your Front Yard Doesn’t Need to Cost a Fortune
A beautiful front yard isn’t about money. It’s about design, intention, and patience.
You’ve seen it: a $5,000 professional landscape that looks generic and uninspired. You’ve also seen a $200 DIY project that stops people in their tracks. The difference isn’t the budget-it’s the thinking behind it.
Here’s what separates the two:
The expensive fail: Random plants, no focal point, overcrowded beds, no edging, confused color scheme, scattered everywhere.
The budget win: Intentional design, clear focal point, strategic plant choices, clean hardscape, cohesive colors, everything purposeful.
You now know the formula:
- Start with hardscape (edging, mulch, pathways)
- Pick 3-4 plant types (repeat them in odd numbers)
- Create a focal point (something your eye lands on)
- Use repetition and layering (height, texture, color)
- Prep your soil (your plants will thank you)
- Plan for maintenance (30 minutes per month keeps it looking sharp)
That’s the whole game. It’s not complicated. It’s just intentional.
Your next move: Pick one of the three before/after projects that looks most like your situation. Spend this coming weekend on hardscape-edging, mulch, maybe a pathway. Then spend the following weekend planting. You’ll have a transformed front yard by the time July ends.
And if you get stuck? You already know what to plant (shrubs, grasses, perennials, succulents). You know where to source free plants (neighbors, divisions, propagations). You know the mistakes to avoid. You’ve got this.
Your front yard can be Instagram-worthy without the Instagram price tag.
What’s your biggest front yard challenge right now? Drop it in the comments and I’ll help you find a budget solution that actually works.
Related Reading
- 7 Front Yard Vegetable Garden Ideas for Any Size Yard
- 12 Outdoor Succulents for Dry Climates for Easy Yards
- 15 Clematis Flower and Care Tips for Healthier Blooms
- 15 Beautiful Green Flowers That Actually Stand Out
- Top 7 Yellow Flowers Worth Adding to Your Garden
Last modified: July 8, 2026
