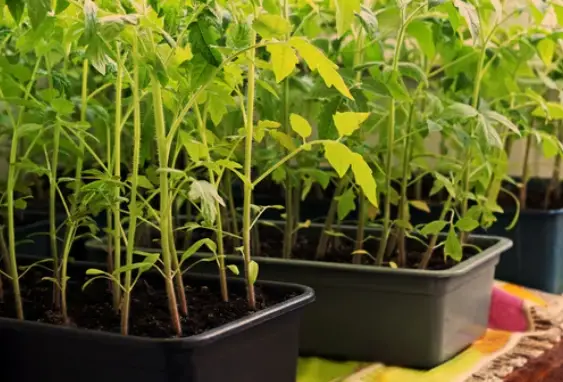
You spent weeks taking care of your small tomato seedlings, making sure they had enough light and moist soil as they grew from seeds into seedlings.
You can’t wait to get them out of their crammed seed tray and into the garden now that they are a few inches tall.
Hold on, though, as too early a transplanting of tomato seedlings will restrict their growth.
When should you transplant your seedlings into the garden?
Here are a few indicators that the tomato seedlings you have are ready to be transplanted.
Determining if Tomato Seedlings Are Ready for Transplanting
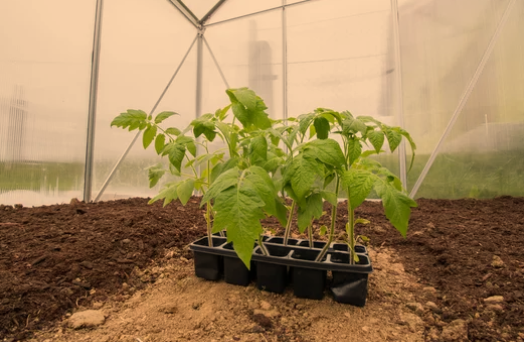
tomato Seedlings From Seed Tray
If those little tomato seedlings are looking full and vibrant, it may be time to move them from their cozy seed tray into the garden. But how can you tell if they are really ready for the transition?
Check if your seedlings have two sets of true leaves.
The first leaves that sprout are seed leaves, meant to provide initial nourishment.
The next set of leaves are the true leaves, and once those are fully developed, your seedlings should be hardy enough for transplanting.
See if the seedlings seem crowded in their cells.
If their stems are very long and spindly, or the leaves are bumping up against the sides of the tray, it’s best to plant them deeper in your garden where they have more room to grow into sturdy, stocky plants.
Give your seedlings a gentle tug to ensure they feel firmly rooted in the soil. If they come up easily without resistance, their root system is quite established enough yet.
Wait another week and check again.
Once your seedlings have true leaves, seem crowded in their cells, and are firmly rooted, its planting time! Gently remove each seedling from its cell, holding it by the leaves instead of the delicate stem.
Create holes in your garden slightly deeper and wider than each seedling’s root ball. Bury the stems up to the top set of leaves, water thoroughly, and you’ll have happy tomato transplants in no time!
Signs Your Tomato Seedlings Have Outgrown the Seed Tray
Your tomato seedlings have been working hard in their little seed tray, and now they’re ready to stretch out in your garden. How can you tell? There are a few signs these little seedlings have outgrown their starter home.
First, if your seedlings have grown to be twice as tall as the height of the container they’re in, it’s time for more space. Their roots and leaves need room to grow, or their growth will become stunted.
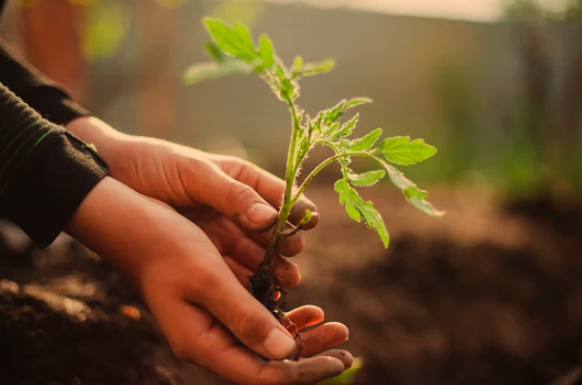
Also, check if there are a lot of roots growing out of the bottom of the seed cells. This means they’re pot-bound and desperately need bigger digs. Once roots start circling the container, plant growth slows down or stops altogether.
Finally, if your tomato seedlings have stopped growing larger or their growth seems impaired, it likely means they’ve outgrown their seed tray. Lack of space, nutrition, or both are preventing them from thriving.
When you see these signs, get your seedlings into the garden or larger pots right away.
Carefully remove them from the seed tray and plant them at the same depth they were growing in the tray.
Keep the soil moderately moist while your seedlings get established in their new home. Soon, with more room and nourishment, they’ll take off and start growing vigorously again.
Preparing the Garden Bed Before Transplanting
When the seedlings in your tray have 2-3 sets of true leaves and the weather starts to warm up, its time to start preparing your garden bed for transplanting.
Preparing the Soil
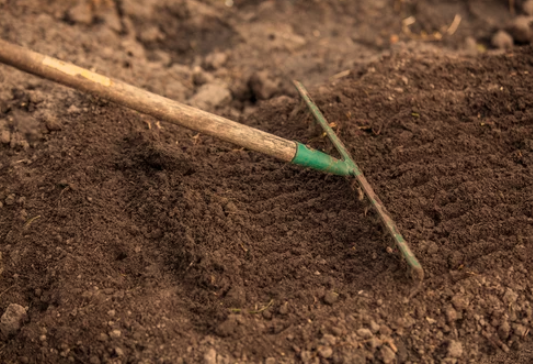
Loosen the top 6 inches of soil in your garden bed before moving your tomato seedlings into it. Break up any large clods of dirt and remove debris like stones or weeds.
Add 2 to 3 inches of compost or other organic matter and rake it into the loosened soil.
This will provide nutrients to your seedlings as they establish themselves. You can also add a balanced fertilizer with equal parts nitrogen, phosphorus, and potassium.
Follow the directions on the product packaging for how much to add.
Make sure your garden bed has full sun exposure for at least 6 to 8 hours per day.
Tomatoes need a lot of light to produce flowers and fruit. Add a cage, stakes, or trellis to support each seedling before transplanting.
This will help the stems grow upright and make it easier to harvest the tomatoes later.
Water the garden bed thoroughly before moving the seedlings into it.
Moisten the soil to a depth of at least 6 inches. This will minimize transplant shock by providing available water for the seedlings as they adjust to their new environment.
Once the weather has stabilized and nighttime temperatures remain above 55 F, your tomato seedlings will be ready to move into their permanent home.
How to Transplant Tomato Seedlings From the Seed Tray
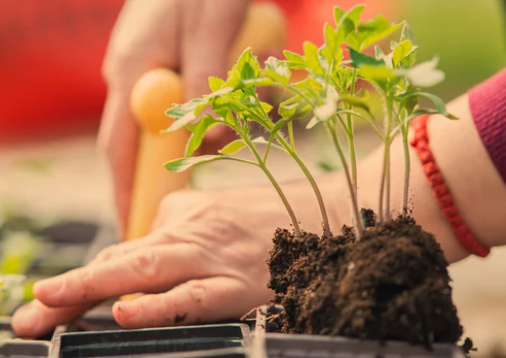
Your tomato seedlings are ready to move out of their cozy seed tray into the garden once they’ve grown a few inches tall and developed their first set of true leaves.
Check for Readiness
Examine your seedlings for signs they’re mature enough for transplanting. Look for:
- Seedlings 3 to 4 inches in height. The taller the better, as long as they still stand upright on their own.
- 2 to 3 pairs of true leaves. The first leaves that appear are seed leaves. True leaves are the second set that is tomato-like in appearance.
- A healthy, stocky stem. Seedlings should have a thick, sturdy stem able to support the plant. Thin, spindly stems indicate a lack of light and the seedling isn’t ready.
- Well-developed root system. Gently lift a seedling out of the tray. Look for roots that have reached the bottom and sides of the cell. Lots of white, healthy roots mean it’s ready to move on.
Prepare the Transplant Site
Select a spot in your garden that gets plenty of sun and has fertile, well-drained soil with compost or other organic matter worked in.
Space the seedlings 2 to 3 feet apart. Dig holes slightly larger than the seedling pots. Mix some compost or fertilizer into the bottom of each hole.
The Move
When the seedlings are ready and the weather is suitable, it’s time for the big move!
Gently lift each seedling out of its tray cell, keeping the root ball intact. Place into the prepared holes and backfill the soil around each plant.
Water thoroughly after transplanting. Keep seedlings well watered while they establish themselves in their new home.
Caring for Newly Transplanted Tomato Seedlings
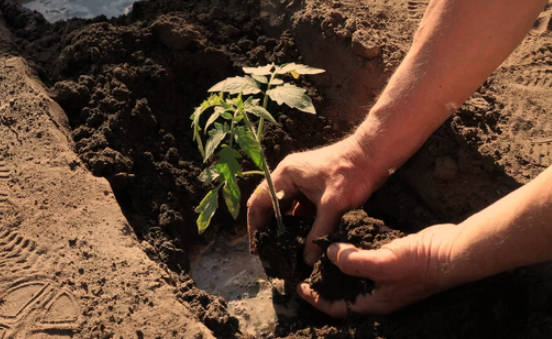
Newly Transplanted Tomato
Once your tomato seedlings have been transplanted into larger containers, they require some extra care and attention.
For the first couple of days, keep them out of direct sunlight so they can recover from the shock of being moved. Place the seedlings in a shady spot outdoors or an area indoors that gets lots of bright, indirect light.
Watering
The potting mix can dry out quickly in warm weather, so check the soil daily and water when the top inch is dry. Water the seedlings thoroughly until water flows out the drainage holes. Never leave them sitting in water.
Fertilizing
After the first week, fertilize your seedlings every few weeks with a balanced, all-purpose fertilizer at 1/2 the recommended strength. This will encourage healthy new growth as the seedlings continue to mature.
Hardening Off
About a week before planting in your garden, start “hardening off the seedlings by gradually exposing them to longer periods of direct outdoor sunlight and cooler temperatures. This helps the seedlings develop a stronger stem and root system so they can better handle transplanting into your garden.
Watch for Pests
Inspect seedlings regularly for common pests like aphids, spider mites, and hornworms. Treat them promptly to avoid damage to your plants. Healthy, hardened-off seedlings planted at the right time will get your tomato garden off to a great start!
Watering and Mulching
Once your tomato seedlings are a few inches tall and have their first set of true leaves, its time to move them from their seed tray into your garden.
Watering
Tomato plants have dense, thirsty roots that need water daily, especially in hot or dry weather. Water the seedlings thoroughly after transplanting and mulch around the base of each plant. The mulch will help the soil retain moisture so you won’t have to water quite as often. Try using straw, shredded leaves, or compost as mulch.
Mulching
Mulching your tomato plants right after transplanting them provides the best results.
The mulch reduces evaporation, so the soil stays damp longer and you don’t have to water as frequently. Mulch also improves soil structure, protects the soil from erosion and compression, and shields it from harsh wind and rain.
To give your tomato seedlings the best start, be sure to plant them at the same depth as they were in the seed tray.
Water the seedlings regularly and monitor them closely for the first few weeks after transplanting.
Once the weather warms up and growth accelerates, you’ll be rewarded with ripe, juicy tomatoes to enjoy!
Providing Support
Once your tomato seedlings are a few inches tall, it’s time to start thinking about providing support for their growth. Tomato plants can become quite large, often over 6 feet tall, so giving them a sturdy structure to climb is essential.
Cages or Trellises
The most common method is using tomato cages or trellises. Tomato cages are wire structures, typically 3 to 5 feet tall, that surround the entire plant. As the plant grows, you guide the branches through the cage openings.
Trellises are wooden or metal frames that you tie the tomato vines to as they grow. Either of these options will fully support your tomato plants and keep the fruit off the ground.
Stakes
If you prefer, you can also use wooden stakes and twine.
Place one or more stakes around 6 feet tall in the ground next to your seedling. As the shoots start to grow, tie them gently to the stakes with twine.
You’ll need to continue securing new growth to the stakes as the season progresses.
Stakes require more attention since you have to manually tie and guide the plant, but can work great, especially for smaller backyard gardens.
No matter which method you choose, providing support for your tomato plants is key.
Once transplanted into your garden, place the cages, trellises or stakes around the seedlings and loosely tie any shoots to get them started climbing the right direction.
Then, check on your tomatoes regularly and gently guide any new growth onto or through the supports. With the proper support, your tomato plants will thrive and produce a successful harvest.
Aftercare and Maintenance
Once your tomato seedlings are in the ground, consistent care and maintenance will ensure a successful harvest.
- Apply tomato fertilizer once fruit is set and every 3-4 weeks afterward. Use a balanced fertilizer with equal parts nitrogen, phosphorus, and potassium, such as 10-10-10. Follow the directions on the product packaging for how much and how often to feed your tomatoes.
- Water tomato plants after planting and everyday afterward, twice daily when weather is hot. Tomato plants need at least 1-2 inches of water per week. Watering in the morning is best, as it gives leaves time to dry out during the day, preventing disease.
- Mulch around the base of tomato plants with compost or straw to help retain moisture in the soil, prevent weeds, and keep soil temperatures steady. Pull any weeds that appear.
- Once flowers form and tomatoes start to develop, prune away side shoots for increased air circulation. This will also allow the plant to focus its energy on ripening the tomatoes.
- Cage or stake tomato plants to provide support for their heavy fruit. Staking or caging also makes harvesting easier and prevents fruit rot. Use stakes that are at least 6 to 8 feet tall for indeterminate varieties.
- Watch for common diseases and pests like early blight, late blight, hornworms, and aphids. Remove infected leaves and treat pests to avoid damage. Plant disease-resistant tomato varieties to eliminate verticillium wilt and other problems.
- Harvest tomatoes once fully ripe and bright red. Gently twist or cut them from the vine. Enjoy your homegrown tomatoes!
With attentive care and by following good practices, you’ll have a successful tomato crop and be enjoying vine-ripened tomatoes all season long.
Warp Up
Now that you have the inside scoop, you can decide when to transfer your tomato seedlings from their cozy seed trays to the spacious garden.
The trick is to keep an eye out for the actual leaves to appear and the seedlings to grow to a height of 3 to 4 inches.
They are then prepared to establish their roots in a larger pot or in the ground in your garden.
Just keep in mind to handle them gently, maintain a moderate moisture level in the soil while they’re establishing themselves, and situate them in an area with lots of sunshine and warmth.
You’ll soon be reaping the benefits of those delicious homegrown tomatoes. Enjoy your garden!

