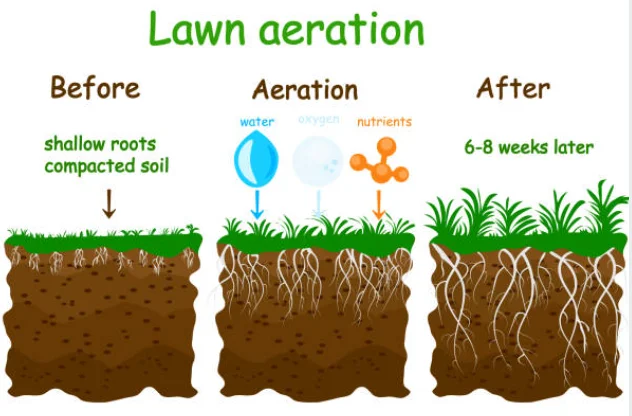
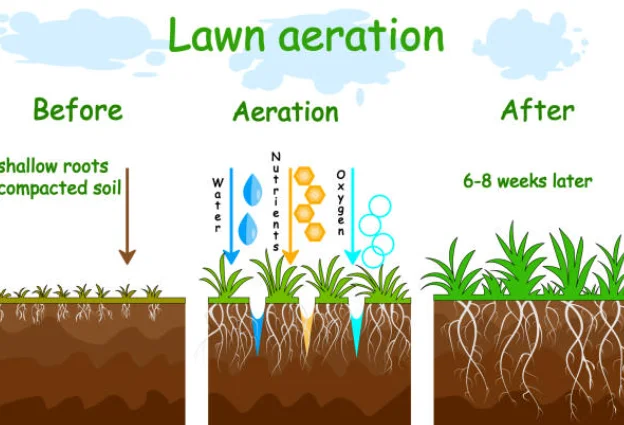
Aerating is a process of using mechanical or manual tools to turn the soil and create additional space within the soil for plant roots to grow.
Aeration is an integral part of a healthy garden. It loosens the soil, creating additional space for plant roots to grow.
It also balances the pH level in the soil and encourages microbial activity that helps break down organic material into nutrients.
This is beneficial to plant growth.
Aeration is recommended for most plants in the following situations:
Soil that has been compacted or contains a lot of clay, clay loam or soil with a high organic content needs to be turned over to allow air into the soil and promote microbial activity.
The added air helps break down organic material into nutrients beneficial to plant growth.
What is Soil Aeration?

How to Aerate Your Own Garden Bed
Soil aeration is the process of loosening the soil with tools such as hoes and spades, is essential to remove compaction and break up subsoil.
Leaving no-digging zones where new plants can grow, the aeration process will help maintain your garden bed healthier and better nourished.
The type of soil aeration you will need depends on the texture, or compactness, of your garden soil.
You can break up compacted areas by hand with a hoe before planting or by using a power tiller to turn over the soil after planting.
Seeds that are planted in well-aerated soil will have better germination rates and grow faster.
Soil aeration is also a basic gardening technique used to open up compacted soil.
Aeration loosens the soil so that it can better support plant growth and deeper rooting of plants.
Plant roots are better able to reach water, nutrients, and air in well-aerated soil, which helps fertilization and drainage.
Most plants prefer loose, well-aerated soil and will grow better in potting soil than in heavy clay.
6 Tips on How to Aerate Your Garden
1. Aerate your garden at least once a year with a core aerator.
2. Aerate your garden when the soil is moist to help loosen compacted soil and improve drainage.
3. Aerate your garden in the fall, before the ground freezes, to help it recover from winter injury and prepare for spring planting.
4. Aerate your garden before you plant to allow roots to grow into new areas of soil and provide better support for plants as they mature.
5. Aerate your garden if you have heavy clay soil or sandy soil, which can be difficult for plants to grow in because of their lack of nutrients and water retention capabilities respectively.
6. Aerate your garden if you have a lawn that is not growing well despite regular watering and fertilizing
How Do You Aerate A Raised Bed Garden?
Aerating a raised garden bed is an easy process. You can either use a long-handled fork or a power aerator.
To do this, first make sure that the garden bed has been watered and is moist enough to be penetrated by the tines of the fork or the blades of the power aerator.
Then, insert your tool into the soil at an angle and twist it back and forth to loosen up any compacted layers.
If you are using a power aerator, make sure to keep it running for about two minutes before stopping to prevent clogging from occurring.
Rake the loosened soil in circles to smooth it out, and then swing your tool back and forth a few times to rake up any clumps.
Prep the Area for Aeration
Those that like to do things themselves, and have time on their hands between all their other gardening responsibilities can learn how to aerate their garden bed.
This means making deep holes of a specific size in individual areas of the garden where plants are not growing or need rest.
In order for roots to get proper oxygen, it’s important that there is an adequate amount of soil life with many tiny microorganisms present.
Soil particles break apart in a different way depending on certain conditions.
Remember good aeration expires air for these delicate roots we’re all about rooting out our gardening fiascoes, so we turn to a range of tools and techniques, the ideal being a layered approach allowing these roots to breathe while they’re getting their nutrients.
Sometimes the gardener gets clever and incorporates a range of these tools in a one-step process, like the use of layers of wet pebbles with a thin layer of soil on top to encourage good aeration and easy drainage.
Here’s How We Get Started
Put your hands down into the soil. Insert your fingers about 6 to 8 inches deep, feeling for roots and soil.
Bubbles will likely be present if the soil is moist enough to provide oxygen, so feel for any bubbles coming up near your fingers as they scoop through the soil.
If you find a cluster of roots with plenty of air around them, gently lift them out of their environment (or just dig up a patch of soil) and then replant them.
Take care not to pull on any of the surrounding roots.
Remove any weeds or plants that have taken root in the garden so there is room for seeds to germinate.
If you find a clump of roots above ground, lift them out gently with your fingers, sometimes even using a trowel.
How Can I Make My Soil Light And Fluffy?

A good soil structure is important for plants to grow well.
If the soil is heavy and dense, it will not be able to provide nutrients to the plants.
This section discusses how to make the soil light and fluffy so that it can provide plant roots with enough space and nutrients.
The first step in making your soil light and fluffy is to remove large rocks, roots, and other debris from the surface of your garden.
You can use a shovel or a trowel for this process. Next, break up any large clumps of dirt with your hands or a hoe until you have small pieces of dirt that are about 1 inch in diameter.
Finally, mix in organic matter like compost or straw into the top layer of dirt until it’s evenly distributed throughout the garden bed.
To Make Your Soil Light and Fluffy:
- remove large rocks, roots, and other debris from the surface of your garden
- break up any large clumps of dirt with your hands or a hoe until you have small pieces of dirt that are about 1 inch in diameter.
- mix in organic matter like compost or straw into the top layer of dirt until it’s evenly distributed throughout the garden bed.
Where Aeration Might Be Necessary

Aeration is the process of adding air to soil and can be done in a number of ways.
It is important for a variety of reasons, including the need for oxygen for plants, soil microbes, and aerobic decomposition.
The Use Of Aeration In Farming Includes:
– Fertilizer application
– Seedbed preparation
– Soil preparation
– Weed control
– Drying wet soil
Can You Aerate Too Much?
Too much of one thing is not good however when your soil seems hard and dry, that is the best time to Aerate.
for Aeration *Aerate after warm spells *No need to aerate if you live close to the beach *Only about 5% of garden beds should be aerated each year
Aerating your garden bed provides a hand for water and air to pass into the soil and stimulates the soil particles.
This increases oxygen levels which in turn suppress fungus and weed growth.
How Can I Improve The Drainage In My Raised Bed?
Having a raised bed garden is a great way to grow vegetables, flowers, and other plants. But what if you’re faced with drainage problems?
This article will help you solve your drainage issues so that you can enjoy an easier gardening experience.
The best way to improve the drainage in a raised bed is by adding gravel or stones at the bottom of the bed. The bottom of the bed should be sloped so that water can easily drain out of it.
You should also try adding soil amendments like compost or peat moss to the soil mix before planting.
If drainage is still a problem, try building a small retaining wall. You can use stones or stacked bricks to make the wall.
The water that drains out of the raised bed should be funneled into the retaining wall so that it does not run into your garden.


