Tillandsias, or air plants, are a fascinating and distinctive class of plants that enchant plant lovers with their ethereal beauty and perplexing growth patterns.
Air plants, in contrast to conventional potted plants, don’t need soil to grow; instead, they absorb their nutrients and water from the surrounding atmosphere.
They are known as “air plants” as a result of this distinguishing quality.
Although it is amazing that they can thrive without soil, it also means that regular watering procedures are crucial for their health.
We’ll explore the science and art of watering air plants in this article.
We’ll look at the variables that affect their water requirements, the warning signals of dehydration and overhydration, and the different techniques you can use to keep your air plants hydrated and healthy.
Basics of Air Plants
Air Plant Watering
Air plants, scientifically known as Tillandsias, have captured the hearts of plant lovers worldwide with their otherworldly charm and ability to thrive without traditional soil.
These unique epiphytes hail from diverse regions, from rainforests to arid deserts, and have evolved fascinating adaptations to survive in their varied habitats.
Epiphytic Lifestyle:
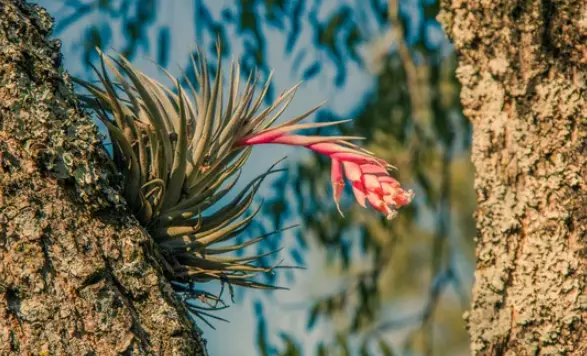
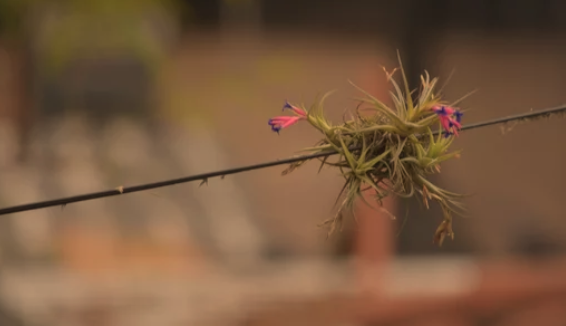
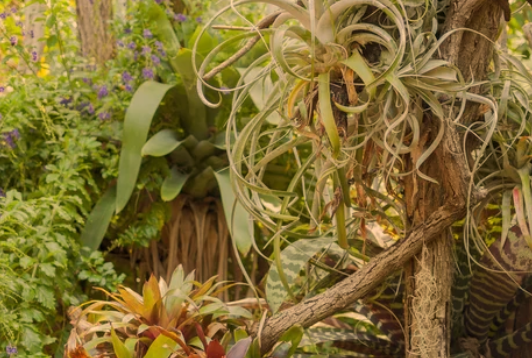
Air plants belong to the bromeliad family and are epiphytes, meaning they grow on other surfaces like trees, rocks, and even telephone wires without parasitizing their host.
Unlike parasites, they don’t derive nutrients from their host; instead, they use them as a secure anchor point while absorbing moisture and nutrients from the air, rain, and debris around them.
No Soil, No Problem:
One of the most remarkable characteristics of air plants is their independence from the soil.
Their leaves are covered in specialized trichomes, tiny, hair-like structures that enable them to absorb moisture from the air.
This adaptation allows them to flourish in a wide range of environments, from tropical rainforests to arid deserts.
Adaptations for Survival:
Air plants have evolved various strategies to thrive in their unique habitats. Some species have developed a rosette shape, which naturally collects rainwater at its base.
Others have adapted to drier conditions by producing a dense covering of trichomes that help them trap and absorb moisture more effectively.
These adaptations have allowed air plants to find their ecological niche in diverse ecosystems.
Life Cycle and Reproduction:
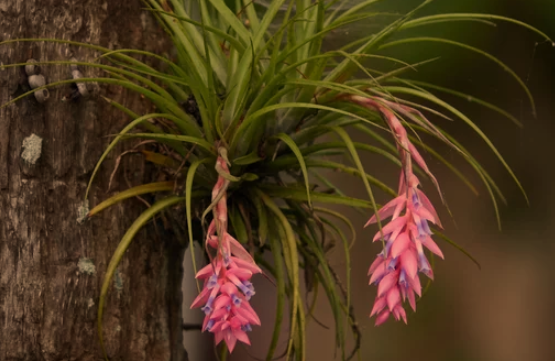
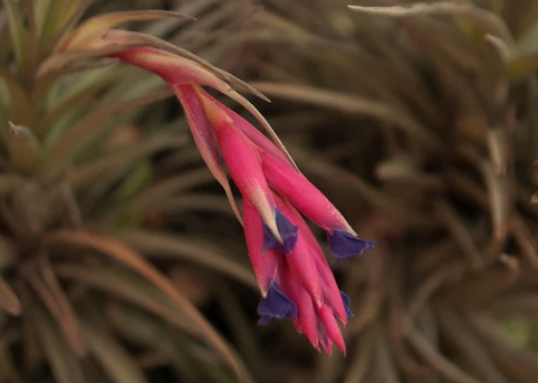
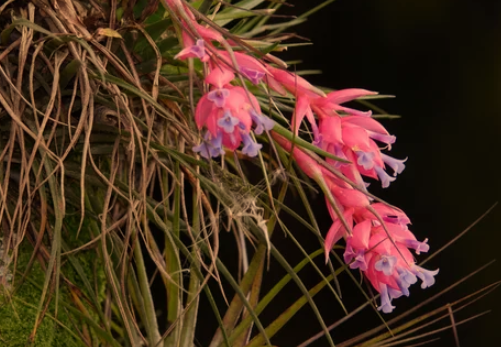
Air plants typically go through a life cycle that involves producing colorful and vibrant flowers.
These flowers attract pollinators, such as bees and hummingbirds, that aid in cross-pollination.
After flowering, air plants produce offsets, also known as “pups,” which can be separated from the parent plant and grown independently.
This unique reproductive cycle adds to the appeal of air plants for collectors and enthusiasts.
Factors Influencing Watering Frequency
Watering air plants might seem like a straightforward task, but their unique growth habits and varying environmental conditions make it important to understand the factors that influence how often they need moisture.
Striking the right balance between hydration and allowing proper drying is crucial for their health and longevity.
1. Humidity Levels: Air plants naturally thrive in humid environments, where moisture is abundant in the air. Higher humidity levels reduce the frequency of watering, as the plants can absorb moisture directly from the atmosphere. In contrast, low-humidity environments will require more frequent watering to prevent dehydration.
2. Temperature Variations: Temperature affects the rate of water evaporation from the plant’s leaves. Warmer temperatures can lead to faster moisture loss, necessitating more frequent watering. Conversely, in cooler conditions, air plants can retain moisture longer, allowing for less frequent watering.
3. Air Circulation and Light Exposure: Proper air circulation is vital for air plants to dry efficiently after watering. Plants that receive good air movement will dry faster, reducing the risk of rot. Similarly, plants exposed to bright, indirect light dry quicker compared to those in low-light conditions.
4. Species and Size: Different air plant species have varying water requirements. Some species have adapted to arid conditions and need less frequent watering, while others from more humid environments may require more moisture. Additionally, larger plants have more surface area to absorb water, affecting their watering needs.
5. Time of Year: Air plants’ watering needs can change with the seasons. During warmer months, when growth is more active, they might require more water. In contrast, they might need less water during colder months when growth slows down.
6. Mounting and Containers: How air plants are mounted or displayed can impact their watering needs. Plants mounted on materials that retain moisture, like moss, might require less frequent watering than those mounted on dry surfaces. Air plants in containers can also influence moisture retention.
7. Recent Rainfall or Watering: If your air plants have been exposed to rain or mist, they may have absorbed additional moisture. Consider recent rainfall or previous watering when determining the need for further hydration.
8. Observation and Touch: Regularly observing your air plants and touching their leaves can provide valuable insights. If the leaves feel overly dry or brittle, it’s a sign that the plants need water. On the other hand, if the leaves are consistently wet or show signs of rot, you might be overwatering.
Signs of Dehydration and Overhydration
Mastering the art of air plant care involves recognizing the telltale signs that your plants are either too thirsty or receiving too much water.
These visual cues can guide you in adjusting your watering routine to maintain your air plants’ optimal health.
Signs of Dehydration:
- Curling Leaves: Dehydrated air plants often display curled or rolled leaves. This is an adaptive mechanism to reduce the surface area exposed to the environment, minimizing water loss.
- Dull Appearance: When air plants lack sufficient moisture, their leaves may appear dull, with a faded or greyish hue. Healthy air plants usually exhibit vibrant, green colors.
- Dry Leaf Tips: Dehydrated plants might have crispy or dry leaf tips, indicating water stress. If the entire leaf is dry and brittle, the plant is severely dehydrated.
Signs of overhydration:
- Brown or Mushy Spots: Overwatered air plants can develop brown or mushy spots on their leaves. These spots are a sign of waterlogged tissue and potential rot.
- Foul Odor: A foul, musty smell emanating from your air plants could indicate bacterial or fungal growth resulting from excessive moisture.
- Leaf Base Rot: Overwatering can cause the base of the leaves to rot, leading to the plant detaching from its anchor or mounting surface.
It’s important to note that air plants can bounce back from dehydration more easily than from overhydration. If you suspect your plants are dehydrated, a good soak or misting should help revive them. However, overhydration can lead to irreversible damage, so it’s crucial to prevent this by ensuring proper drying between waterings.
Observation and Adjustment:
Regularly examining your air plants for these signs and adjusting your watering routine accordingly is key to maintaining their health. Remember that the frequency of watering varies based on factors like humidity, temperature, and species. By closely monitoring your plants and responding to their needs, you can strike the right balance and provide the ideal environment for your air plants to flourish.
Watering Methods and Techniques for Air Plants
When it comes to watering air plants, there’s no one-size-fits-all approach. The unique nature of these plants, along with different environmental conditions, requires a range of watering methods. Here, we’ll delve into various techniques you can employ to ensure your air plants receive the right amount of moisture while avoiding common pitfalls.
1. Mist-Spraying: Mist-spraying involves using a fine mist of water to simulate dew or rain. This method is suitable for environments with moderate humidity. Mist your air plants 2-3 times a week, ensuring the leaves are evenly coated but not soaked.
2. Soaking: Soaking is a thorough method that mimics heavy rainfall. Submerge your air plants in room-temperature water for about 20–30 minutes. After soaking, gently shake off excess water and allow the plants to dry upside down to prevent water from pooling in their basess.
3. Dunking: Similar to soaking, dunking involves immersing the entire plant in water. This method is efficient for larger collections. Dip your plants in water for a few seconds to a minute, then follow the same drying process as soaking.
4. Rainwater Collection: Collecting rainwater is a natural and beneficial way to water plants. Rainwater is free of chemicals and minerals found in tap water, which can accumulate and harm your plants over time. Set your air plants outside during a gentle rain or collect rainwater to mist or soak your plants.
5. Using a Water Tray: Place your air plants on a shallow tray filled with water-absorbent materials like pebbles or decorative stones. As the water evaporates, it creates a microclimate of increased humidity around the plants.
6. Air Circulation and Drying: Regardless of the watering method you choose, proper drying is crucial. After watering, allow your air plants to dry upside down in a well-ventilated area. This prevents water from pooling at the base of the leaves, reducing the risk of rot.
7. Adjusting Frequency: Observe how your air plants respond to different watering methods and adjust the frequency based on their needs. Factors like humidity levels, temperature, and the size of your plants can influence how often they require moisture.
Creating a Watering Schedule
Creating a Watering Schedule for Your Air Plants
Establishing a consistent watering schedule for your air plants is a crucial step in their care routine. A well-planned schedule takes into account factors like humidity, temperature, and the specific needs of different air plant species. By tailoring your watering routine to these variables, you can ensure that your plants remain healthy and vibrant year-round.
1. Consider environmental conditions:
- Start by assessing the natural conditions in your environment. Are you in a humid or arid region? Is your home consistently warm,, or does it experience temperature fluctuations?
2. Know Your Air Plant Species:
- Different air plant species have varying water requirements. Research the species you have to understand their native habitat and how often they naturally receive water.
3. Adapt to the Seasons:
- Adjust your watering schedule based on the changing seasons. Air plants tend to grow more actively during warmer months and may require more frequent watering. In colder months, when growth slows, watering can be less frequent.
4. Humidity Levels:
- If you’re in a humid environment, your air plants may require less frequent watering. Conversely, if you’re in a dry climate, you’ll need to water more often to compensate for lower humidity levels.
5. Temperature Variations:
- Warmer temperatures increase water evaporation, so air plants might need more frequent watering during hotter months. Cooler temperatures slow down evaporation, allowing you to water less often.
6. Observation and Adaptation:
- Pay close attention to your air plants. Regularly assess their condition and adjust your watering schedule based on their response. If you notice signs of dehydration, increase the frequency, and if you see signs of overhydration, decrease it.
7. Create a calendar:
- Develop a simple calendar to keep track of your watering schedule. Note the specific days you plan to water each batch of air plants, and adjust the schedule as needed.
8. Rotate Your Plants:
- As you water your air plants, make sure to rotate them. This ensures that all sides of the plant receive adequate moisture and light exposure.
9. Flexibility is Key:
- While having a schedule is important, be flexible. Environmental factors can change, and your plants might need adjustments to their routine.
Water Quality and Its Impact on Air Plants
Water is the lifeblood of any plant, including air plants. The quality of water you provide can significantly influence the health and well-being of your Tillandsias. Understanding the potential issues related to water quality and adopting strategies to ensure the best water for your plants is an essential aspect of air plant care.
1. Tap Water Concerns:
- Tap water often contains chlorine, chloramines, and minerals that can harm air plants over time. These substances can accumulate on the leaves, blocking the trichomes responsible for absorbing moisture.
2. Benefits of Filtered or Distilled Water:
- Filtered or distilled water is a better option for watering air plants. It lacks the harmful chemicals and minerals found in tap water, reducing the risk of leaf damage and mineral buildup.
3. pH Levels:
- The pH of the water you use can impact your air plants’ ability to absorb nutrients. Most air plants prefer slightly acidic to neutral pH levels.
4. Rainwater:
- Rainwater is an excellent choice for watering air plants, as it’s naturally pure and free from chemicals. Collect rainwater during showers and use it to mist or soak your plants.
5. Testing Water Quality:
- You can test your water’s pH and mineral content using testing kits available at garden centers or online. This will give you insights into the suitability of your water source.
6. Watering Methods and Quality:
- Regardless of the water source, ensure that it’s at room temperature before using it to water your plants. Sudden temperature changes can shock your air plants.
7. Flushing with Clean Water:
- Occasionally, flush your air plants with clean, room-temperature water to remove accumulated salts and minerals. This can help keep their trichomes open and functioning optimally.
8. Avoiding Stagnant Water:
- Stagnant water, especially at the base of the plant, can lead to rot. Ensure proper drying after watering to prevent water from pooling in the leaves’ centerss.
Fertilization and Its Relationship with Air Plant Watering
While air plants are known for their ability to thrive without soil, they still require essential nutrients for optimal growth and health. Fertilization plays a significant role in providing these nutrients.
However, the interaction between fertilization and watering is a delicate balance that requires careful consideration to avoid overloading or starving your air plants.
1. Nutrient Needs of Air Plants:
- Air plants extract nutrients from the air and water, absorbing trace elements like nitrogen, phosphorus, and potassium. While they don’t need as many nutrients as soil-bound plants, providing some supplementation can enhance their growth.
2. Choosing the Right Fertilizer:
- Opt for a balanced, water-soluble fertilizer formulated for epiphytic plants or bromeliads. Dilute the fertilizer to half or quarter strength to prevent over-fertilization.
3. Incorporating fertilization into watering:
- A common approach is to mix the diluted fertilizer with the water you use for misting or soaking your air plants. This ensures a consistent supply of nutrients during watering sessions.
4. Frequency of Fertilization:
- Fertilize your air plants every 4–6 weeks during their active growth period (typically spring and summer). Reduce or cease fertilization during the dormant period (fall and winter).
5. Avoiding Over-Fertilization:
- Over-fertilization can lead to salt buildup on the leaves and damage to the trichomes, hindering their ability to absorb water and nutrients. This is why using a diluted solution is crucial.
6. Flushing with Clean Water:
- Occasionally, flush your air plants with clean water to remove any accumulated salts from fertilization. This helps maintain the health of the trichomes and prevents leaf damage.
7. Monitoring Growth and Health:
- Regularly observe your air plants for signs of healthy growth. Vibrant colors, increased pup production, and overall vitality are indicators that your fertilization routine is effective.
8. Adjusting Fertilization with Watering:
- Be mindful of the interaction between fertilization and watering. If you’re misting more frequently, reduce the concentration of fertilizer to avoid excessive nutrient buildup.
9. Listen to Your Plants:
- Just like with watering, pay attention to how your air plants respond to fertilization. If they show signs of stress or over-fertilization, adjust your routine accordingly.
Troubleshooting Common Watering Issues with Air Plants
Even with the best intentions, air plant care can sometimes present challenges. Understanding and troubleshooting common watering issues can help you identify and address problems promptly, ensuring the health and longevity of your Tillandsias.
1. Underwatering:
- Signs: curling, shriveling, or rolled leaves; dull appearance; slow growth.
- Solution: Increase the frequency of watering; consider misting or soaking more often; ensure proper drying after watering.
2. Overwatering:
- Signs: Brown or mushy spots on leaves; foul odor; leaf base rot.
- Solution: Reduce watering frequency; improve air circulation; adjust the drying time after watering.
3. Improper drying:
- Signs: water pooling in the base of leaves; rot; mold growth.
- Solution: Ensure thorough drying after watering; prevent water from accumulating in the center of the plant.
4. Water-Related Pests and Diseases:
- Signs: presence of pests like aphids or scale insects; fungal growth.
- Solution: Isolate affected plants; use insecticidal soap or neem oil for pests; improve air circulation to prevent fungal growth.
5. Ignoring environmental factors:
- Signs: inconsistent plant response despite adhering to a watering schedule.
- Solution: Consider other factors such as humidity, temperature, and light; adapt your care routine accordingly.
6. Overcrowding and Poor Air Circulation:
- Signs: Plants are slow to dry after watering; increased risk of rot.
- Solution: Space out plants to allow air to circulate; avoid densely packed displays.
7. Watering at inappropriate times:
- Signs: watering during the hottest part of the day; using cold water.
- Solution: Water during the cooler part of the day; use room-temperature water to prevent temperature shock.
8. Inadequate observation:
- Signs: missing signs of dehydration or overhydration.
- Solution: Regularly inspect your air plants; get to know their specific needs and behaviors.
9. Sticking to a Rigid Routine:
- Signs: Plants show signs of stress despite sticking to a set watering schedule.
- Solution: Be flexible with your routine; adjust watering based on plant response and environmental changes.
Advanced Tips for Dedicated Air Plant Enthusiasts
For those who are passionate about air plant care and want to optimize their plants’ growth and well-being, there are several advanced techniques you can explore.
These tips will allow you to fine-tune your care practices and create an environment that supports the flourishing of your Tillandsias.
1. Humidifying Trays:
- Place your air plants on trays filled with water-absorbent materials like decorative stones. This creates a microclimate of increased humidity around the plants, which is beneficial, especially in drier environments.
2. Adjusting Watering Frequency by Growth Stage:
- Different growth stages may require varied watering. For instance, plants producing offsets might need slightly more moisture to support pup growth.
3. Using a hygrometer:
- Invest in a hygrometer to measure humidity levels accurately. This data can guide you in adjusting your care routine to provide consistent and optimal moisture levels.
4. Incorporating Air Plant Terrariums:
- Create beautiful terrariums with air plants, utilizing glass containers to maintain a humid environment. Be mindful of not overwatering in enclosed spaces.
5. Introducing Controlled Light Exposure:
- Experiment with controlled light exposure by moving your air plants to areas with varying light intensities. Observe how different light levels impact their growth.
6. Grafting and Mounting Techniques:
- Explore grafting air plants onto different bases or mounting surfaces. This can result in unique and eye-catching displays while promoting optimal growth.
7. Specialized Fertilization Regimens:
- Tailor your fertilization routine to the specific needs of each air plant species in your collection. Research individual species’ preferences for nutrients.
8. Encouraging Flowering:
- Adjust light exposure and fertilization to encourage air plants to produce flowers. Once they flower, they will produce offsets,, or “pups.”
9. Experimenting with Different Mounting Methods:
- Try mounting air plants on various materials,, such as driftwood, cork bark, or decorative stones. Each substrate can influence the aesthetic and care requirements.
10. Learning from Fellow Enthusiasts:
- Engage with air plant communities, forums, and local gardening clubs. Learning from others’ experiences can provide valuable insights and ideas.
Conclusion: Nurturing the Elegance of Air Plants Through Thoughtful Watering
Air plants, with their remarkable ability to thrive without soil, have captivated the hearts of plant enthusiasts around the world. Their unique characteristics and captivating beauty make them a joy to care for and observe. As you embark on your journey of air plant care, remember that mastering the art of watering is a fundamental key to their health and vitality.
Knowing the basics of air plants, such as their epiphytic nature and the role of trichomes in moisture absorption, sets the stage for successful care.
Factors like humidity, temperature, and air circulation influence how often you should water your air plants. Learning to read the signs of dehydration and overhydration empowers you to adjust your routine with precision.
Exploring various watering methods from misting and soaking to using rainwater allows you to tailor your approach to your environment and air plant species.
Creating a personalized watering schedule based on humidity levels, temperature variations, and growth patterns ensures a consistent routine that supports optimal growth.
Considering water quality and its impact on air plants helps you make informed decisions about the water source you use. Proper drying and air circulation after watering prevent rot and ensure your plants’ well-being. Balancing fertilization with watering provides essential nutrients for growth, while advanced techniques allow dedicated enthusiasts to fine-tune their care practices and create the best environment for their air plants to thrive.
As you embark on this journey, remember that air plant care is both an art and a science.
Each plant is unique, and your understanding of their individual needs will grow with time.
Observing, adapting, and nurturing your air plants with care and attention, you’ll reap the rewards of vibrant, healthy plants that bring a touch of natural elegance to your living spaces.
So, continue to water thoughtfully, watch them flourish, and revel in the magic of Tillandsias.

