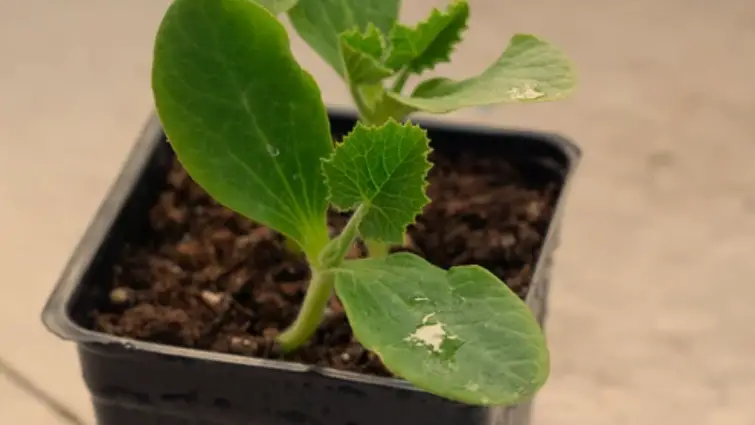
For weeks, you’ve been attentively taking care of your squash seedlings while observing their development in the cozy light of your grow light.
The seedlings are beginning to outgrow their little seedling pots and have grown several sets of genuine leaves.
The main concern right now is whether they’re prepared to move outside into the garden.
The success of seedlings depends on their timely transplantation.
If you take them outside too soon, they’ll suffer in the harsher environment and grow more slowly.
If you wait too long, your roots can get restricted, which would also prevent proper growth.
When squash seedlings have three to four sets of true leaves and a strong root system that can support ongoing growth in the garden, it is time to transplant them.
Your seedlings need to be several inches tall at this point, with thick enough stems to support the plant.
Lift a seedling gently to inspect the roots; they should occupy the majority of the pot with some room to grow.
It’s time to head outside if the roots are wrapping around the edges.
Your perseverance will be rewarded with squash plants that are strong, healthy, and ready to begin bearing lots of fruit.
It’s time to get moving and plant your squash seeds in the garden!
Squash Seedling Growth Stages
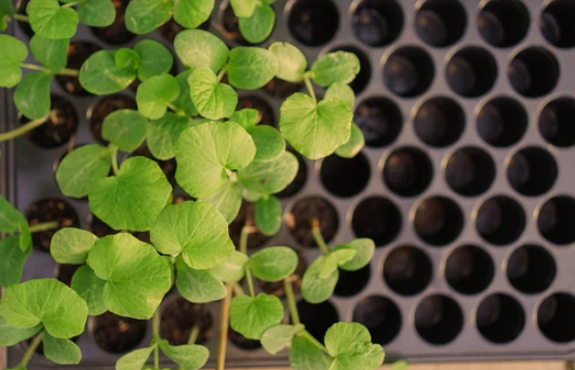
Once your squash seedlings sprout, it’s time to watch them closely so you know when they’re ready for the garden. There are a few growth stages to look for.
First, the seedling will develop its first true leaves. These look different from the rounded cotyledon leaves that first emerge. The true leaves will be lobed and oval-shaped. At this point, your seedling is ready for its first feeding. Use a balanced, all-purpose fertilizer at 1/2 the recommended strength.
Next, your seedling will become a young plant with 3-4 true leaves. This is when you need to start the hardening-off process, taking the plant outside for some time each day to get used to the elements. Start with just 30-60 minutes and increase by 30 minutes each day. Make sure temperatures stay above 65 F.
Finally, once there are 4-6 true leaves and the weather has warmed up, your squash seedling should be ready to transplant into the garden, spaced 2 to 3 feet apart. Bury the stem up to the top set of leaves when planting.
Provide shade for the first week or so, then full sun exposure. Keep the soil consistently damp while your Squash Seedlings Seedlings establishes itself.
With the right care and patience at each stage, your squash seedlings will thrive in their new home and provide you with a bountiful harvest. Enjoy!
How Many Leaves Should Squash Seedlings Have Before Transplanting?
Squash Seedlings Are Ready
So your little squash seedlings are up and at ’em, but when are they actually ready to transplant into your garden? The key is to look for a couple of signs that they’re mature enough to thrive after being moved.
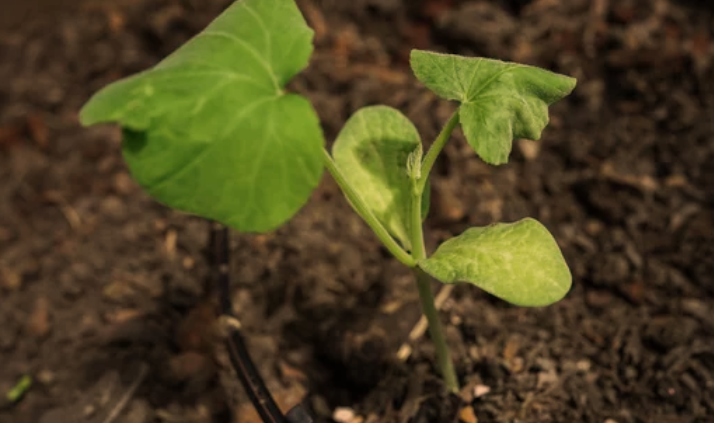
First, squash seedlings should have their first set of true leaves before they are ready for transplanting. The “true” leaves will look different from the first set of leaves (called cotyledons) that emerge. True leaves are usually darker green, larger, and more squash-like in shape. If your seedling only has its cotyledons, it’s too young to transplant.
Second, aim for transplanting squash seedlings with 2-3 mature true leaves and a well-developed root system. Gently lift one out of its pot to check – the roots should be dense and filling out the root ball. Transplanting before the roots have had a chance to establish can shock the plant.
As a general rule of thumb, it is usually safe to transplant squash seedlings about 3 weeks after they sprout or when they have 1-2 sets of true leaves. Squash seedlings should have 2-3 mature true leaves before they are ready for transplanting. Squash seedlings that have grown more than a couple true leaves may experience transplant shock, become stressed, or even die when moved into your garden.
So keep a close eye on your squash seedlings and check for those first true leaves and a healthy root system. Once they’ve reached that stage of maturity, it’s time to harden them off and get them into your garden so they can really take off! With the proper care and conditions, your squash seedlings will transition smoothly and start pumping out blossoms and fruit in no time.
Consider the Weather Before Transplanting Squash
The weather is one of the most important things to consider before transplanting your squash seedlings into the garden. Squash plants are very sensitive to temperature, so you need to make sure the conditions are just right.
Soil temperature
Squash seeds won’t sprout in cold soil, so hold off on planting or transplanting until the soil has warmed to at least 65-70°F. You can use a soil thermometer to check the temperature at the depth you plan to transplant. If it’s not quite warm enough yet, consider using plastic mulch, row covers, or cold frames to help heat up the soil.
Air temperature
Squash also need warm air temperatures to thrive, ideally staying above 65-70°F during the day and not dropping below 55°F at night. Watch the weather forecast to make sure there are no cold spells or frosts coming before you transplant. If temperatures do drop, be ready to protect your seedlings with frost protection cloth, cloches, or row covers.
Sun exposure
Squash require full sun for at least 6 to 8 hours per day to produce their best growth and yields. Choose a spot in your garden that gets plenty of direct sunlight throughout the day. If possible, plant in a location that is sheltered from strong winds which can damage the broad leaves and snap fragile stems.
Rain and humidity
While squash need consistent moisture, especially after transplanting, too much rain or high humidity can lead to disease problems. Try to transplant on a dry, sunny day if possible. Water seedlings thoroughly after transplanting and regularly check soil moisture to ensure the top few inches are damp but not soggy. Providing good air circulation around the plants will also help prevent disease.
The ideal weather for transplanting squash is a warm, sunny day with temperatures of 70-75°F, low humidity, and a minimal chance of rain in the forecast. Paying close attention to these factors will give your seedlings the best start in the garden so you can enjoy a successful harvest of squash this season!
Hardening Off Squash Seedlings
Once your squash seedlings are a couple inches tall and have their first set of true leaves, it’s time to start hardening them off so they’re ready to thrive when you transplant them to your garden. Hardening off seedlings is the process of gradually exposing them to outdoor conditions over 7 to 10 days. This toughens them up and prevents transplant shock when you move them into your garden.
Them In Slowly
Start by placing your seedlings in a shady spot outdoors for just an hour or two the first day. Slowly increase the time over the next few days. After a couple days of shade, move them to a spot with filtered sunlight, like under a tree. Finally, expose them to more direct sun for a few hours a day. Be sure to bring them in at night since temperatures will still be cool.
Watch the Weather
Pay attention to weather conditions and adjust as needed. On very hot or windy days, hardening off may need to be cut short. Cold temperatures below 50 F can also damage seedlings, so bring them in if frost is threatening. On rainy days, place seedlings under a sheltered area. Monitor soil moisture and water thoroughly when the top few inches become dry.
They’re Ready!
After 7-10 days of hardening off, your squash seedlings should be fully acclimated to outdoor conditions and ready to transplant into your garden. Look for seedlings with sturdy, thick stems and healthy green leaves. Dig holes 12-18 inches apart and place seedlings at the same depth as they were in their pots. Water thoroughly after transplanting and check regularly to ensure the soil stays consistently moist while your seedlings establish themselves.
With the proper care and hardening off, your squash seedlings will thrive in their new home and produce an abundant harvest. Be patient through the process and you’ll be rewarded with homegrown squash this season!
How to Transplant Squash Seedlings
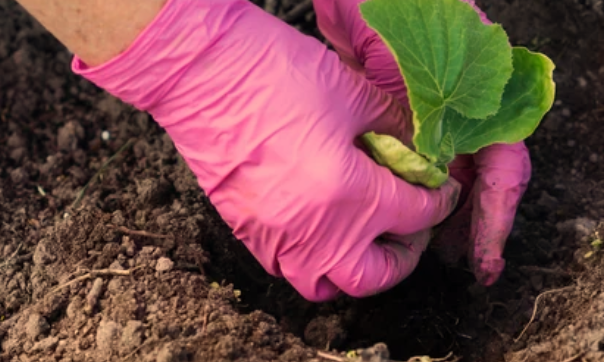
The time has finally come to move your squash seedlings from their cozy indoor home to the great outdoors. But how do you know if they’re ready for transplant and the best way to do it? Here are some tips to ensure your seedlings make a smooth transition to the garden.
Wait until at least 2 weeks after the last spring frost and daytime highs are in the 65 F range before transplanting. Squash are very frost-tender, so be patient – their new home will be ready when the weather warms up.
Check that your seedlings have 2-3 sets of true leaves, are 3 to 6 inches tall, and the stems are about as thick as a pencil. This shows they are mature enough to handle the move.
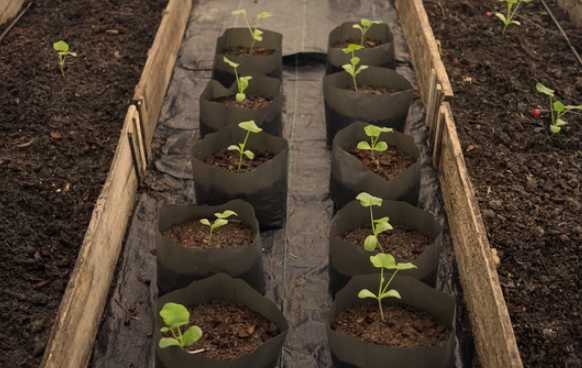
Prepare the garden bed ahead of time. Work in compost or other organic matter and turn the soil to a depth of 8 to 12 inches. Space the holes 3 to 4 feet apart so the vines will have plenty of room to sprawl out.
Gently loosen the seedling roots if they’re in small pots or cells before transplanting. For seedlings in compostable pots, you can plant the entire pot to minimize root disturbance. Bury the pot completely in the soil.
Place the seedling in the hole and backfill the soil around it, patting down firmly to remove any air pockets. Water the seedling thoroughly after transplanting.
Provide shade for 3 to 5 days as the seedlings adjust. Use shade cloth, paper bags with holes cut in them or lattice propped up over the seedlings. Remove the shade gradually over the period.
Fertilize the seedlings a week after transplant and again every few weeks. Use a balanced fertilizer with equal parts nitrogen, phosphorus, and potassium. Follow the directions on the product packaging.
Keep the soil consistently moist while the seedlings become established. Water at least an inch per week.
In a few short weeks, you’ll be harvesting fresh squash from your garden! Paying close attention to the needs of your seedlings during this transition will set them up for a successful growing season.
Conclusion
So there you have it, the key signs to look for to know when your squash seedlings are ready to be transplanted into your garden. Once you see several sets of true leaves, the seedlings are a few inches tall, and the weather has warmed up for good, it’s go time. Get those babies in the ground and watch them take off. In just a short time, you’ll be harvesting fresh squash for dinner and enjoying the fruits of your labor. Gardening is rewarding work, but seeing those little seedlings you nurtured turn into big, healthy plants producing food for your table makes all the effort worthwhile. Happy gardening and bon appetit!

