Scalloped potatoes recipe look so simple, right? Slice some potatoes, pour on something creamy, bake, and wait for applause. Then real life shows up and hands you a pan of half-raw potatoes swimming in broken sauce.
Cute.
I learned this the annoying way after bringing a dish of undercooked scalloped potatoes to a family dinner.
People still ate them because my family loves me, or because they felt trapped, who am I to judge?
Since then, I’ve tested this recipe enough times to know what actually makes it work.
You do not need chef skills. You just need a few smart moves, a solid sauce, and the patience to let the pan rest before you attack it with a spoon.
This article gives you the version I’d text to a friend who wanted scalloped potatoes that come out creamy, tender, and reliable every single time. Not fancy. Just good.
Why Scalloped Potatoes Matter
I keep coming back to this dish because reliability matters. Scalloped potatoes can sit next to roast chicken on a random Tuesday, and they can also show up at Thanksgiving without embarrassing you. That range makes them worth learning well.
My favorite version uses thin potato slices, a cooked cream sauce, and enough seasoning to make each layer taste like something. That last part sounds obvious, yet so many pans taste like boiled sadness with a browned top.
Ever taken a bite and wondered where the flavor went? It stayed in the sauce because nobody seasoned the layers.
I also love that this recipe scales easily.
I make it in an 8-by-8-inch dish for 4 to 6 people, or I double it in a 9-by-13-inch dish for a holiday table. The method stays the same, which helps a lot when you already have six other things going on and one of them is probably on fire.
If you learn one thing early, learn this: scalloped potatoes reward patience. Thin slices, a hot sauce, enough bake time, and a proper rest turn a basic potato dish into something people actually remember.
Ingredients and Recipe Table
You do not need a long ingredient list. You need the right amounts, and you need them ready before you start layering. I keep this recipe pretty classic because classic works.
| Item | Amount | Notes or Swap |
|---|---|---|
| Yukon Gold potatoes | 2 1/2 pounds | About 6 to 7 medium potatoes; Russets also work |
| Butter | 4 tablespoons | Salted or unsalted |
| Garlic | 2 cloves, minced | Use 1 teaspoon garlic paste if needed |
| All-purpose flour | 3 tablespoons | Helps thicken the sauce |
| Whole milk | 2 cups | 2% works, but sauce tastes thinner |
| Heavy cream | 1 cup | Swap with more whole milk for a lighter version |
| Kosher salt | 2 teaspoons, divided | Start here, then taste the sauce |
| Black pepper | 1 teaspoon | Freshly ground tastes better |
| Thyme | 1 teaspoon | Fresh or dried |
| Gruyère or sharp cheddar | 1 cup, shredded | Optional, but I use it |
| Parmesan | 1/4 cup | For the top |
| Prep time | 25 minutes | Count 10 extra if you slice by hand |
| Coo time | 70 to 85 minutes | Covered 50 to 60, uncovered 20 to 25 |
| Servings | 6 | 4 if your family loves potatoes like mine does 🙂 |
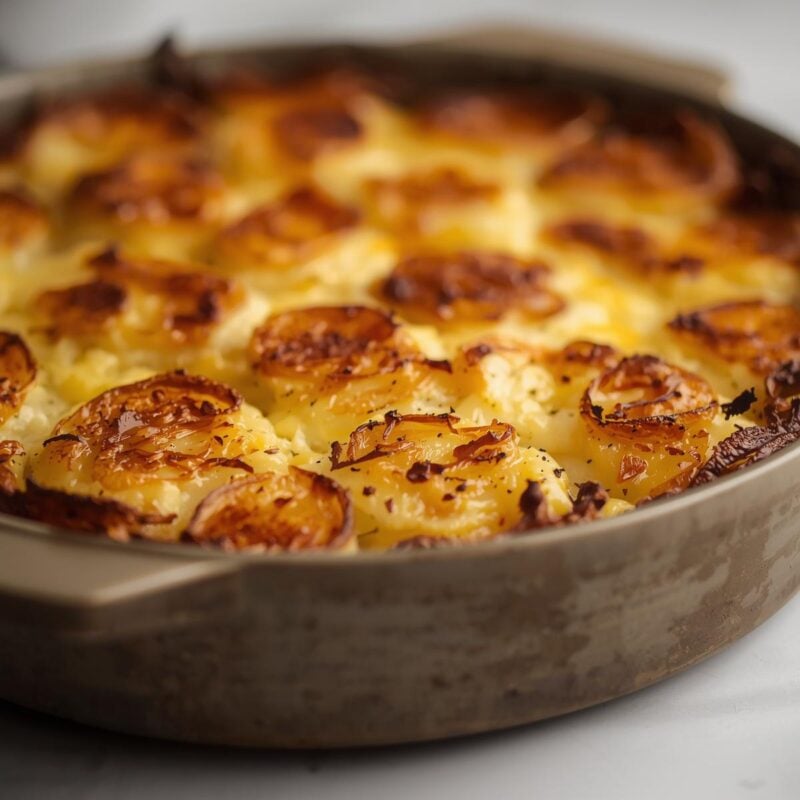
Recipe snapshot: heat the oven to 375°F, make the sauce on the stove, layer sliced potatoes with seasoning and sauce, cover with foil, bake until tender, uncover for color, and rest 15 minutes before serving. That rest matters more than people think because the sauce thickens and the slices settle into actual layers instead of potato soup.
Choosing Potatoes and Dairy
Your best shot at a smooth, creamy pan starts with Yukon Gold potatoes and decent dairy. I use Yukon Golds most often because they hold their shape, turn tender without falling apart, and bring a buttery flavor on their own. Russets work too, especially if you want softer layers and a thicker sauce, but they can break down faster.
Which potatoes make the best layers?
Pick potatoes that look firm and feel heavy for their size. Skip any with green spots or sprouting eyes. I slice them about 1/8 inch thick. Thicker slices take much longer to cook, and then you stand over the oven poking them with a knife like that somehow speeds things up.
If you use Russets, rinse the slices quickly and pat them dry. They release more starch. That extra starch can help the sauce thicken, but too much can make the layers a little gluey. Yukon Golds give me more control, so I reach for them first.
Milk, cream, and cheese that actually behave
I use 2 cups whole milk and 1 cup heavy cream because that mix gives me a rich sauce that still pours easily. If I use all cream, the dish feels too heavy. If I use all milk, the sauce tastes thinner and can look a little flat.
For cheese, I like Gruyère for a nutty flavor or sharp cheddar for a more familiar, cozy vibe. Scalloped potatoes do not always include cheese in the strict old-school sense, however I make them with some cheese because I enjoy happiness. Add about 1 cup to the sauce or between layers, then a little Parmesan on top.
Need a budget move? Use all whole milk and sharp cheddar. That combo still works well. Avoid pre-shredded cheese if you can, because the anti-caking powder keeps it from melting as smoothly.
Tools That Make It Easier
You can make this recipe with basic kitchen gear, but a few items make the job much easier and more even. My most-used mandoline earns its drawer space every single time.
- Baking dish: Use an 8-by-8-inch or 2-quart ceramic or glass dish for this recipe. A shallow dish helps the potatoes cook more evenly than a very deep one.
- Mandoline or sharp knife: A mandoline gives you even 1/8-inch slices fast. If you use a knife, cut one potato first, check the thickness, and adjust before you do the other six.
- Medium saucepan: Make the sauce in a 2- to 3-quart pan so you have room to whisk without splashing hot dairy all over yourself. I’ve done that. I did not enjoy it.
- Foil: Cover the dish tightly for the first part of baking. Foil traps steam and helps the potatoes soften before the top browns.
- Paring knife: Test doneness by sliding a knife into the center. It should glide in with almost no resistance.
If you own a mandoline, use the hand guard. Potatoes do not care about your fingertips. FYI, I stop slicing when the potato gets too small to hold safely. One uneven end slice never ruined dinner.
Prep the Layers Properly
This part decides whether every bite tastes balanced or bland. Good layers mean even slices, steady seasoning, and sauce spread all the way to the corners.
Slice first, then season in stages
Peel the potatoes if you want a smoother texture. I usually peel them for holidays and leave a little skin on for casual dinners. Slice them to 1/8 inch thick and keep them in a bowl. Do not soak Yukon Golds unless you need to hold them for more than 15 minutes. You want some starch on the surface because it helps the sauce cling.
Mix 1 1/2 teaspoons kosher salt, 1 teaspoon black pepper, and the thyme in a small bowl. Use that mix a little at a time as you build the pan. This move changed everything for me because each layer gets flavor, not just the top.
Build the pan step by step
- Butter the baking dish well, especially the corners.
- Spread a thin spoonful of sauce on the bottom.
- Add one layer of potato slices, slightly overlapping.
- Sprinkle a little seasoning mix over that layer.
- Spoon over some sauce, enough to lightly coat.
- Repeat until you use all the potatoes.
- Finish with the last of the sauce and the Parmesan on top.
Press down gently after every second layer so the potatoes settle into the dish. You do not need to mash them. Just nudge them into place. If the sauce barely covers the top layer, that’s fine. The potatoes release moisture as they bake.
Cook the Sauce First
I always make the sauce on the stove before the pan goes into the oven. That one step gives you more control over thickness, seasoning, and texture. It also cuts down the risk of curdling because the flour stabilizes the dairy.
Make a simple roux-based cream sauce
Melt 4 tablespoons butter in a saucepan over medium heat. Add the minced garlic and cook for 30 seconds. Stir in 3 tablespoons flour and whisk for 1 full minute. Keep the heat moderate. You want the flour to lose its raw taste, not turn brown.
Pour in the milk and cream slowly, whisking the whole time. Add 1/2 teaspoon salt at first, then the pepper and thyme if you did not save them for the layers. Cook the sauce for 4 to 6 minutes, whisking often, until it coats the back of a spoon. If you drag one finger through the sauce on the spoon, the line should stay clear.
Know when to add cheese
Take the pan off the heat before you stir in shredded Gruyère or cheddar. Cheese melts better in slightly cooler sauce. If you boil cheese hard, it turns grainy and oily, which feels rude after all that effort.
Taste the sauce before you build the dish. It should taste a little more seasoned than you think it should, because potatoes absorb a lot. If it tastes flat in the pan, it will taste flatter after baking. I learned that after serving a very pretty but deeply boring casserole to friends :/
Bake Step by Step
Baking scalloped potatoes goes better when you treat it like a two-stage process. First you soften the potatoes. Then you brown the top. That order gives you the best bake time and texture.
Heat your oven to 375°F. Put the filled dish on a sheet pan in case the sauce bubbles over a little. Cover the dish tightly with foil. Bake for 50 to 60 minutes on the center rack. Start checking at 50 if your dish sits on the shallow side or your slices run very thin.
Take off the foil and test the center with a paring knife. The knife should slide through with very light resistance. If the middle still feels firm, cover the dish again and bake 10 more minutes. Do not just uncover it and hope for the best. Hope does not cook potatoes.
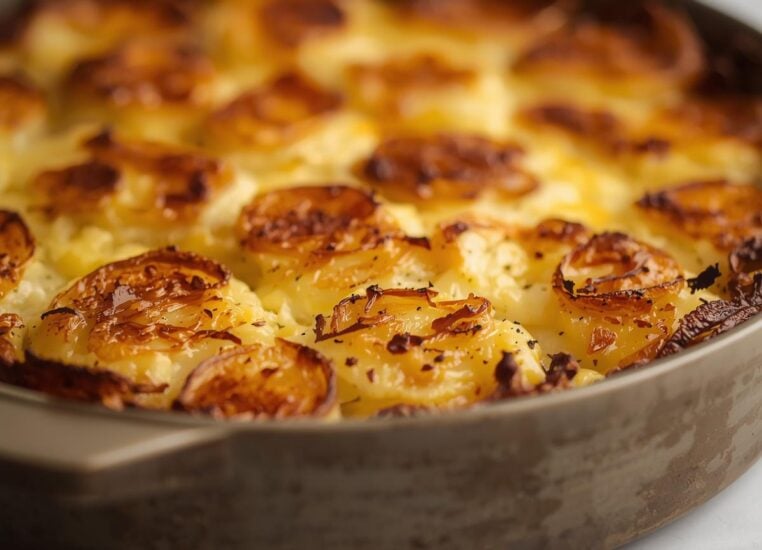
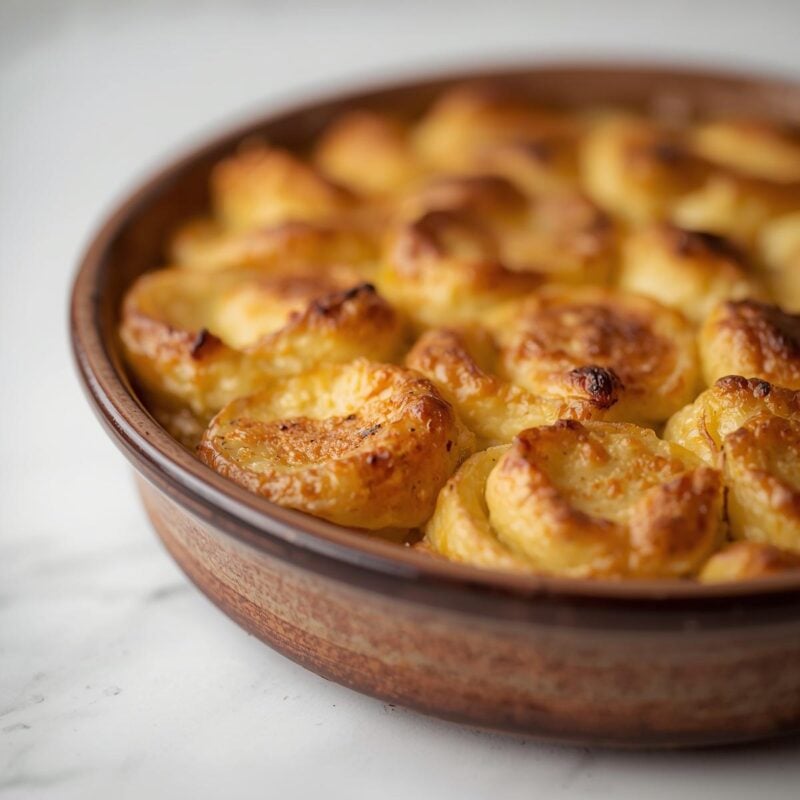
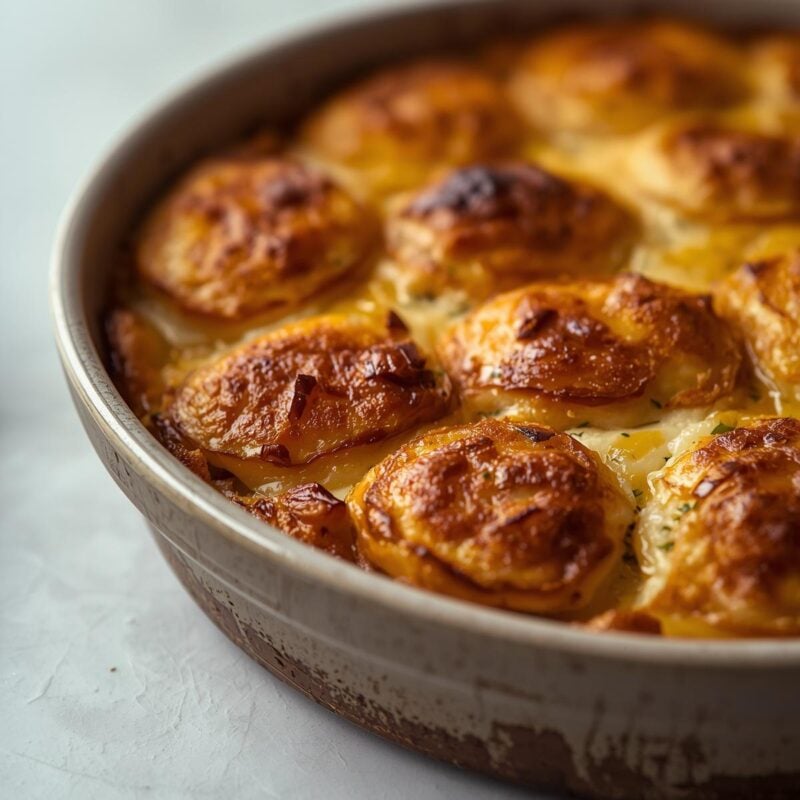
Once the center feels tender, uncover the dish and bake 20 to 25 more minutes. The top should turn golden with darker brown spots around the edges. If you want more color, broil for 1 to 2 minutes, but stay there and watch it. Broilers go from pale to charcoal with weird confidence.
Rest the dish for 15 minutes before serving. I know. Waiting feels unfair. Still, that rest lets the sauce thicken and the slices hold together, therefore you can cut neat portions instead of scooping a molten potato landslide onto each plate.
Fix Common Potato Problems
Even a good scalloped potatoes recipe can go sideways. Most issues come from slice thickness, oven time, or sauce heat. The good news? You can fix a lot of them.
Quick problem solver
- Potatoes stay firm: Cover the dish again, add 2 to 4 tablespoons hot milk around the edges, and bake 10 to 15 more minutes. Thick slices usually cause this.
- Sauce splits or looks oily: The heat ran too high, or the cheese got too hot. Next time, keep the sauce at a gentle simmer and add cheese off the heat. For the current pan, let it rest longer. The sauce often settles back enough to serve.
- Top browns too fast: Tent foil loosely over the dish and keep baking. Put the pan one rack lower if your oven runs hot.
- Sauce looks too thin: Give it the full 15-minute rest. If it still looks loose, your sauce started too thin. Next time cook it on the stove until it coats a spoon before layering.
- Edges dry out: Your dish baked too long uncovered. Spoon a little warm cream over the edges right after baking.
I also rotate the dish once during the uncovered stage because my oven heats one side harder than the other. Every oven has a personality, and some of them act like little gremlins. Make one note after you cook this recipe, and the next pan will come out even better.
FAQs, Recommendations, and Summary
This section covers the stuff people actually ask me after they taste a spoonful and decide I suddenly run a potato help desk. Fair enough. A few FAQs clear up the last bits.
Can I make scalloped potatoes ahead?
Yes. Assemble the dish up to 24 hours ahead, cover it, and refrigerate it. Let it sit at room temperature for 30 minutes before baking. Add 10 to 15 minutes to the coo time if it still feels very cold in the center.
How do I store and reheat leftovers?
Cool the dish, cover it, and refrigerate leftovers for up to 4 days. Reheat individual portions in the microwave at 70 percent power so the sauce stays smoother. For a larger amount, cover the dish with foil and warm it in a 325°F oven for about 20 minutes.
What should I serve with it?
I pair scalloped potatoes with roast chicken, ham, pork chops, or a simple green salad with sharp vinaigrette. The acid in the salad helps a lot because this dish runs rich. My holiday plate usually gets ham, green beans, and one shamelessly large square of potatoes.
My recommendation stays simple: use Yukon Golds, cook the sauce first, slice the potatoes thin, and test the center before you uncover the dish. That combo has saved me from a lot of mediocre pans. IMO, it gives the best mix of creamy sauce, tender layers, and a top worth fighting over.
Conclusion
If you want scalloped potatoes that turn out right, focus on four moves: slice the potatoes to 1/8 inch, make the sauce on the stove, season the layers as you build, and bake covered until the center turns fully tender. Then uncover the dish for color and let it rest 15 minutes. Those steps fix most of the usual problems before they start.
I’d bookmark this recipe and write your actual bake time on the back of the dish or in your phone after you make it once. That tiny note helps a lot because ovens and baking dishes all behave a little differently. After one or two rounds, you’ll stop guessing and start making scalloped potatoes that people request by name. That’s a good place to be.