

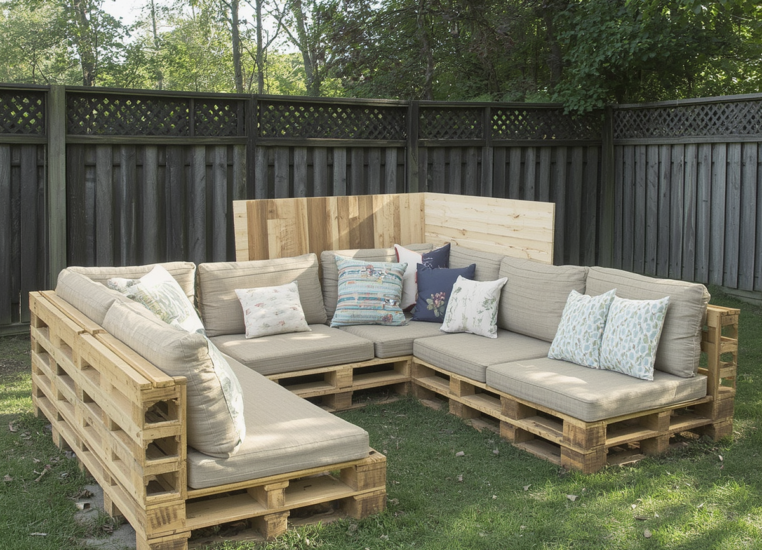
Building a pallet deck transforms your yard into a functional outdoor living area without breaking the bank. Pallets are affordable, versatile, and sturdy enough to support a complete seating or lounging platform.
Whether you have a small patio or a sprawling backyard, these twelve ideas show exactly how to design and construct pallet decks that fit your space and lifestyle.
Pallet Deck Basics
Before diving into specific ideas, know what makes a solid pallet deck. Standard pallets measure 48 inches long by 40 inches wide and can support up to 1,500 pounds when stacked properly. Hardwood pallets last longer than softwood, and pallets marked “HT” (heat-treated) are safe for outdoor use, avoid pallets marked “DB” (fumigated with methyl bromide).
Two to four pallets stacked and fastened together create a stable base for a lounge platform, while six to eight pallets arranged in an L-shape form a sectional seating area.
Sand rough surfaces with 80-grit sandpaper, then seal your deck with exterior-grade wood stain or sealant to protect against weather and extend its lifespan to 5–7 years with maintenance.
1. Ground-Level Lounge Platform
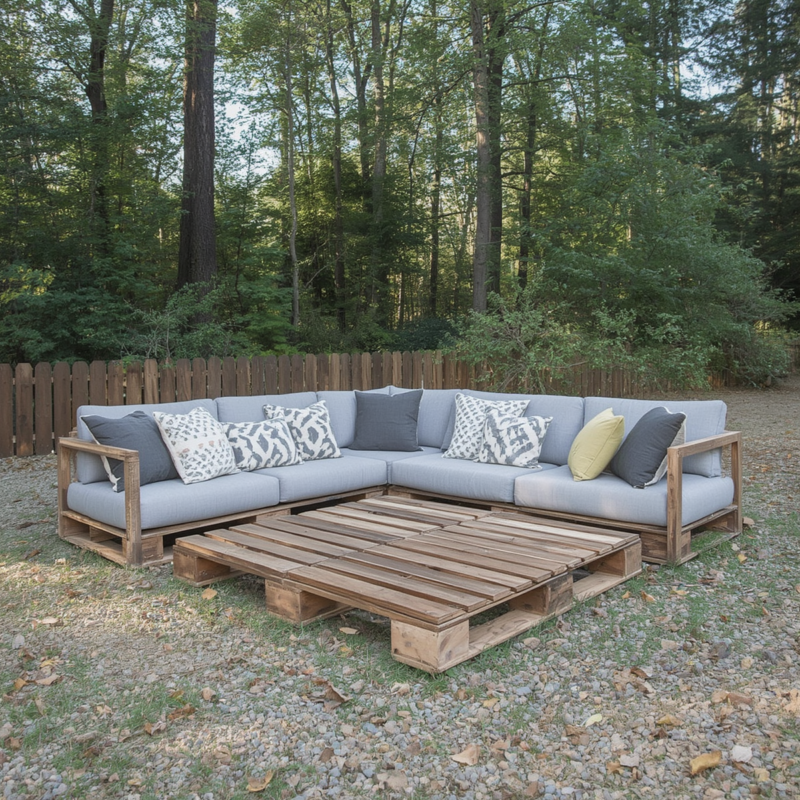
This is the simplest pallet deck to build and the most forgiving for beginners.
What you need: 4 pallets, deck stain, outdoor cushions, sandpaper
How to build it:
- Arrange pallets in a 2×2 grid directly on level ground. Use a level to confirm the base is even before placing the pallets.
- Secure pallets to each other with 3-inch exterior-grade screws at each corner, drilling four holes per connection point.
- Sand any rough edges and splinters.
- Apply two coats of exterior deck stain, allowing 24 hours between coats.
- Add cushions and throw pillows.
Why it works: No footings, no digging, and you can move it if needed. It sits 10–14 inches high, making it ideal for small yards or renters. Sunken into the grass, it creates an integrated look without modification.
Time to complete: 4 hours (plus drying time)
2. Elevated Deck with Concrete Footings
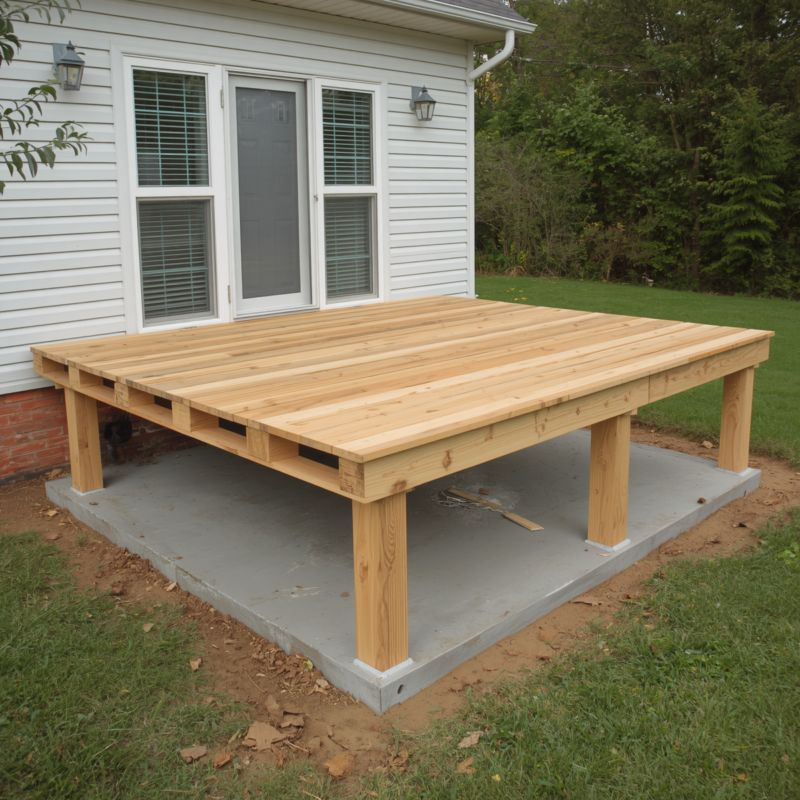
For a permanent, professional structure that won’t settle over time, use concrete footings.
What you need: 6–8 pallets, concrete mix, post holes digger, pressure-treated posts, galvanized fasteners, deck stain
How to build it:
- Mark four corners where your deck will sit, spacing them 4 feet apart to support the pallet frame.
- Dig post holes 12 inches deep and 12 inches wide at each corner.
- Mix concrete according to package directions and fill each hole halfway.
- Set pressure-treated 4×4 posts in each hole (cut to 18–24 inches above ground) and fill with concrete. Let cure for 48 hours.
- Attach pressure-treated 2×8 joists between the posts using lag bolts.
- Lay pallets on the joists, orienting them in the same direction. Secure to the frame with bolts or heavy-duty fasteners.
Why it works: Footings prevent ground rot and settling. The deck sits 18–24 inches high, providing storage space underneath or a clear view from inside the house.
Time to complete: 2 days (including concrete curing)
Cost range: $400–700 for materials
3. Multi-Level Corner Sectional
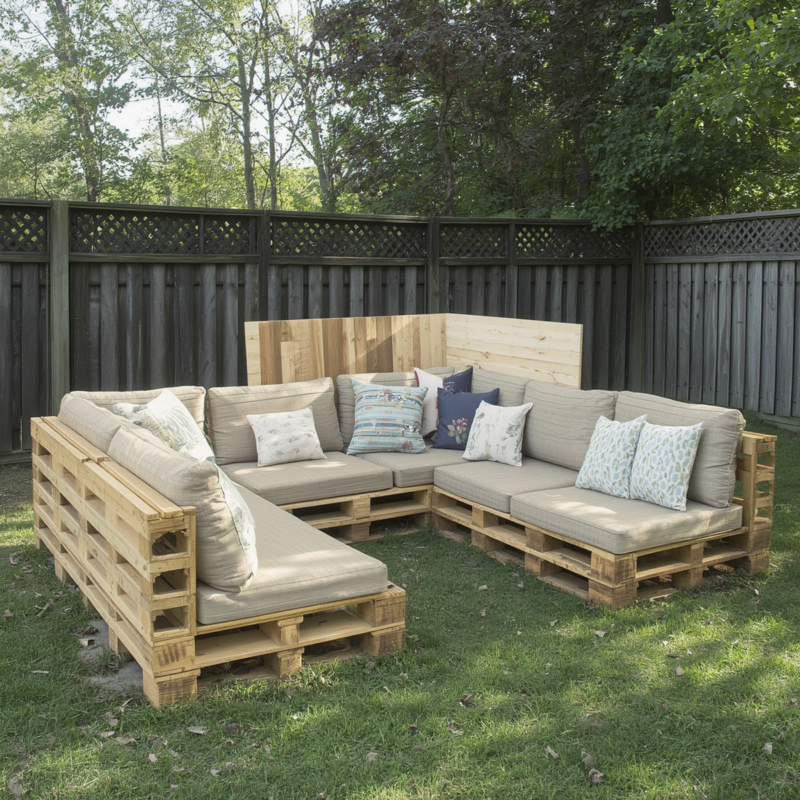
Build a wraparound seating area that maximizes corner space.
What you need: 12–14 pallets, fasteners, stain, exterior cushions, plywood for back support
How to build it:
- Create an L-shaped base using 8 pallets: 4 pallets along one edge (40 inches deep) and 4 along the other. Position the corner where the edges meet.
- Secure all pallets together at connection points with 3-inch screws (4 screws per connection).
- At the inside corner of the L, add two additional pallets stacked vertically (one on top of the other) to create an armrest or backrest support.
- Attach plywood backing to the top pallet using exterior wood glue and screws to create a backrest surface.
- Add cushions: one long cushion for each arm of the L, and additional pillows for back support.
Why it works: This design seats 5–7 people and defines a gathering zone. The raised corner acts as a natural divider and adds visual interest.
Cushion recommendation: Get a custom cushion cut to 80 inches for the long side and 60 inches for the short side, both 5 inches thick.
Time to complete: 6 hours
4. Tiered Planter and Deck Combo
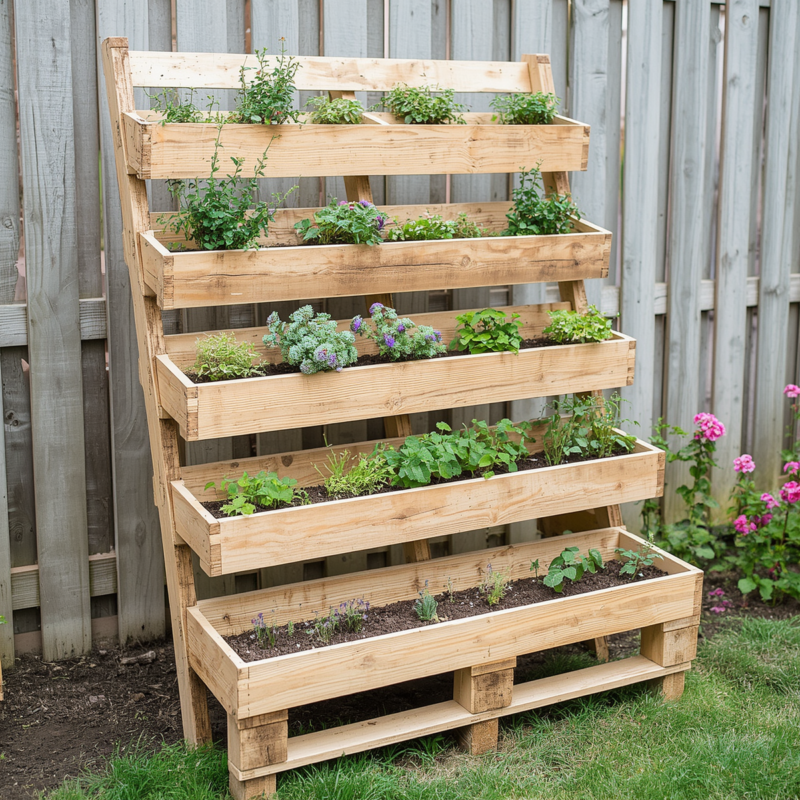
Combine seating with a vertical garden or flowers.
What you need: 8 pallets (4 for deck, 4 for tiered planters), landscape fabric, garden soil, potting mix, fasteners, stain
How to build it:
- Build a 2×2 pallet deck as your base (see idea #1).
- Behind the deck, stand 4 additional pallets vertically, stacking them in a tiered pattern: 1 pallet (back row), 2 pallets (middle row), 1 pallet (front row).
- Secure each tier to the pallets below using 4-inch exterior screws drilled through the side.
- Line the inside of each pallet with landscape fabric (staple it to the boards).
- Fill each tier with potting soil and plant herbs, succulents, or shallow-rooted flowers.
- Stain all visible wood before planting.
Why it works: You get seating and grow herbs, flowers, or vegetables in the same footprint. Ideal for small yards and creates a backdrop for the sitting area.
Plant suggestions: Basil, thyme, rosemary, sedum, creeping phlox, or trailing ivy.
Time to complete: 5 hours
5. Sunken Deck with Built-In Bench Seating
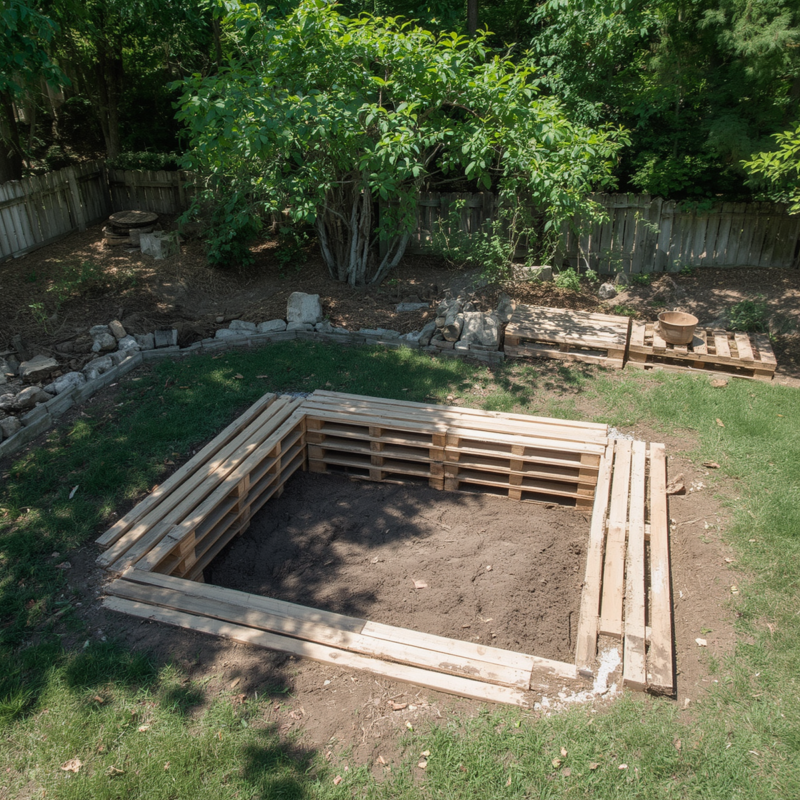
Create a recessed lounge area that sits partially below grade.
What you need: 10–12 pallets, landscape timbers, concrete, level, fasteners, cushions
How to build it:
- Mark a 8×8-foot square in your yard.
- Remove 12 inches of soil from inside the square and level it.
- Build a frame using landscape timbers or pressure-treated 2x8s around the perimeter, securing corners with 6-inch lag bolts.
- Lay pallets inside the frame (6–8 depending on size).
- Along two sides of the frame, build bench seats by stacking additional pallets horizontally and securing them to the main frame at 14-inch height.
- Add cushions to the benches.
Why it works: A sunken design feels more integrated with the landscape and provides natural wind protection. Bench seating maximizes space and creates intimate conversation areas.
Time to complete: 8 hours
6. Modular Pallet Deck Sections
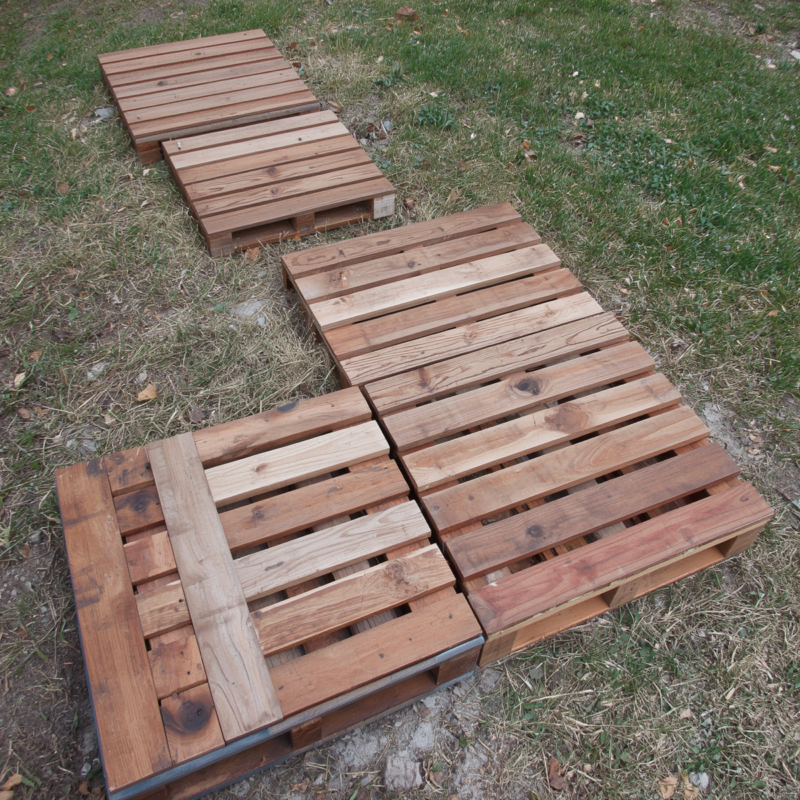
Build small, moveable decks that can be rearranged for different events.
What you need: 4–6 pallets per section, fasteners, stain, felt pads or furniture sliders
How to build it:
- Create 3–4 small platforms, each made from 2–3 pallets fastened together.
- Sand and stain each section.
- Attach furniture sliders or felt pads to the bottom of each section.
- Arrange sections however you like, in a line, an L-shape, a triangle, or scattered for different purposes.
Why it works: Perfect for renters or anyone who moves frequently. You can add or remove sections, change configurations seasonally, or sell individual pieces later.
Furniture slider note: Heavy-duty sliders rated for 300+ pounds per corner work on grass, gravel, and wood surfaces.
Time to complete: 5 hours per section
7. Pool-Side Deck with Drainage
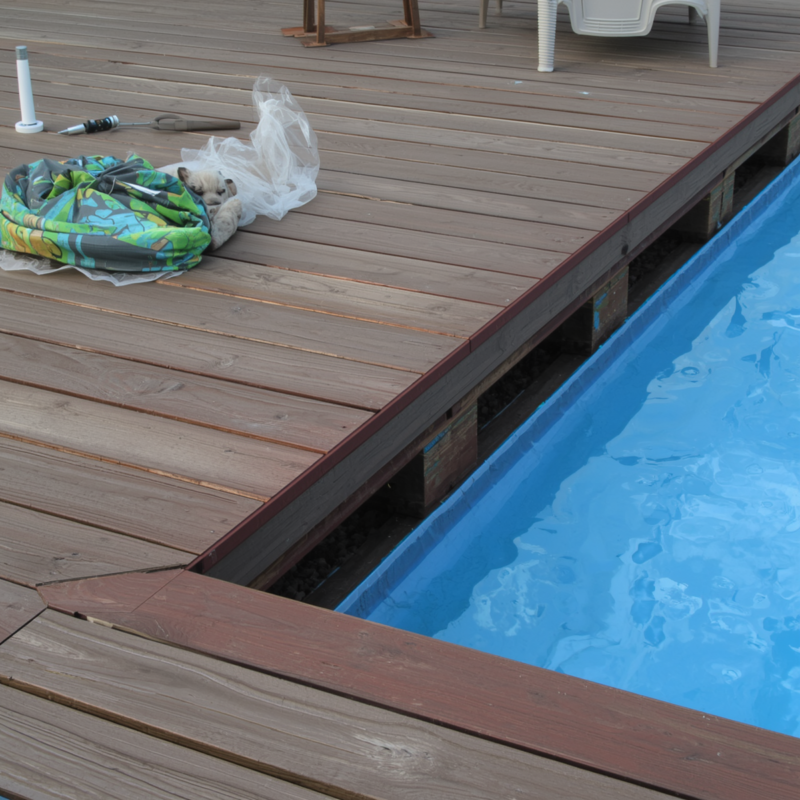
Pallets near water need proper drainage to prevent rot.
What you need: 6–8 pressure-treated pallets, plastic membrane, gravel, fasteners, stain rated for moisture
How to build it:
- On your chosen spot, lay a plastic moisture barrier (6-mil polyethylene) to block ground water.
- Cover the barrier with 2 inches of gravel for drainage.
- Lay pallets on top of the gravel, spacing them 2 inches apart to allow air circulation.
- Secure pallets together at corners.
- Use exterior stain rated for high-moisture environments (or skip stain and let the wood weather naturally to gray).
Why it works: The air gap and gravel layer prevent water from pooling under the deck, which is the main cause of rot. Pressure-treated wood resists moisture damage.
Maintenance tip: Check underneath annually and refresh stain every 2 years in humid climates.
Time to complete: 4 hours
8. Fire Pit Seating Deck
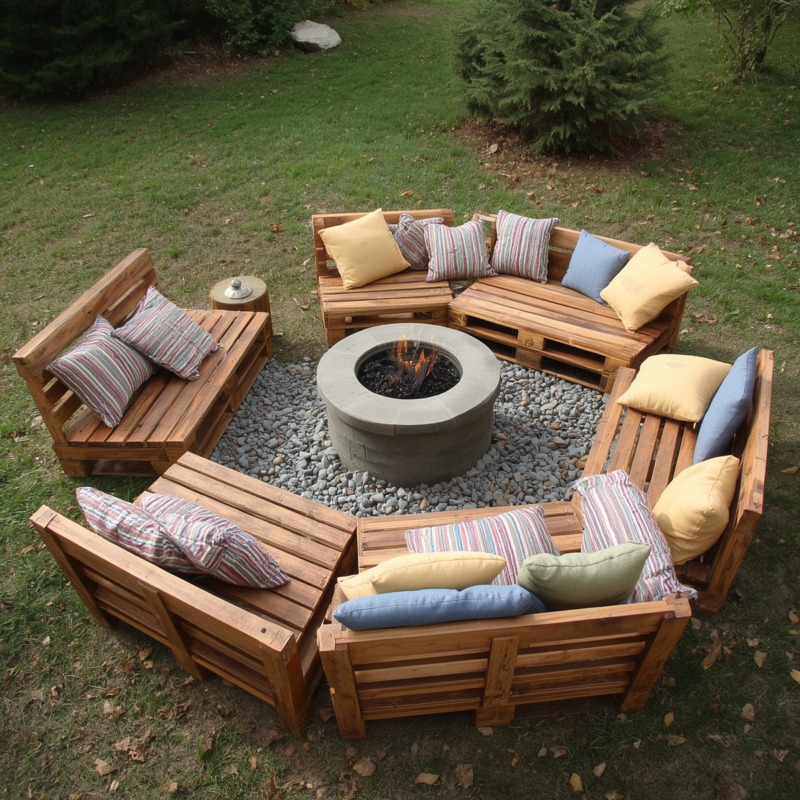
Build a pallet deck around a central fire pit or outdoor heater.
What you need: 10–12 pallets, fasteners, heat-resistant stain or sealant, fire pit or heater, metal framing for pit opening
How to build it:
- Lay out a circular or square deck around your fire pit, leaving a 3-foot clearance from the pit edge to the seating pallets.
- Build the deck in sections that fit around the pit opening (cut pallets to fit if needed).
- Secure all sections to each other.
- Use heat-resistant deck stain or sealant (check the product label for fire safety ratings).
- Arrange cushions on the outer edges for seating.
Why it works: Creates a natural gathering zone for evening entertaining. The deck defines the space and keeps guests seated at a safe distance.
Safety note: Maintain 3 feet minimum clearance from any heat source. Never build directly over the pit.
Time to complete: 6 hours
9. Two-Tier Stepped Deck
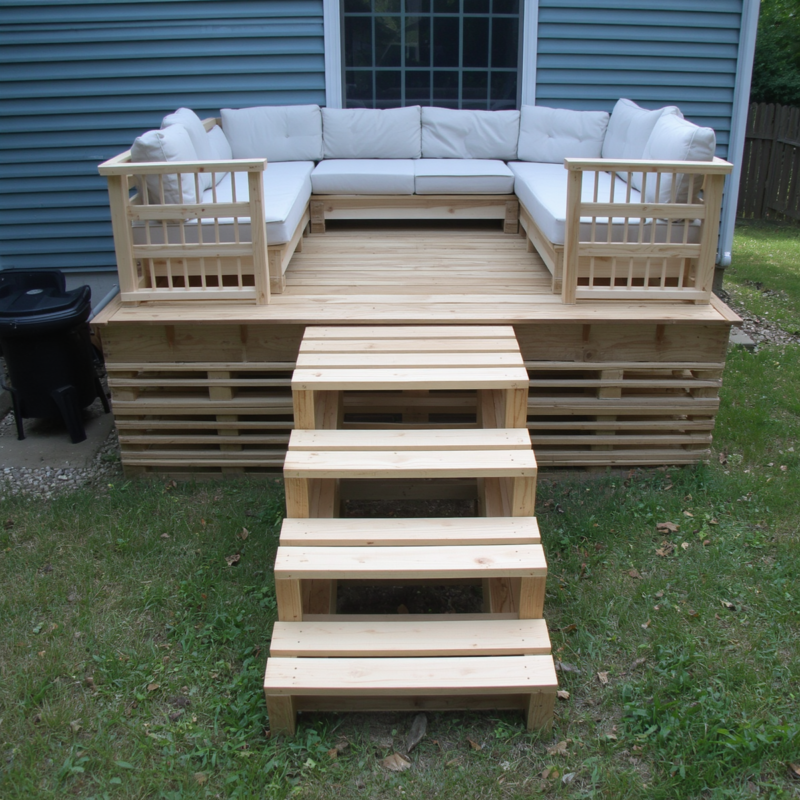
Add visual dimension and separate zones with a stepped design.
What you need: 12–14 pallets, fasteners, plywood for riser surfaces, stain, cushions
How to build it:
- Build a lower deck using 6 pallets arranged in a 2×3 grid.
- Behind the lower deck, build an upper platform using 6–8 pallets at 12 inches higher.
- Create steps between the levels using plywood cut to fit the gap (attach to the front edge of the upper pallets).
- Secure the upper deck to the lower deck at the connection points.
- Sand and stain all visible surfaces.
- Add cushions to both levels.
Why it works: The step naturally separates lounging areas from viewing or conversation areas. It works particularly well on sloped yards.
Space savings: Uses the same footprint as a large single deck but accommodates 8–10 people more comfortably.
Time to complete: 7 hours
10. Pallet Deck with Shade Pergola
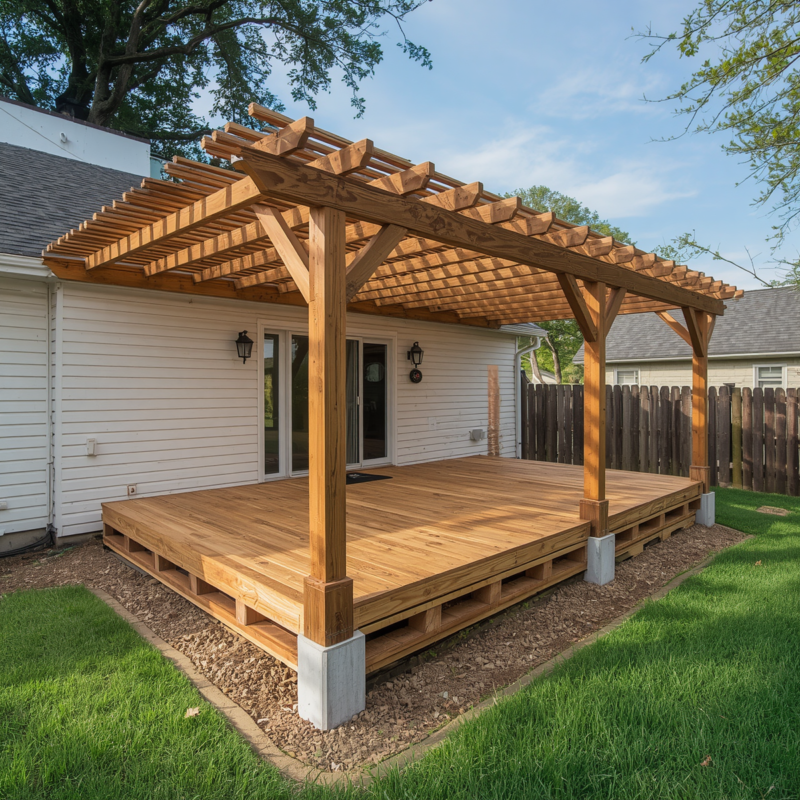
Add a pergola overhead for sun protection.
What you need: 8 pallets for deck, 8–10 pressure-treated 4×4 posts, 2×8 beams, 2×6 crossbeams, fasteners, stain
How to build it:
- Build a solid pallet deck base (see idea #2 for elevated deck with footings).
- At each corner and two center points, install 4×4 posts (10–12 feet tall) using concrete footings.
- Attach 2×8 beams horizontally between the posts at the top, 10 feet above the ground.
- Attach 2×6 crossbeams perpendicular to the main beams, spacing them 12–18 inches apart for dappled shade.
- Paint or stain all wood.
Why it works: Shade makes the deck usable during peak sun hours. The pergola also becomes a frame for climbing vines or string lights.
Vine options: Clematis, grapevine, or wisteria for permanent coverage; morning glory or annual clematis for seasonal color.
Time to complete: 3 days
Cost range: $900–1,400
11. Wraparound Deck with Built-In Planters
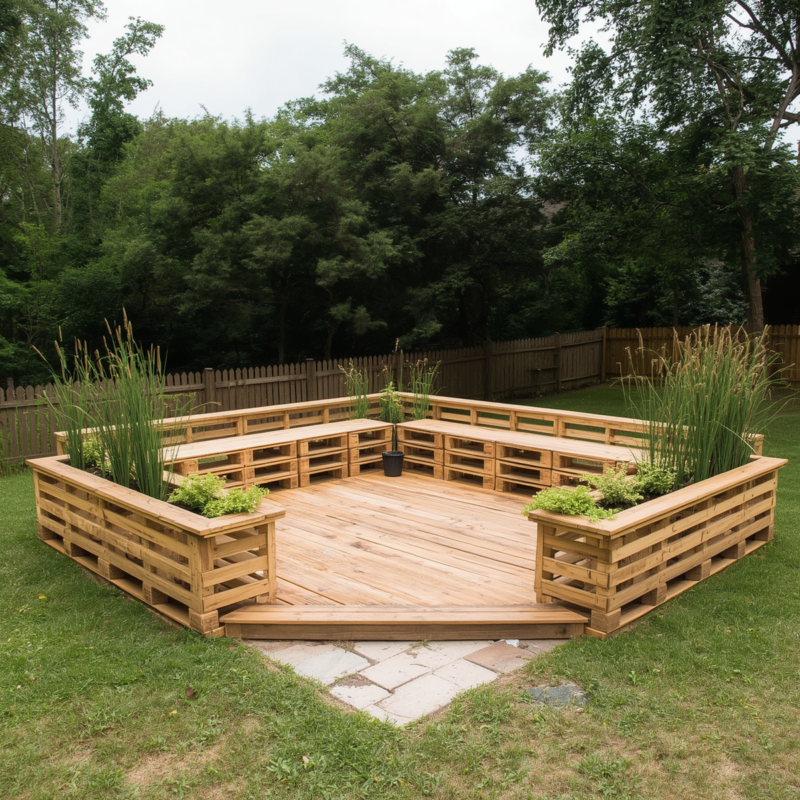
Edge your deck with integrated planting boxes for a polished look.
What you need: 12 pallets (8 for seating, 4 for planter boxes), landscape fabric, fasteners, potting soil, stain
How to build it:
- Build a core deck using 8 pallets in a rectangular shape.
- Stand 4 additional pallets vertically along the perimeter of the deck (one on each side, or cluster them at corners).
- Secure the vertical pallets to the horizontal deck frame using heavy-duty fasteners.
- Line the interiors with landscape fabric stapled to the wood.
- Fill with potting soil and plant low-growing shrubs, ornamental grasses, or seasonal flowers.
Why it works: Planters frame the deck and define the space without building traditional railings. They hide the underside of the deck and add color and texture.
Plant height tip: Choose plants that won’t block sightlines. Keep them under 24 inches tall.
Time to complete: 6 hours
12. Off-Season Storage Deck with Hinged Access
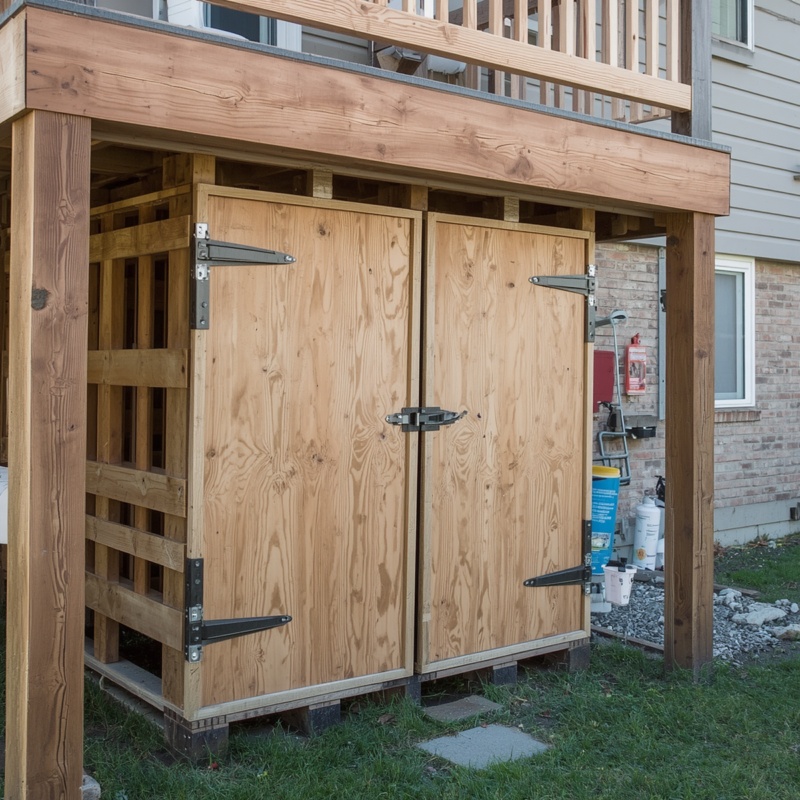
Build a deck that doubles as storage for garden equipment and seasonal items.
What you need: 6–8 pallets, plywood, hinges, latches, fasteners, stain, weatherproof sealant
How to build it:
- Build an elevated deck using 6 pallets on a frame (use the elevated deck approach from idea #2).
- Under the deck, frame an opening using 2×4 lumber.
- Cut plywood panels to fit the opening.
- Attach the plywood panels to the frame using heavy-duty hinges, creating a hinged storage door.
- Add a latch or magnetic catch to keep it closed.
- Seal all wood with weatherproof sealant.
Why it works: You get seating and hidden storage in one structure. Ideal for storing cushions, pool supplies, garden tools, or winter equipment.
Storage capacity: An 8×8 deck can hold 30–50 cubic feet of items under 18-inch clearance.
Time to complete: 8 hours
Installation and Maintenance Guide
| Task | Frequency | Details |
|---|---|---|
| Sand surface | Every 2 years | Use 80–120 grit sandpaper to refresh the top layer |
| Reapply stain or sealant | Every 2–3 years | Inspect for fading or water spots; refinish as needed |
| Check fasteners | Annually | Retighten screws or bolts if they’ve loosened |
| Clear debris | Weekly | Sweep off leaves and dirt to prevent moisture retention |
| Inspect underside | Annually | Look for rot, mold, or pest damage; treat with fungicide if needed |
| Pressure wash | Every 3 years | Use 1,500 PSI maximum to avoid damaging wood fibers |
Material Cost Comparison
| Deck Type | Materials | Labor (DIY) | Total Cost |
|---|---|---|---|
| Ground-level lounge | $200–300 | Free | $200–300 |
| Elevated with footings | $400–700 | Free | $400–700 |
| Multi-level sectional | $350–550 | Free | $350–550 |
| Tiered planter combo | $300–450 | Free | $300–450 |
| Pergola deck | $900–1,400 | Free | $900–1,400 |
Best Practices for Long-Lasting Pallet Decks
Choose HT (heat-treated) pallets. They cost slightly more but are certified safe and last longer than untreated wood.
Avoid pallets from chemical facilities. Check the pallet’s origin if possible. Pallets used for moving hazardous materials can retain residue.
Create airflow underneath. Even ground-level decks benefit from a gravel base that allows water to drain and air to circulate.
Tighten fasteners before the season. Winter freeze-thaw cycles and seasonal movement loosen bolts and screws. Check everything in spring.
Replace damaged boards immediately. A rotting board spreads decay to adjacent wood. Cut out the bad section and replace it with a new pallet board.
Seal cut ends. Cut pallet wood exposes fresh grain that absorbs water faster. Brush stain into all cut edges.
Sand before staining. A smooth surface accepts stain more evenly and looks more finished.
Choosing the Right Pallet Deck for Your Space
| Your Situation | Best Deck Type |
|---|---|
| Small patio, renting | Ground-level lounge or modular sections |
| Sloped yard | Two-tier stepped deck or elevated with footings |
| Want storage | Off-season storage deck with hinged access |
| Entertain groups | Multi-level sectional or fire pit seating deck |
| Garden enthusiast | Tiered planter combo or wraparound with planters |
| Want shade and views | Pergola deck |
| Pool or wet area | Poolside deck with drainage |
Final Thoughts
Pallet decks deliver function, style, and durability at a fraction of the cost of traditional composite or pressure-treated decks. Whether you build a simple ground-level lounger or a complex multi-level design, the principles stay the same: start with quality heat-treated pallets, secure fasteners properly, protect the wood with stain, and maintain airflow underneath.
Your first deck doesn’t need to be perfect. Start with one of the simpler ideas (ground-level lounge or modular sections), gain experience with fastening and finishing, then expand or build additional platforms next season. Most people find they want to add to their pallet deck once they see how much outdoor living space it creates.
Choose the idea that matches your yard’s size, your skill level, and how you actually use your outdoor space. A well-built pallet deck will serve your family for 5–7 years and can be refreshed or reconfigured whenever your needs change.
Related
Outdoor Succulents
Last modified: July 20, 2026
