Cabbage, a versatile and nutritious vegetable, has been a staple in kitchens worldwide for centuries.
Whether you love it in coleslaw, stir-fries, or simply steamed, growing your own cabbage can be a rewarding experience.
Cabbage is a cool-season crop that thrives in the garden, and with the right care, you can enjoy a bountiful harvest.
Let us take you through the step-by-step cabbage growing stages, from choosing the right variety to harvesting your fresh and delicious cabbage.
Step 1: Selecting the Right Cabbage Variety
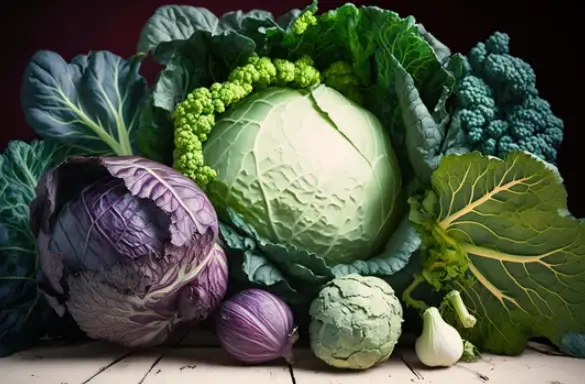
Cabbage Variety
The first step in growing cabbage is to choose the right variety for your garden.
Cabbage comes in different shapes, colors, and sizes. Some popular cabbage varieties include:
- Green Cabbage: This is the classic cabbage variety, known for its round, green heads. It’s great for traditional recipes like coleslaw and cabbage rolls.
- Red Cabbage: Red cabbage is known for its vibrant purple-red color. It adds a colorful touch to salads and coleslaw.
- Savoy Cabbage: Savoy cabbage has crinkled leaves and a milder flavor. It’s perfect for making stuffed cabbage rolls.
- Napa Cabbage: Also known as Chinese cabbage, Napa cabbage has a mild, slightly sweet taste. It’s commonly used in Asian cuisine.
- Bok Choy: Bok choy is a type of Chinese cabbage with thick, white stems and tender green leaves. It’s great for stir-fries and soups.
- Cauliflower: While not a true cabbage, cauliflower is part of the same family. It’s an excellent choice for a different flavor and texture in your garden.
Think about your environment, the available area, and your culinary preferences when selecting a cabbage variety.
While some types do better in colder areas, some do better in warmer ones.
Keep an eye on the days to maturity as well because it will affect when you can harvest your cabbage.
Step 2:
Cabbage, like most vegetables, thrives in well-prepared soil.
Follow these steps to ensure your soil is ready for planting:
- Choose the Right Location: Cabbage prefers full sun but can tolerate partial shade. Ensure your chosen spot receives at least 6 hours of sunlight per day.
- Test and Amend the Soil: Conduct a soil test to determine its pH and nutrient levels. Cabbage prefers a slightly acidic to neutral pH (around 6.5). If your soil is too acidic, add lime to raise the pH. Conversely, if it’s too alkaline, add sulfur to lower the pH. Incorporate organic matter, such as compost, into the soil to improve its structure and nutrient content.
- Clear the Area: Remove any weeds, rocks, or debris from the planting area. Cabbage competes poorly with weeds, so a clean bed is crucial.
- Till the Soil: Use a tiller or garden fork to work the soil to a depth of 6-8 inches. This helps improve aeration and drainage.
Step 3: Starting from Seeds
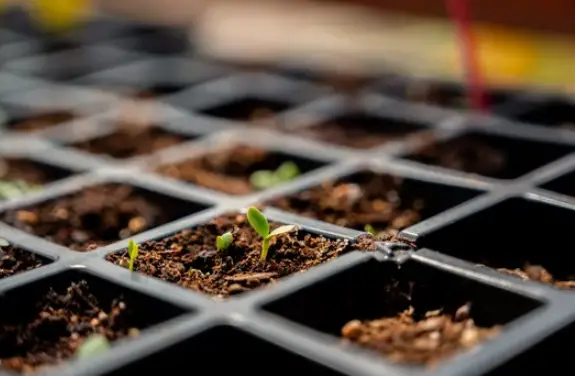
Cabbage can be grown from seeds or transplants.
Starting from seeds offers more variety and control over your crop. Here’s how to start cabbage from seeds:
- Sowing Indoors: Cabbage seeds should be started indoors 6-8 weeks before the last expected frost date in your area. Fill seedling trays or pots with a seed-starting mix. Plant the seeds ¼ inch deep and about 2 inches apart. Keep the soil consistently moist.
- Provide Light: Place the trays or pots in a sunny window or under fluorescent grow lights. Cabbage seedlings need ample light to grow strong and healthy.
- Harden Off: About a week before transplanting, start acclimating your seedlings to outdoor conditions by moving them outside for a few hours each day. This process, known as hardening off, prepares them for the change in environment.
- Transplanting: Once your cabbage seedlings have reached 4-6 inches in height and have at least two sets of true leaves, they are ready for transplanting. Space them 18-24 inches apart in rows or in your garden bed.
Step 4: Caring for Your Cabbage
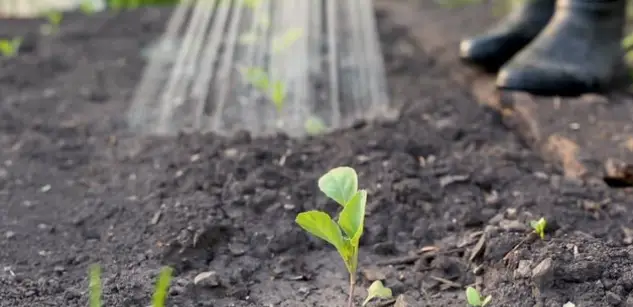
Step-by-Step Cabbage Growing
Caring for cabbage is crucial to ensure a successful harvest. Here are the key steps in nurturing your cabbage plants:
- Watering: Cabbage needs consistent moisture, so keep the soil evenly moist throughout the growing season. Avoid overhead watering to reduce the risk of fungal diseases. Drip irrigation or soaker hoses are ideal.
- Mulching: Apply a layer of mulch around your cabbage plants to help retain soil moisture, suppress weeds, and regulate soil temperature. Straw or shredded leaves work well as mulch.
- Fertilizing: Cabbage is a heavy feeder. Start with a balanced fertilizer, and then side-dress with a high-nitrogen fertilizer when the heads start forming. Follow the recommended rates on the fertilizer packaging.
- Thinning: If you’ve sown your cabbage seeds directly in the garden, thin the seedlings to the recommended spacing when they reach a few inches in height. This ensures proper air circulation and reduces the risk of disease.
- Pest and Disease Management: Keep an eye out for common cabbage pests like cabbage worms, aphids, and slugs. You can use physical barriers like row covers or organic solutions like neem oil to deter pests. Also, watch for signs of diseases like clubroot or blackleg, and remove infected plants to prevent further spread.
- Support: Cabbage heads can become heavy, and strong winds or heavy rain can cause them to topple. Consider providing support for your cabbage plants by staking or using a frame to keep them upright.
- Crop Rotation: Avoid planting cabbage in the same spot in consecutive years to prevent soil-borne diseases from building up in the garden.
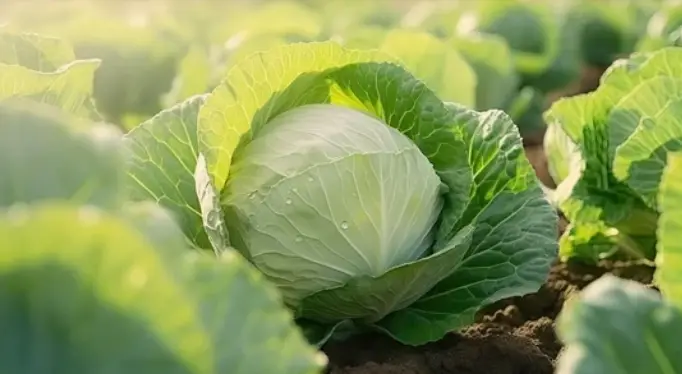
Step 5: Cabbage Head Formation
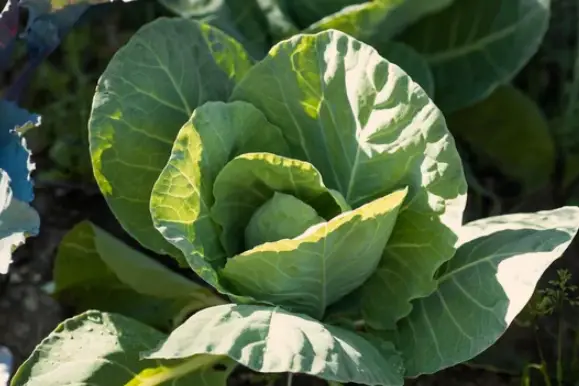
Step-by-Step Cabbage Growing
0As your cabbage plants grow, they will begin to form heads.
This is the stage where your patience is rewarded.
Here’s what to expect:
- Formation: Cabbage heads will start to form as the outer leaves tightly encase the inner head. Depending on the variety, heads can range from compact to loose.
- Check for Readiness: When the heads feel firm and dense to the touch, they are ready for harvest. You can also visually inspect the heads; they should be compact and fully developed.
- Harvest Time: Cabbage can be harvested at any stage, depending on your preference. Younger cabbage is milder in flavor and more tender, while fully mature cabbage has a stronger flavor and is great for cooking. To harvest, use a sharp knife to cut the head from the base, leaving a small stem attached.
Step 6: Post-Harvest Care
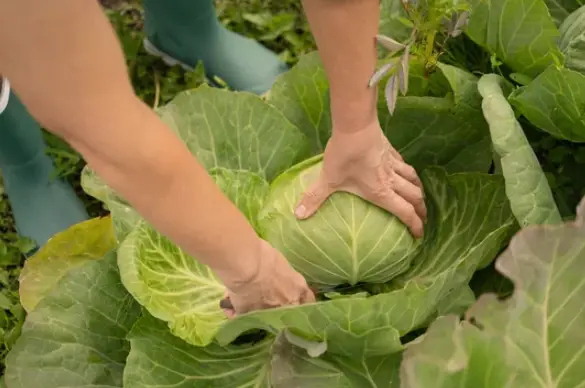
Cabbage Harvest
After harvesting your cabbage, there are a few things you can do to maximize its shelf life and taste:
- Storage: Store cabbage in the refrigerator. Wrap it in plastic wrap or put it in a plastic bag to keep it from drying out. Cabbage can last for several weeks when stored properly.
- Cooking and Preservation: Fresh cabbage can be used in various dishes, from salads and slaws to soups and stir-fries. If you have an abundance of cabbage, consider pickling or fermenting it for longer-term storage.
- Saving Seeds: If you’re planning to save seeds for future planting, select one or two of your best cabbage plants and allow them to bolt and produce flowers. Once the flowers have dried, collect the seeds for future use.
Step 7: Crop Rotation and Soil Care
After harvesting your cabbage, it’s essential to practice crop rotation to maintain soil health and reduce the risk of pests and diseases.
Avoid planting cabbage or other brassica crops in the same spot for at least two years. Instead, follow with crops from different plant families.
Before planting another crop in the same area, take the opportunity to improve your soil.
Add more organic matter, perform another soil test, and adjust the pH if necessary.
This ensures that your soil remains fertile and suitable for your future cabbage and vegetable crops.
Wrapping Up
The process of growing cabbage can be very rewarding, especially if you follow these detailed steps.
Every step of the procedure, from picking the best variety to harvesting your own cabbage, presents an opportunity to learn and take pleasure in the activity.
There is nothing quite like the delight of enjoying a dinner produced from your very own cabbage harvest, whether you are an experienced gardener or a newbie.
Get your hands filthy, follow these instructions, and then savor the abundance of delicious, fresh cabbage that comes from your own yard.