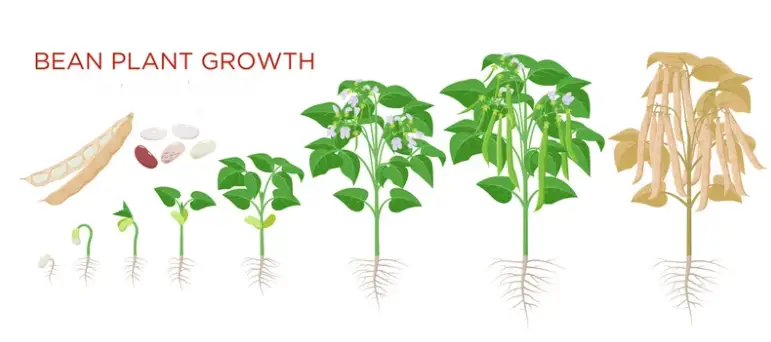
Growing beans from seed is a fun and rewarding experience for both new and experienced gardeners.
With a little care and attention, you can grow a bountiful harvest of fresh, delicious beans in your own backyard.
Whether you are looking for a tasty flavor to your meals or a new hobby, planting beans from seed is a great way to get started.
In this post, we will cover everything you need to know about planting beans from seed, including the best types of beans to grow, how to prepare your soil, how to plant and care for your seeds, and much more.
How to Plant beans from seed?
Planting beans from seed is a simple and rewarding process that can provide you with a fresh and tasty harvest in just a few months. Here is a step-by-step guide on how to plant beans from seed:
- Choose the right location: Beans thrive in full sun and well-drained soil, so choose a sunny spot in your garden with rich, fertile soil.
- Prepare the soil: Before planting, work organic matter, such as compost or aged manure, into the soil to improve its fertility and structure. If your soil is heavy or poorly drained, consider planting your beans in raised beds or mounds to improve drainage.
- Determine the right planting time: Bean seeds can be planted in spring after the last frost date, or in late summer for a fall harvest. In most climates, spring is the best time to plant beans.
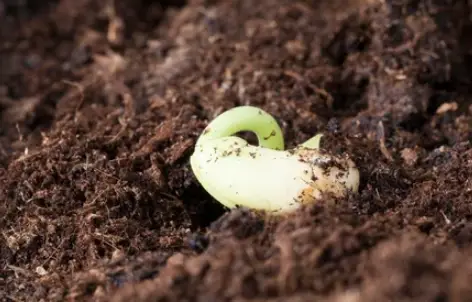
- Plant the seeds: Plant bean seeds about 1 inch deep and 3-4 inches apart, in rows about 18-24 inches apart. If planting multiple rows, space them 2-3 feet apart. Gently water the seeds after planting to settle the soil and ensure good seed-to-soil contact.
- Provide support: Most bean plants need support as they grow, so be sure to provide a trellis or stake for the plants to climb on. If planting bush beans, you can simply mound the soil up around the base of the plant to provide support.
- Water regularly: Keep the soil consistently moist but not waterlogged, and water the plants regularly, especially during dry spells.
- Fertilize: Beans are nitrogen-fixing plants, which means they add nitrogen to the soil as they grow. However, you can still fertilize your bean plants with a balanced fertilizer, such as 10-10-10, about 2-3 weeks after planting, and then again every 4-6 weeks during the growing season.
- Control pests and diseases: Regularly inspect your bean plants for signs of pests or diseases and take appropriate action if necessary. You can use natural pest controls, such as insecticidal soap or neem oil, to keep pests at bay, and remove any infected plant parts to prevent the spread of disease.
Choosing the Right Beans
One of the most important steps in growing beans from seed is choosing the right type of bean to grow. There are many different types of beans to choose from, including snap beans, shell beans, lima beans, and even dry beans.
Snap beans are the most popular type of bean and are best eaten fresh or cooked when they are young and tender. Shell beans are also best eaten when they are young and tender and are used in a variety of dishes, including soups and stews.
Lima beans are a great choice for home gardens because they are easy to grow and produce a large harvest. Dry beans are a good option if you want to store your beans for later use, as they can be dried and stored for several months.
Preparing Your Soil
Before planting your beans, it’s important to prepare your soil. Beans need well-drained soil that is rich in nutrients and free from weed seeds. To prepare your soil, you should first remove any weeds, rocks, or debris. Then, add compost or other organic matter to the soil to improve its fertility. Finally, mix the soil thoroughly and rake it smooth to create a level planting area.
Planting Your Beans
Once your soil is prepared, it’s time to plant your beans. The best time to plant beans is in the spring after the last frost date in your area. Beans can be planted directly into the ground or in pots, depending on your preference. When planting in the ground, plant each seed about 2-3 inches deep and 4-6 inches apart. When planting in pots, plant 2-3 seeds in each pot and place the pots in a sunny location.
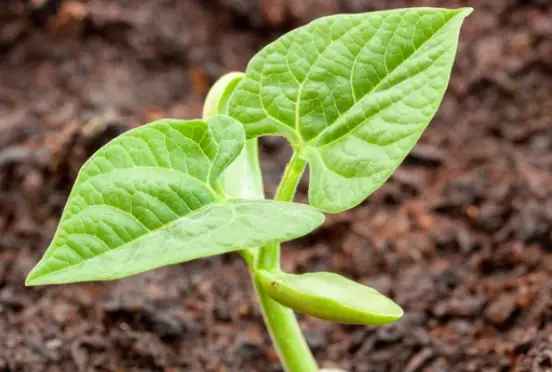
Caring for Your Seeds
After planting your seeds, it’s important to give them the care and attention they need to grow into healthy plants. Beans need plenty of sunlight, water, and nutrients to grow strong and produce a good harvest. Here are some tips for caring for your seeds:

- Water regularly: Beans need consistent moisture to grow and produce a good harvest. Water your beans regularly, making sure to keep the soil moist but not soaking wet.
- Fertilize: Beans need a steady supply of nutrients to grow and produce a good harvest. Fertilize your beans every 2-3 weeks with a balanced, water-soluble fertilizer.
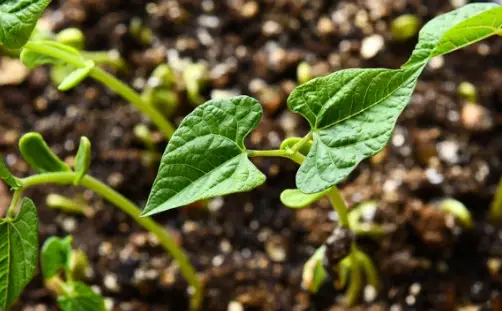
- Thin seedlings: If you planted more than one seed per pot or area, you will need to thin your seedlings once they have grown a few leaves. Thin your seedlings to one per pot or area, leaving the strongest and healthiest plant.
- Support your plants: Beans need support as they grow, especially if they are tall or heavy-bearing. Use stakes, trellises, or cages to support your plants and keep them upright.
Harvesting Your Beans
After a few months of care and attention, it’s time to harvest your beans! The best time to harvest beans is when they are young, tender, and full of flavor. To harvest your beans, simply pick the pods when they are plump and bright green.
Snap beans are typically ready to harvest about (60-70 days) after planting, while lima beans and shell beans may take a bit longer, up to (80-90 days). If you’re growing dry beans, wait until the pods have turned yellow and the beans inside have started to rattle. Then, pick the pods, let them dry in the sun for a few days, and store the dried beans in an airtight container for later use.
Companion Planting
One way to improve the health and productivity of your bean plants is to practice companion planting. Companion planting is the practice of planting certain crops together to benefit each other.
For example, beans and corn make great companion plants because they provide each other with support and improve the overall health of the garden. Additionally, beans add nitrogen to the soil, which helps to improve the growth of other crops, such as corn, tomatoes, and lettuce.
Pests and Diseases
Unfortunately, bean plants can be susceptible to a variety of pests and diseases. Some of the most common problems include aphids, bean beetles, and fungal diseases like powdery mildew. To prevent and control these problems, it’s important to practice good garden hygiene, such as removing dead plant material and rotating crops every year. Additionally, you can use natural pest controls, such as insecticidal soap or neem oil, to keep pests at bay.
Related Post: High quality bean bags
Conclusion
Planting beans from seed is a great way to add fresh, delicious beans to your meals and enjoy a new hobby at the same time. With a little care and attention, you can grow a bountiful harvest of healthy and productive bean plants.
Whether you’re new to gardening or an experienced grower, this guide has everything you need to know about planting beans from seed, including the best types of beans to grow, how to prepare your soil, how to plant and care for your bean seeds, and much more. So why wait? Get started today and enjoy the taste and satisfaction of growing your own beans!