

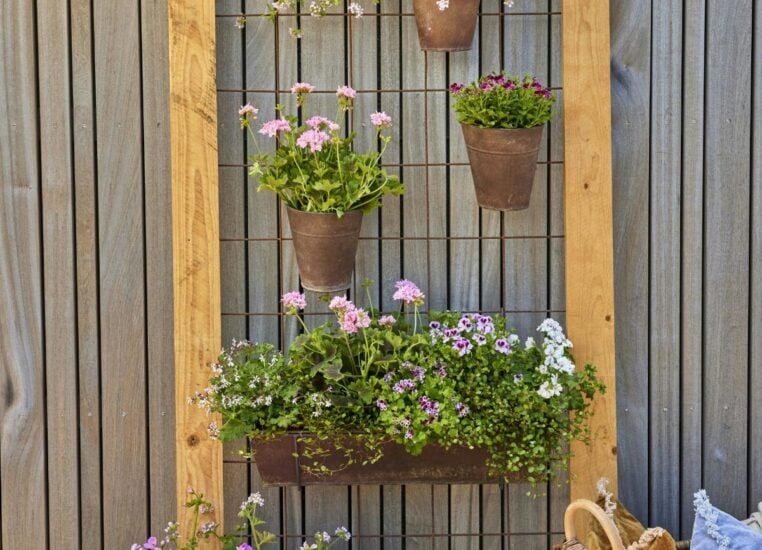
Small yards and tight patios can feel flat, crowded, and hard to use. A vertical garden fixes that fast because it pulls your plants up the wall, fence, or railing and gives you more green without taking over your floor space.
You can grow fresh basil near the kitchen door, trailing ivy on a warm wood pallet, and bright flowers climbing a plain fence. The mix of leaf shapes, rough timber, soft moss, and sunlit pots can turn a bare corner into the prettiest part of your home.
In this post, I share 7 DIY vertical garden ideas that save space, cut clutter, and make small outdoor areas feel fuller and calmer. You will also get planning tips, a tool list, and two simple projects you can build with basic supplies.
Why Vertical Gardens Work
Vertical gardening uses walls, fences, rails, and frames to grow more plants in less ground space.
I like this method because it solves two problems at once. It gives us room to grow herbs, flowers, or greens, and it also makes a small yard look styled instead of squeezed. Plants sit higher, so air can move around them better, and that helps leaves dry faster after rain.
A blank fence can feel harsh. Add layers of pots, pocket planters, or climbing vines, and the whole area feels softer and more alive. Our eye moves up, therefore the yard often feels taller and larger than it really is.
Why people love it
- Saves floor space
Containers go up instead of out, so you still have room for chairs, bikes, or a grill. This matters a lot on a balcony or in a narrow side yard. - Keeps plants within reach
Raised planters are easier to water, trim, and harvest. I also find it easier to spot dry soil or pests when plants are at eye level. - Makes small areas look finished
A vertical setup adds texture, color, and shape to plain surfaces. Even a simple frame with three pots can make our yard feel more pulled together.
When it’s a good idea
- ✓ Tight patios and balconies
You need greenery, however you cannot spare much walking space. - ✓ Empty fences or walls
A bare vertical surface is the easiest place to add impact fast. - ✓ Kitchen-adjacent outdoor spots
Herbs and salad greens stay close to the door, so picking them feels easy whenever you cook.
Match the structure to the plant weight.
Light herbs can live in fabric pockets or small plastic pots. Heavier plants, wet soil, and wood boxes need anchors screwed into solid studs or posts because water adds more weight than many people expect.
7 DIY vertical garden ideas at a glance
| Idea | Best For | Main Material | Example Plants |
|---|---|---|---|
| Pallet herb wall | Sunny fence or patio | Wood pallet | Basil, thyme, parsley |
| Hanging bottle garden | Low-budget setup | Plastic bottles | Lettuce, mint, strawberries |
| Ladder planter stand | Rental-friendly spaces | Old ladder | Pothos, petunias, small herbs |
| Gutter wall planter | Long narrow walls | Rain gutters | Leaf lettuce, chives, pansies |
| Wire grid pot wall | Flexible layouts | Metal grid panel | Ferns, ivy, oregano |
| Shoe organizer grow wall | Lightweight greens | Fabric shoe organizer | Spinach, cilantro, marigolds |
| Trellis vine screen | Privacy and shade | Wood or metal trellis | Jasmine, peas, beans |
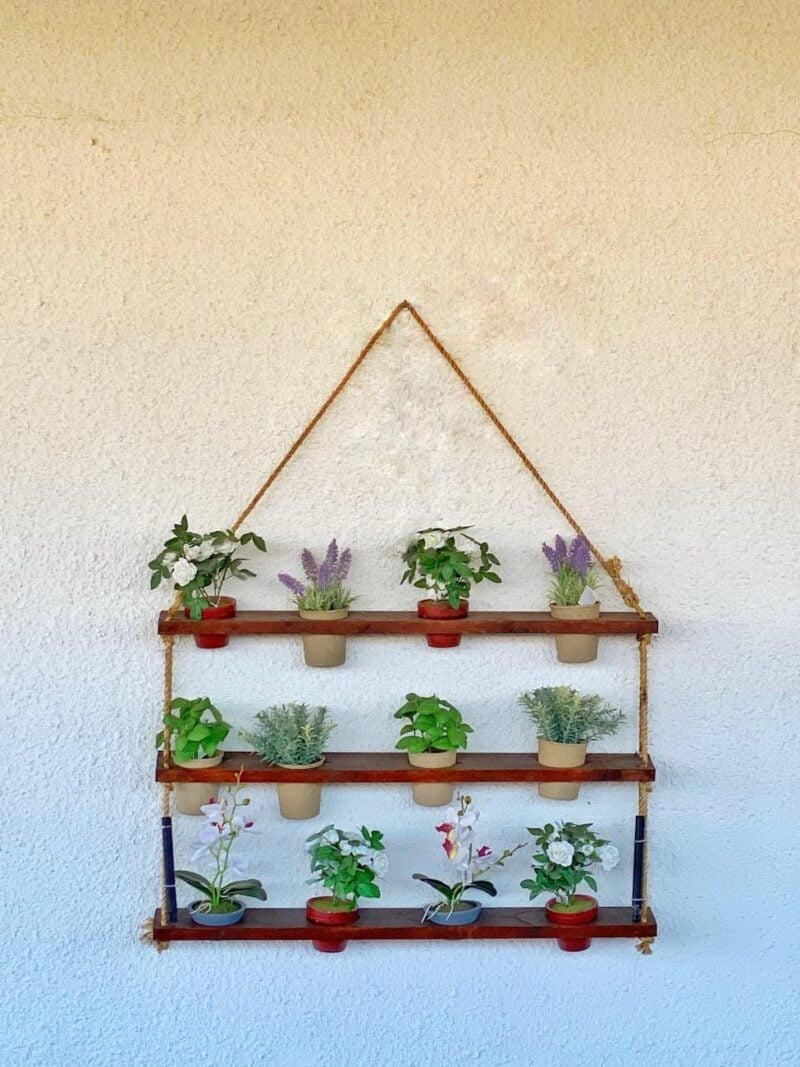
Plan Your Small-Space Layout
A good layout starts with measuring the space, checking sunlight, and planning easy access for care.
I always start with a tape measure and a notebook because guessing causes trouble later. If the planters stick out too far, they block doors, chairs, or paths. A vertical garden should help our space feel better, not tighter.
Sun matters just as much as size. Some walls get bright morning light, others stay shaded most of the day, and a few spots bake in hot afternoon sun. I watch the area for a full day whenever possible, then I write down how many hours of direct light each wall gets.
Water access is another part people skip. A pretty garden is harder to enjoy if you have to drag a hose across the whole yard every evening. I also leave enough room to prune, harvest, and replace pots without taking apart the whole display.
Test the layout with paper first.
Cut paper shapes to match your pots or planter boxes, then tape them to the wall. This shows the final size fast, and it helps you catch crowded spots before you drill holes or buy extra containers.
My simple planning routine
- Measure wall height and width.
- Mark door swings, windows, and walking paths.
- Track sunlight for one full day.
- Choose plants that fit that light level.
- Keep the top row easy to water.
Tools and Materials Checklist
The right supplies make the build safer, faster, and easier to maintain.
I keep my setup simple because most DIY vertical garden ideas do not need fancy gear. Basic tools, solid fasteners, lightweight containers, and the right soil do most of the work. Good prep also saves money because we buy once instead of making repeat trips to the store.
Containers should suit the plants. Shallow roots, like lettuce and thyme, can live in smaller planters. Bigger roots or thirstier plants need more soil, and therefore they need stronger support too.
Soil matters more than people think. Garden dirt from the yard gets heavy in wall planters and may not drain well. I use a potting mix with compost and perlite because it stays lighter and helps roots breathe.
Sort supplies by step.
I place tools in one tray, fasteners in labeled cups, and planting items in a second area. That small habit cuts confusion, especially if our project has several repeated steps like drilling, lining, filling, and hanging.
Basic checklist
- Tools
Drill, screwdriver, measuring tape, pencil, level, scissors, utility knife, gloves. - Fasteners
Exterior screws, wall anchors, hooks, zip ties, brackets, strong rope or chain. - Containers
Small pots, window boxes, bottles, fabric pockets, gutters, wooden boxes. - Planting items
Potting mix, compost, perlite, mulch, watering can, saucers if needed.
1. Pallet Herb Wall Project
A pallet herb wall turns an old wooden pallet into a compact garden for cooking herbs and small flowers.
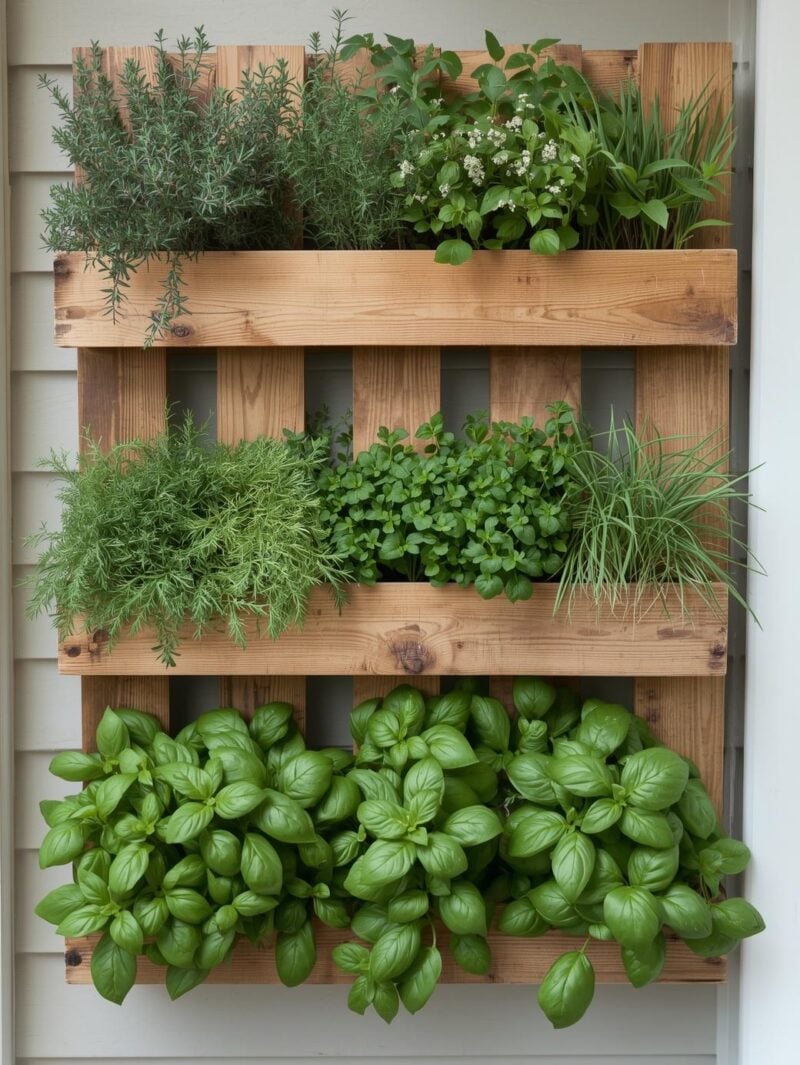
This is one of my favorite DIY vertical garden ideas because it looks warm and rustic, and it fits many small spaces. A pallet gives you ready-made rows, which makes the structure simple to understand. It also works well near a back door, where fresh herbs are easy to grab.
Start with a clean heat-treated pallet, not one marked for chemical treatment. Sand rough edges, then stand it upright and check that it feels solid. I like to add landscape fabric behind planting gaps to hold soil in place, and I staple it tightly so the pockets stay neat.
Once the pallet is ready, attach it to a wall or fence with heavy-duty screws. Fill each planting row with potting mix, then add herbs that stay fairly compact. Basil, thyme, parsley, oregano, and chives are great choices because they grow well in small sections and are useful in the kitchen.
Why people love it
- Low-cost build
Old pallets are often cheap or free. With a few supplies, we can turn scrap wood into something useful and attractive. - Easy herb access
Cooking feels better when fresh leaves are a few steps away. I cut what I need, and the garden still looks full. - Rustic style
The wood adds texture to plain fences and walls. It works with modern patios, cottage gardens, and simple backyard setups.
When it’s a good idea
- ✓ You cook often
Kitchen herbs are the most practical crop for this design. - ✓ You have a sunny wall
Most herbs need several hours of sun to stay full and flavorful. - ✓ You want one strong feature
A pallet wall can act as a focal point in a plain yard.
Keep thirsty herbs together.
Plant basil and parsley in one row, and place drier herbs like thyme and oregano in another. This makes watering easier because each row has plants with similar needs.
Step-by-step instructions
- Find a heat-treated pallet in good shape.
- Sand rough spots and clean the wood.
- Staple landscape fabric to create planting pockets.
- Mount the pallet securely to a wall or fence.
- Fill pockets with light potting mix.
- Plant compact herbs and water slowly.
Example planting plan
Top row: thyme and oregano. Middle row: parsley and chives. Bottom row: basil, because it is easy to harvest often and benefits from quick access near the kitchen.
Recommendation: I recommend sealing the outside wood with a plant-safe exterior finish. It helps the pallet last longer, especially in wet weather.
2. Hanging Bottle Garden Setup
A hanging bottle garden reuses plastic bottles as planters that hang in rows from rope, wire, or a frame.
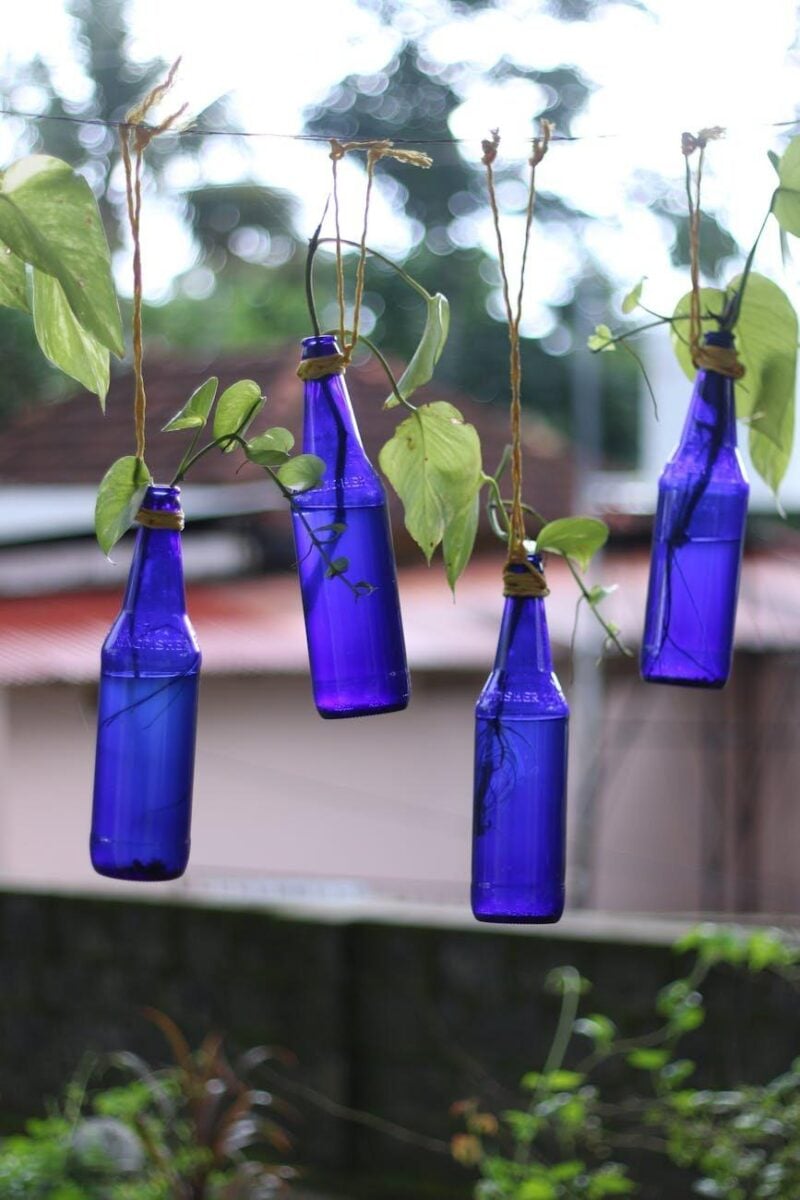
This project is affordable, light, and easy to adjust. I use it whenever I want a quick build with recycled materials. It suits renters too, because a freestanding frame or simple hook system can hold the bottles without major construction.
Start by washing the bottles well and removing labels. Cut a side opening large enough for planting, then make a few drainage holes in the bottom. Add two hanging holes near each end, thread strong rope or wire through them, and tie secure knots so the bottle sits level.
Fill each bottle with a light potting mix. Small herbs, lettuce, strawberries, and trailing flowers do well here because the root space is limited. Keep the rows far enough apart so upper bottles do not drip too heavily onto lower plants. A little overlap is fine, however constant soaking can lead to rot.
Why people love it
- Very budget-friendly
Most of the main material is already in the recycling bin. That makes this a smart first project for our yard. - Lightweight design
Bottles weigh less than wood boxes or clay pots. They are easier to hang on small frames and narrow fences. - Easy to customize
You can hang one row, three rows, or a whole curtain of planters. I also like painting the outside for a cleaner look.
When it’s a good idea
- ✓ You want a recycled project
This setup gives plastic bottles a second use instead of throwing them away. - ✓ You have a very small budget
The cost stays low because the containers are free or nearly free. - ✓ You need a lightweight planter wall
Bottles are easier to support on simple hooks or rope systems.
Add side drainage, not just bottom holes.
Excellent image match · 9/10 Image shows multiple blue bottles hanging with plants inside, clearly depicting a DIY hanging bottle garden.
3. Tiered Ladder Planter Display
An old ladder becomes a vertical stand that holds pots on several levels.
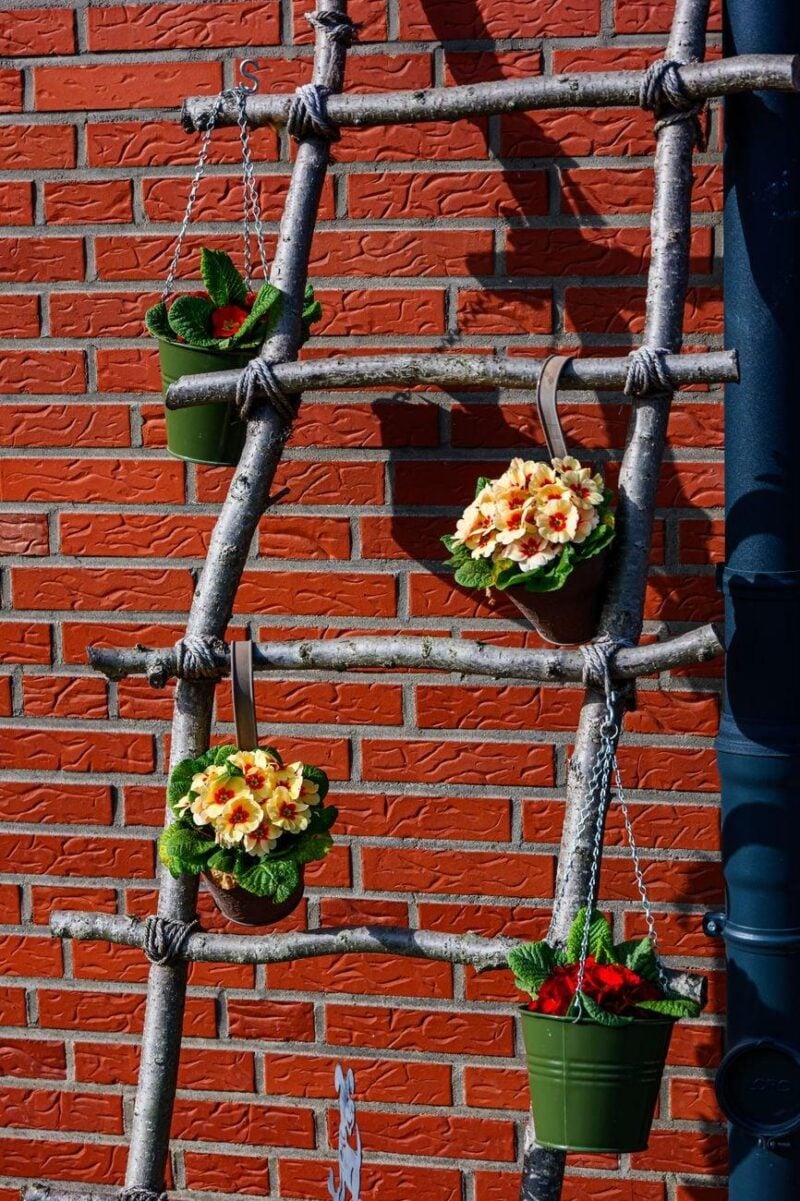
I love this idea because it turns one narrow spot into a full planting display. A wooden step ladder or straight ladder can hold herbs, flowers, and even compact vegetables. It also lets each plant get more light, because the pots sit at different heights instead of crowding one another on the ground.
To build it, I check that the ladder feels solid first. Then I sand rough edges, add outdoor paint or sealer, and place wood boards across the rungs if I need wider shelves. Shelf spacing matters a lot here. I leave more room on lower levels whenever I want trailing plants like ivy, sweet potato vine, or strawberries to hang down without getting crushed.
My basic setup is simple. I place the largest pots on the bottom step, medium pots in the middle, and small pots near the top. That keeps the ladder steady and also makes watering easier because the heavy containers stay low.
Why people love it
- Fits awkward corners
A ladder planter uses height instead of width. It works well beside a shed, near a back door, or on a slim patio edge. - Easy to change by season
I can swap pots whenever I want. Herbs in spring, flowers in summer, and cool-season greens in fall all work well. - Looks styled with little effort
The tiered shape creates a full layered look. Even a few simple pots can make a small yard feel more designed.
When it’s a good idea
- ✓ You rent your home
This setup does not need wall anchors if the ladder stands on its own. - ✓ You want trailing plants
Open shelf gaps give vines room to spill down in a soft, pretty way. - ✓ You need a movable garden
You can shift the whole display or move individual pots with ease.
Match pot weight to shelf height.
Put the heaviest containers on the bottom shelf and the lightest ones near the top. I also recommend using saucers or lined shelves, because water drips can stain wood and make the steps slippery over time.
4. Pocket Fabric Wall Planter
A fabric pocket planter hangs flat on a wall and holds small plants in stitched sections.
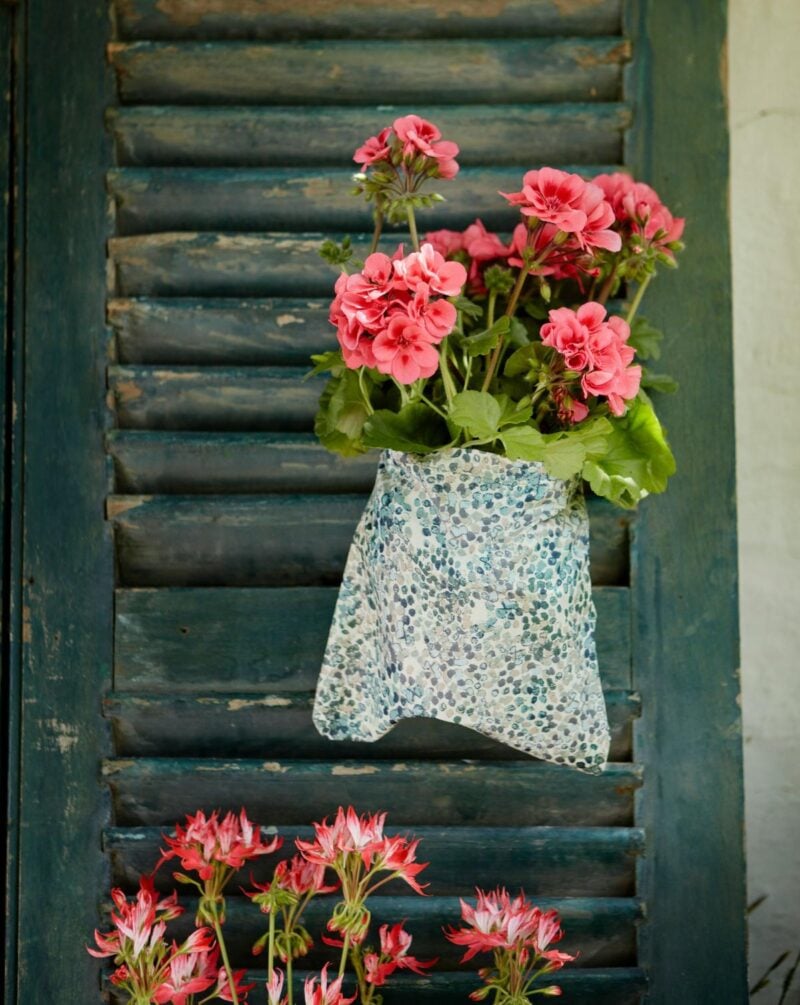
This is one of my favorite DIY vertical garden ideas for tight spaces because it turns a plain wall into a soft, green panel. A pocket planter works best for lightweight crops, not heavy root vegetables. Think lettuce, spinach, herbs, baby kale, and even strawberries if the pockets are deep enough.
I use thick landscape fabric, felt grow pockets, or a ready-made shoe organizer made from strong cloth. Then I mount it to a wood frame or directly onto a fence with screws and washers. The washers matter because they spread the pressure and help stop the fabric from tearing. I always leave a small gap between the planter and the wall, because airflow helps the fabric dry faster after watering.
Soil choice also makes a big difference. Regular garden soil is too heavy and can stay wet for too long. I fill each pocket with a light potting mix, then add a little compost and perlite. My example planting mix is simple: basil in the top row, leaf lettuce in the middle, and trailing strawberries near the bottom where fruit can hang freely.
Why people love it
- Uses almost no floor space
The planter sits against the wall, so your patio or balcony still feels open. - Great for fresh kitchen crops
Small herbs and salad greens grow close at hand. I can step outside and snip what I need. - Softens hard surfaces
Brick, wood, and concrete look warmer with living plants on them.
When it’s a good idea
- ✓ You have a bare fence
A fabric planter covers empty vertical space in a neat, useful way. - ✓ You grow shallow-rooted plants
These pockets suit herbs and greens much better than tomatoes or peppers. - ✓ You want a low-cost wall garden
Fabric and a few fasteners cost less than many rigid planter systems.
Water top pockets slowly.
Water runs downward, so the top row can dry out first and the bottom row can stay wetter. I water in two light passes, wait a minute, and then check each pocket by touch. That keeps roots moist without turning the lower pockets soggy.
5. Mounted Gutter Garden Rows
Rain gutters mounted in horizontal rows create slim planting channels for shallow-rooted crops.
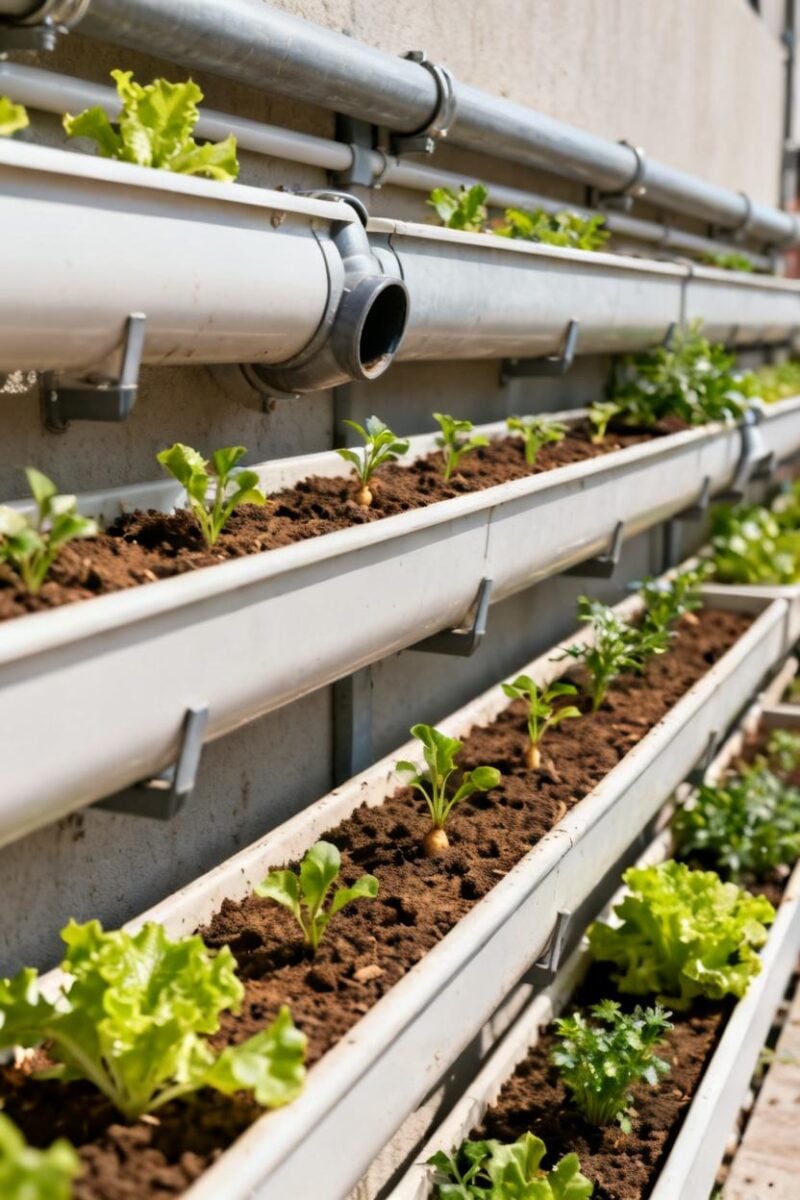
This system looks clean and organized, and I like that it makes a fence work harder. Mounted gutters are perfect for lettuce, radishes, green onions, spinach, and small herbs because the root space is limited. They also keep crops off the ground, which helps reduce dirt splash on leaves after rain or watering.
I start with vinyl rain gutters, end caps, screws, brackets, and a drill. Then I attach the gutters in rows to a sturdy fence, wall, or wooden frame. I keep a little space between each row so plants can get light and my hands can fit in for planting and harvest. Drainage holes are a must. I drill several small holes along the bottom of each gutter, then add potting mix that drains well.
Row spacing can change based on what I grow. For cut-and-come-again lettuce, I keep the rows closer. For herbs that need more airflow, I give them more room. If the wall gets strong afternoon sun, I also watch the gutters closely because shallow soil dries out faster than a deep pot.
Why people love it
- Neat, productive layout
Rows make the garden easy to read and easy to manage. You can group crops by type or watering needs. - Fast to harvest
Greens sit at eye and hand level. That saves bending and makes picking quicker. - Budget-friendly build
Gutters are widely available and often cost less than stacked planter boxes.
When it’s a good idea
- ✓ You have a long fence line
This design fills horizontal wall space in a tidy way. - ✓ You grow salad crops often
Frequent harvest plants do very well in easy-to-reach rows. - ✓ You want a simple watering routine
All the planters sit in one zone, so care feels more organized.
Give each gutter a slight tilt.
I install each row with a gentle slope so extra water can move toward one end and drain out well. Too much tilt washes soil away, so keep it subtle. A small angle is enough to help roots stay healthy.
6. Crate Stack Garden Tower
Wooden crates stacked into a tower create planting pockets and shelves in a compact footprint.
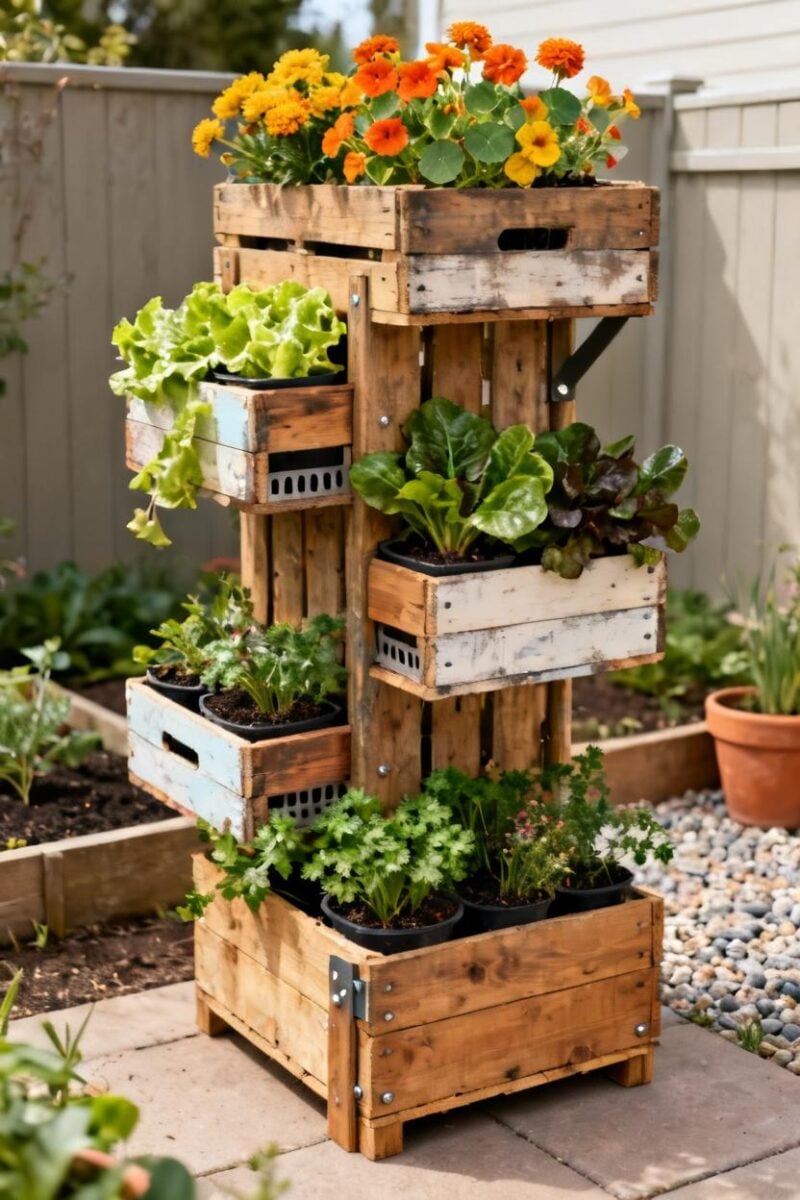
This idea has a more rustic look, and it works well in a yard or on a patio where you want height without attaching anything to a wall. I use wooden crates because they are easy to paint, line, and rearrange. The open sides also let me tuck plants into different levels, which gives the whole tower a fuller look.
Safety comes first here. I place the bottom crate on flat ground, then stack each crate with the openings facing outward or slightly angled. I screw the crates together and add corner braces if the tower is tall. For extra support, I anchor the back of the stack to a fence post or a heavy base whenever wind is a concern. That small step matters, because a top-heavy tower can tip after watering.
My favorite example arrangement mixes flowers and greens. I plant marigolds or nasturtiums in the top crate for color, leaf lettuce and spinach in the middle levels, and fuller herbs like parsley near the bottom. The different textures make the tower look lush, and the edible crops stay close together.
Why people love it
- Strong visual impact
A crate tower adds height fast. It feels more like a garden feature than a row of plain pots. - Flexible planting spots
Each crate can hold a liner, a pot, or a small box of soil. That gives you many ways to plant. - Easy to expand
You can start with three crates and add more later if the base is stable enough.
When it’s a good idea
- ✓ You want a freestanding garden
This build does not need wall space, so it suits open patios and small yards. - ✓ You like a rustic style
Wood crates bring warmth and character to plain outdoor areas. - ✓ You need separate planting zones
Different levels make it easier to group flowers, herbs, and greens.
Line crates, then leave drain gaps.
I line the inside with landscape fabric to hold soil in place, but I do not seal the bottom fully. Small drain gaps help stop root rot. I also recommend checking screws once a season, because wood swells and shrinks outdoors.
7. Trellis With Climbing Vegetables
A simple trellis gives beans, peas, and cucumbers a vertical path so they can grow up instead of out.
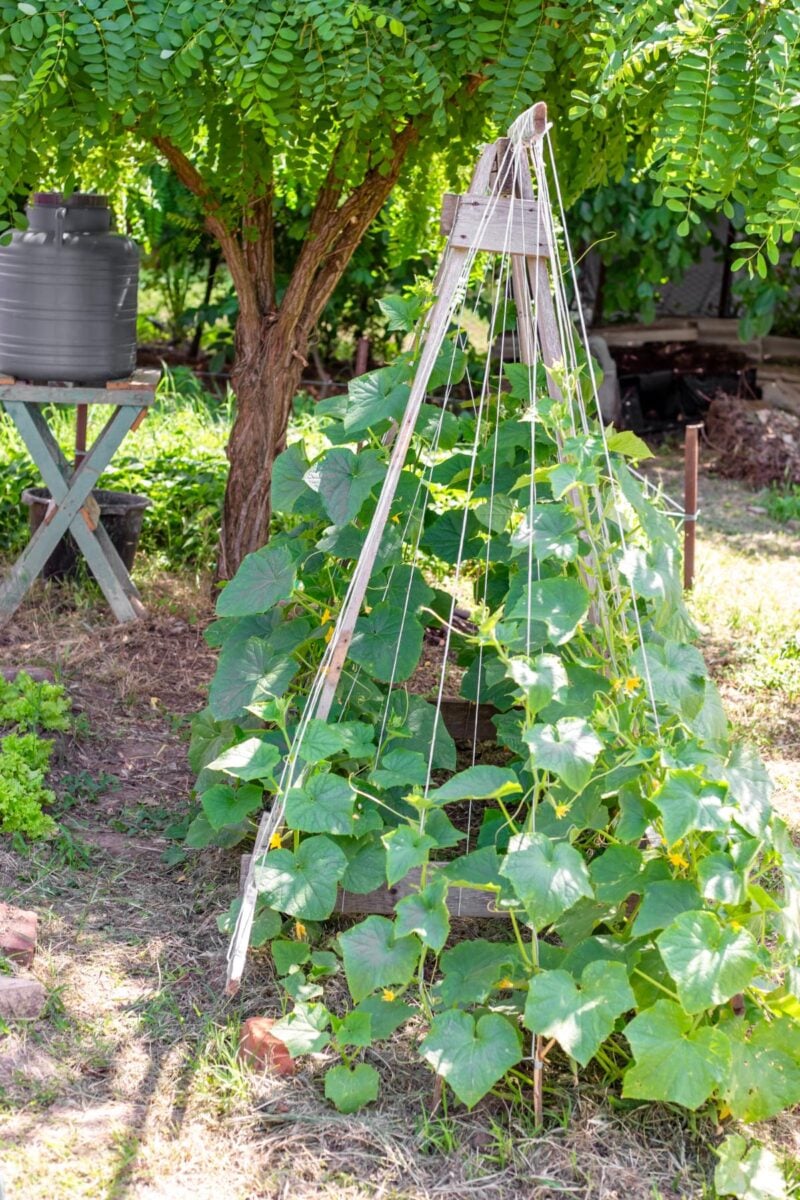
If I want more harvest from a small bed, this is often the first idea I choose. Climbing vegetables use very little ground space, yet they produce well when they can reach sunlight and airflow. A basic trellis can be made from bamboo poles, wood strips, metal mesh, or strong garden netting tied to a frame.
I place the trellis at the back of a raised bed, along a fence, or inside a large container. Then I sow seeds or plant starts a few inches from the base. As the vines grow, I guide them toward the support. Peas usually grab on by themselves. Cucumbers and some beans need a little help at first, and that is where gentle tying matters. Soft plant ties or cloth strips support stems without cutting into them.
This setup also helps keep fruit cleaner. Cucumbers hanging on a trellis stay straighter and are easier to spot at harvest time. Beans show up better too, which means fewer missed pods hiding under leaves. I think that makes this one of the most productive DIY vertical garden ideas for a small yard.
Why people love it
- Bigger harvest in less space
Vines grow upward, so the soil below can still hold other crops or mulch. - Better air movement
Leaves dry faster after rain or watering, which can help reduce common plant problems. - Easier picking
Fruit and pods hang where you can see them. That saves time and reduces damage during harvest.
When it’s a good idea
- ✓ You grow beans, peas, or cucumbers
These crops respond very well to vertical support. - ✓ You garden in raised beds
A trellis keeps the bed neat and leaves room for companion plants below. - ✓ You need more yield from a small area
Vertical vines make smart use of limited square footage.
Best Plants for Each Idea
This section matches the right plants to each DIY vertical garden idea, because plant size, roots, and sun needs decide your results.
A vertical garden looks good fast, but the real win comes from smart plant choices. I always match the plant to the container first, because shallow planters dry out faster and hold less soil. That simple step helps our herbs stay fresh, our greens stay tender, and our flowers keep blooming longer.
Each of the seven projects works best with a different group of plants. The pallet herb wall is great for basil, thyme, parsley, and chives. The hanging bottle garden suits mint, leaf lettuce, and baby spinach. The tiered ladder planter gives more room, so I like strawberries, marigolds, and compact peppers there.
Pocket fabric planters do well with shallow-rooted herbs and trailing flowers. Mounted gutter rows are ideal for lettuce, arugula, radishes, and small herbs. Crate towers can hold larger roots, so I use kale, bush beans, and even dwarf tomatoes in the deeper levels. A trellis works best for climbers such as peas, cucumbers, and pole beans.
Sun matters too. Herbs and strawberries love strong light. Lettuce and spinach prefer cooler spots with morning sun. Whenever I place a thirsty plant in full afternoon sun, I expect more watering and faster growth.
Group by thirst level.
Keep plants with similar water needs in the same project. I put mint and lettuce together, and I keep rosemary away from them, because rosemary likes drier soil. That one change makes watering much easier for our whole vertical garden.
Care Routine and Troubleshooting
This is the simple care plan that keeps a vertical garden healthy, tidy, and productive through the season.
Vertical planters dry out faster than beds on the ground. Soil sits higher, wind hits it more, and smaller containers hold less moisture. Because of that, I check mine often, especially in hot weeks.
My basic routine is simple. I water in the morning so leaves dry fast and roots drink before the heat rises. I feed every two to three weeks with a mild liquid fertilizer, because frequent watering washes nutrients out. I also pinch herbs, trim dead leaves, and harvest often. That keeps plants full instead of leggy.
Problems show up fast in a wall garden, yet early action helps. Yellow leaves can mean too much water, poor drainage, or hunger. Crispy edges usually point to dry soil or strong afternoon sun. If growth looks thin, I move that planter to a brighter spot or feed it. Whenever I see aphids, I spray with water first, then use insecticidal soap if needed. Slugs are less common on raised systems, which is one reason many gardeners love vertical setups.
Here is a real example from my own routine. My gutter garden once held lettuce and parsley in full west sun. The lettuce turned bitter within days. I moved it to a spot with morning light, watered more evenly, and the next batch stayed soft and sweet.
Use the finger test daily at first.
Press one finger into the top inch of soil. If it feels dry, water slowly until the soil is evenly moist. I do this every day for the first week after planting, because new roots need steady moisture to settle in well.
Comparison Table and Recommendations
This quick comparison helps us choose the best vertical garden idea by cost, difficulty, space use, and plant type.
Seven projects can feel like a lot. I like a clear chart because it turns ideas into a simple choice. A renter may want a light bottle garden, yet a family that cooks often may prefer a pallet herb wall or gutter rows.
| Project | Cost | Difficulty | Space Use | Best Plants |
|---|---|---|---|---|
| Pallet herb wall | Low | Medium | Wall | Basil, thyme, parsley |
| Hanging bottle garden | Very low | Easy | Narrow vertical strip | Mint, lettuce, spinach |
| Tiered ladder planter | Medium | Easy | Floor corner | Strawberries, flowers, peppers |
| Pocket fabric planter | Low | Easy | Wall | Herbs, shallow greens |
| Mounted gutter rows | Low | Medium | Fence or wall | Lettuce, arugula, radishes |
| Crate stack tower | Low to medium | Easy | Small footprint | Kale, bush beans, dwarf tomato |
| Trellis with climbers | Low | Medium | Vertical fence line | Peas, cucumbers, pole beans |
My recommendation is the pallet herb wall for cooks, the gutter rows for salad lovers, and the ladder planter for patios because each one gives quick results without much waste. If I had to pick one for most small spaces, I would choose gutter rows. They are affordable, tidy, and very productive.
Conclusion
A good vertical garden does more than save space. It makes empty walls, fences, and corners useful every day. Start with the project that fits your light, budget, and watering habits, then build from there.
I suggest beginning small, because early wins build confidence. One row of lettuce, a few herbs, or a simple strawberry shelf can change how our yard feels. Save these ideas, pick your favorite, and try one this weekend. You may end up growing much more than you expected.
Last modified: May 25, 2026
