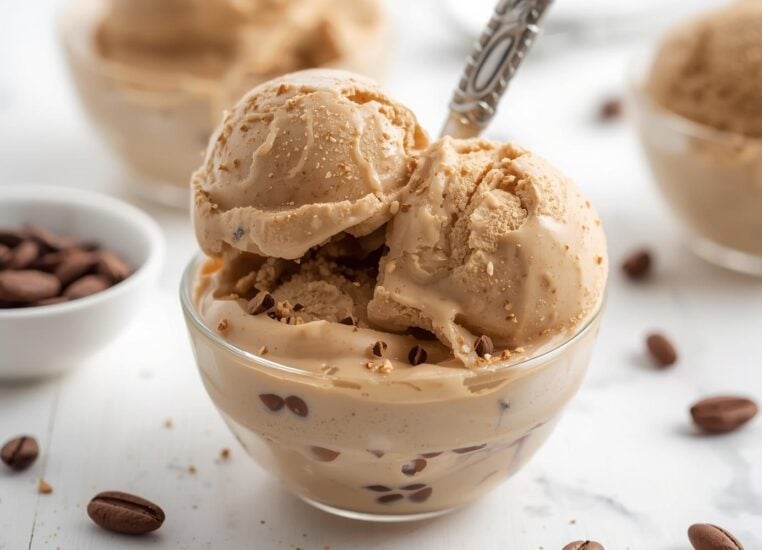
Rich, ultra-creamy, and bursting with bold coffee flavor this homemade coffee ice cream recipe has become my family’s absolute favorite summer treat!
I’ve spent years perfecting this recipe, and I’m thrilled to finally share it with you.
As a coffee lover, I’ve always been disappointed by store-bought versions that taste artificial or lack that true coffee punch.
This recipe, however, delivers that perfect roasty flavor that coffee enthusiasts crave.
The best part? You can make it with just 7 simple ingredients and customize the coffee intensity to your preference!
Why Make Homemade Coffee Ice Cream?
I am constantly amazed by how much better homemade ice cream tastes compared to store-bought varieties.
When it comes to coffee ice cream specifically, the difference is even more dramatic.
Here’s why I believe making your own coffee ice cream is absolutely worth it:
- Control over coffee intensity – You can make it as bold or subtle as you prefer
- No artificial flavors – Pure coffee taste from real coffee or espresso
- Customizable sweetness – Adjust sugar levels to your preference
- Creamier texture – Commercial brands often contain stabilizers and air
- Make it decaf – Use decaffeinated coffee for evening enjoyment
- Add mix-ins – Chocolate chips, cookie pieces, or caramel swirls
- Impress friends and family – Nothing beats serving homemade ice cream!
I’ve been making this recipe for years, and it never fails to impress guests.
My Mom, who initially claimed she didn’t like coffee flavor, now requests this ice cream for her birthday every year!
Therefore, I’m confident that even those who aren’t coffee enthusiasts might be converted with this recipe.

Ingredients for Coffee Ice Cream
One of the things I love most about this recipe is that it requires just a handful of simple ingredients that you likely already have in your kitchen.
I’ve tested countless variations over the years, and this combination creates the perfect balance of creaminess and coffee flavor.
| Ingredient | US Measurement | Metric | Notes |
| Heavy Cream | 2 cups | 480ml | Full-fat only for proper texture |
| Whole Milk | 1 cup | 240ml | Don’t substitute with low-fat |
| Granulated Sugar | ¾ cup | 150g | Can reduce to ⅔ cup if preferred |
| Egg Yolks | 4 large | 4 large | Room temperature works best |
| Instant Coffee/Espresso | 1½ tablespoons | 9g | Regular or decaf |
| Vanilla Extract | 1 teaspoon | 5ml | Pure, not imitation |
| Salt | ¼ teaspoon | 1.5g | Enhances coffee flavor |
Ingredient Notes and Substitutions
Dairy Components
The combination of heavy cream and whole milk creates the perfect balance of richness and scoopability.
I’ve tried making this recipe with half-and-half instead of the cream/milk combination, and while it works, the texture isn’t quite as luxurious.
If you need to substitute, you can use all heavy cream for an ultra-rich result, but I wouldn’t recommend using anything with less fat than whole milk.
Coffee Options
Instant espresso powder gives the boldest flavor, but regular instant coffee works well too.
I’ve also tested this recipe with freshly brewed espresso (3 tablespoons), but found the instant powder provides more concentrated flavor.
For those sensitive to caffeine, decaf instant coffee is perfect. You can adjust the amount based on how intense you want the coffee flavor to be.
Equipment’s To Make Ice Cream
Making homemade ice cream does require some specific equipment, but you don’t need anything fancy or expensive.
I have been using the same basic setup for years with great results.
Here’s what you’ll need:
Equipment
- Ice Cream Maker – I use a Cuisinart 2-Quart Ice Cream Maker that has served me well for years
- Medium Saucepan – For heating the custard base
- Mixing Bowls – At least 2, including one large one
- Fine Mesh Strainer – Essential for a smooth texture
- Whisk – For combining ingredients
- Rubber Spatula – For scraping down sides
- Measuring Cups and Spoons – For accurate measurements
Storage Containers
Once your ice cream is churned, you’ll need a proper container for freezing. I’ve tried many options over the years, and these work best:
- Loaf Pan – A simple metal or glass loaf pan works well
- Dedicated Ice Cream Containers – I love these reusable ice cream tubs with lids
- Ice Cream Scoop – A good quality scoop makes serving much easier
Pro Tip: Make sure your ice cream maker bowl has been frozen for at least 24 hours before churning. I keep mine in the freezer permanently so it’s always ready when the ice cream craving strikes!
Homemade Coffee Ice Cream Recipe
This recipe creates approximately 1.5 quarts of delicious coffee ice cream.
The process involves making a custard base, chilling it thoroughly, then churning and freezing.
While it does require some patience, most of the time is hands-off chilling and freezing.
Step 1: Make the Custard Base
- In a medium saucepan, combine the whole milk, half of the heavy cream (1 cup), sugar, and salt. Warm over medium heat, whisking occasionally, until the sugar dissolves completely (do not boil).
- While the milk mixture is warming, whisk the egg yolks in a separate bowl until smooth.
- Once the milk mixture is warm, slowly pour about ½ cup of it into the egg yolks while whisking constantly. This tempers the eggs and prevents them from scrambling.
- Pour the egg mixture back into the saucepan with the remaining milk mixture, whisking constantly.
- Add the instant coffee and whisk until completely dissolved.
- Cook over medium-low heat, stirring constantly with a wooden spoon or silicone spatula, until the mixture thickens enough to coat the back of the spoon (170°F on an instant-read thermometer if you have one).
- Place the remaining 1 cup of heavy cream in a large bowl and set a fine-mesh strainer over it.
- Pour the custard through the strainer into the cold cream, which stops the cooking process.
- Add the vanilla extract and stir to combine.
Step 2: Chill the Mixture
- Cover the bowl with plastic wrap, pressing it directly onto the surface of the custard to prevent a skin from forming.
- Refrigerate for at least 4 hours, but preferably overnight. The colder the mixture, the better it will churn.
Step 3: Churn the Ice Cream
- Set up your ice cream maker according to the manufacturer’s instructions.
- Remove the chilled custard from the refrigerator and give it a good whisk to make sure everything is well combined.
- Pour the mixture into your ice cream maker and churn according to the manufacturer’s instructions, usually 20-30 minutes.
- The ice cream is ready when it has the consistency of soft-serve ice cream.
Step 4: Add Mix-ins (Optional)
If you’d like to add mix-ins to your coffee ice cream, now is the time! I love adding chocolate chips, crushed chocolate-covered espresso beans, or a caramel swirl. Add them during the last 2-3 minutes of churning or fold them in by hand after churning.
Step 5: Freeze
- Transfer the churned ice cream to your storage container, smoothing the top with a spatula.
- Press a piece of plastic wrap directly onto the surface of the ice cream to prevent ice crystals from forming.
- Cover with a lid and freeze for at least 4 hours until firm.
Step 6: Serve and Enjoy!
Let the ice cream sit at room temperature for about 5 minutes before scooping for the perfect consistency. Serve in bowls, cones, or use to make delicious coffee milkshakes!
Nutritional Information
While this homemade coffee ice cream is definitely a treat, it’s helpful to know the nutritional content. One serving is approximately ½ cup.
| Nutrient | Amount Per Serving | % Daily Value* |
| Calories | 285 | – |
| Total Fat | 22g | 28% |
| Saturated Fat | 13g | 65% |
| Cholesterol | 145mg | 48% |
| Sodium | 75mg | 3% |
| Total Carbohydrates | 21g | 7% |
| Sugar | 19g | – |
| Protein | 3g | 6% |
| Caffeine | ~15mg | – |
*Percent Daily Values are based on a 2,000 calorie diet. Your daily values may be higher or lower depending on your calorie needs.
Troubleshooting Common Issues
Even with the best recipes, things can sometimes go wrong. Here are solutions to common problems you might encounter when making homemade coffee ice cream:
Why is my ice cream icy or grainy?
This usually happens when the ice cream isn’t churned long enough, or when it melts and refreezes. Make sure your ice cream maker bowl is completely frozen, your mixture is very cold before churning, and you churn until the mixture has the consistency of soft serve.
Also, store your ice cream in the back of the freezer where the temperature is most consistent.
My custard curdled. Can I save it?
If your custard curdled, it likely got too hot too quickly.
You can try to save it by immediately straining it through a fine-mesh sieve and whisking vigorously.
If it’s badly curdled, you might need to start over. Always cook custard over medium-low heat and stir constantly.
Why doesn’t my ice cream have a strong coffee flavor?
The coffee flavor can vary depending on the brand and type of instant coffee used.
For a stronger flavor, you can increase the amount of instant coffee to 2 tablespoons.
Using instant espresso powder rather than regular instant coffee will also give you a more intense flavor.
My ice cream is too hard to scoop straight from the freezer
Homemade ice cream often freezes harder than store-bought because it doesn’t contain commercial stabilizers and additives.
Let it sit at room temperature for 5-10 minutes before scooping.
You can also add 1-2 tablespoons of alcohol (like Kahlúa, which complements the coffee flavor) to the mixture before churning, as alcohol lowers the freezing point.
Delicious Variations to Try
One of the things I love most about this Homemade Coffee Ice Cream Recipe is how versatile it is. Here are some of my favorite variations that I’ve developed over the years:
Mocha Chip
Add ¼ cup cocoa powder to the milk mixture when heating, and fold in 1 cup of mini chocolate chips after churning. This creates a delicious chocolate-coffee combination that’s irresistible!
Coffee Caramel Swirl
After churning, layer the ice cream in your storage container with ribbons of caramel sauce. Use a knife to create swirls throughout. The sweet caramel perfectly balances the robust coffee flavor.
Tiramisu Ice Cream
Fold in ½ cup of crushed ladyfingers and 2 tablespoons of Kahlúa or Marsala wine after churning. Top with a dusting of cocoa powder before serving for an ice cream version of the classic Italian dessert.
Reader Favorite: The Coffee Caramel Swirl variation has been made by over 200 readers who have left comments saying it’s even better than premium store-bought brands!
Serving Suggestions & Pairings
Coffee ice cream is incredibly versatile and pairs beautifully with many desserts and toppings. Here are some of my favorite ways to serve this homemade coffee ice cream:
Perfect Pairings
- Chocolate Brownies – The rich chocolate complements the coffee flavor
- Almond Biscotti – Perfect for dipping
- Warm Apple Pie – An unexpected but delicious combination
- Pound Cake – Simple and elegant
Delicious Toppings
- Chocolate Sauce – For a mocha experience
- Crushed Chocolate-Covered Espresso Beans – For coffee lovers
- Toasted Almonds or Hazelnuts – Adds wonderful texture
- Whipped Cream – A classic topping that balances the coffee intensity
Coffee Ice Cream Affogato
My absolute favorite way to enjoy this ice cream is in an affogato – the classic Italian dessert where hot espresso is poured over ice cream.
The contrast of hot and cold, along with the intensified coffee flavor, is simply divine.
To make it, simply place a scoop of coffee ice cream in a small bowl or cup and pour a shot of hot espresso over it. Enjoy immediately!
Storage & Freezing Tips
Proper storage is crucial for maintaining the quality of your homemade coffee ice cream.
Without commercial stabilizers, homemade ice cream is more susceptible to ice crystal formation and texture changes. Here’s how I keep mine fresh:
- Use an airtight container – This prevents freezer burn and absorption of other flavors
- Press plastic wrap directly onto the surface – This creates a barrier against ice crystals
- Store in the back of the freezer – Temperature is more consistent here than in the door
- Keep at 0°F (-18°C) or below – Higher temperatures accelerate texture degradation
- Consume within 2 weeks – For best flavor and texture
“I’ve found that using a shallow, wide container rather than a deep one helps maintain better texture throughout the freezing process. The ice cream freezes more evenly this way.”
Important: Avoid repeatedly thawing and refreezing your ice cream, as this will create large ice crystals and ruin the smooth texture. Scoop what you need and immediately return the container to the freezer.
Final Thoughts
Making this Homemade Coffee Ice Cream Recipe has become a beloved tradition in my household.
There’s something truly special about creating such a delicious treat from scratch, knowing exactly what ingredients went into it.
The process might take a bit more time than simply buying a carton from the store, but the results are incomparable.
I hope you enjoy making and eating this coffee ice cream as much as my family and I do.
The rich, bold coffee flavor and ultra-creamy texture make it worth every minute spent in the kitchen.
Don’t be afraid to experiment with the variations or create your own unique twist!
If you try this recipe, I’d love to hear how it turned out for you.
Also, remember that practice makes perfect when it comes to homemade ice cream.
Each time you make it, you’ll learn something new about the process and how to adapt it to your preference.