

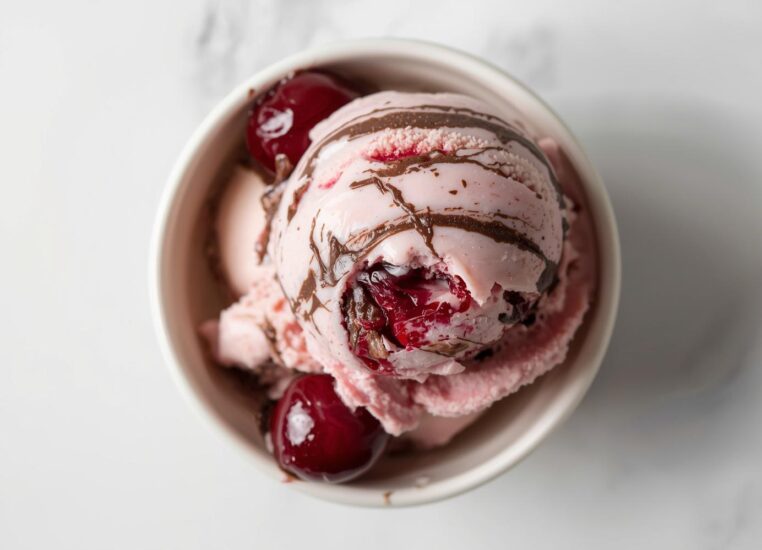
Homemade Cherry Garcia ice cream is one of those desserts that never goes out of style.
I am always amazed at how simple ingredients can come together to create something so rich, creamy, and satisfying.
This recipe is inspired by the famous flavor that combines sweet cherries, dark chocolate, and a smooth vanilla base.
Making it at home allows us to control the quality of ingredients, adjust sweetness, and enjoy a fresher, more natural version.
Therefore, if you have ever wanted to make your own Cherry Garcia ice cream, this guide will walk through every step from preparing the custard base to freezing and storing it properly.
I will also include helpful tables, ingredient breakdowns, and practical tips to ensure your ice cream turns out perfectly every time.
Why Make Cherry Garcia Ice Cream at Home
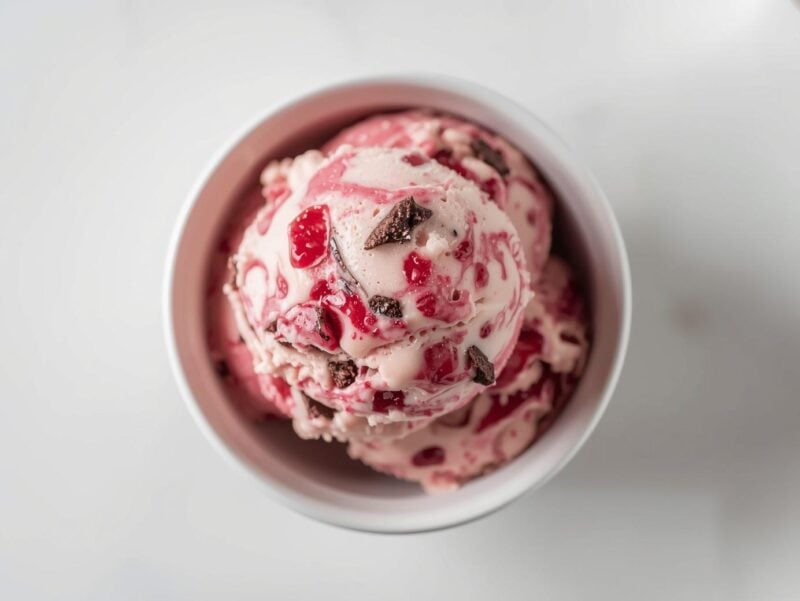
There are several reasons why making ice cream at home is worth the effort.
|
Reason |
Explanation |
|---|---|
|
Freshness |
Homemade ice cream uses fresh cream, milk, and cherries, which means better flavor. |
|
Customization |
We can adjust sweetness, chocolate amount, or even use dairy-free alternatives. |
|
No Preservatives |
Store-bought ice creams often contain stabilizers and artificial flavors. |
|
Satisfaction |
There’s something rewarding about creating a dessert from scratch. |
I prefer homemade ice cream because I know exactly what goes into it. The flavor is cleaner, and the texture feels more natural.
Ingredients Overview
The key to great Cherry Garcia ice cream lies in using high-quality ingredients.
|
Ingredient |
Amount |
Purpose |
|---|---|---|
|
Heavy Cream |
2 cups |
Provides richness and creamy texture. |
|
Whole Milk |
1 cup |
Balances the fat content for smoothness. |
|
Granulated Sugar |
¾ cup |
Adds sweetness and helps with texture. |
|
Egg Yolks |
4 large |
Thickens the custard base. |
|
Vanilla Extract |
1 teaspoon |
Enhances flavor. |
|
Fresh or Frozen Cherries |
1 cup (pitted and chopped) |
Adds fruity sweetness. |
|
Dark Chocolate |
¾ cup (chopped or chips) |
Provides texture and contrast. |
|
Lemon Juice |
1 teaspoon |
Brightens the cherry flavor. |
|
Salt |
Pinch |
Balances sweetness. |
I always recommend using fresh cherries when they are in season because they have a natural sweetness that frozen ones can’t match. However, frozen cherries work well when fresh ones aren’t available.
Equipment Checklist
Before starting, it’s important to have the right tools.
|
Tool |
Purpose |
|---|---|
|
Saucepan |
To heat the custard base. |
|
Mixing Bowls |
For whisking ingredients. |
|
Whisk |
To combine eggs and sugar. |
|
Fine Mesh Strainer |
To remove any cooked egg bits. |
|
Ice Cream Maker |
For churning the mixture. |
|
Freezer-Safe Container |
For storing the ice cream. |
If you don’t have an ice cream maker, I will explain a no-churn method later in this post.
Step-by-Step Instructions
Step 1: Prepare the Cherries
- Pit and chop the cherries into small pieces.
- Place them in a bowl with lemon juice and 1 tablespoon of sugar.
- Let them sit for 15 minutes to macerate.
Explanation:
Macerate means to soak fruit in sugar or liquid so it becomes softer and releases its juices. This step enhances the cherry flavor and prevents icy bits in the final ice cream.
Step 2: Make the Custard Base
- In a saucepan, combine the milk, half of the cream, and half of the sugar.
- Heat over medium heat until warm but not boiling.
- In a separate bowl, whisk the egg yolks with the remaining sugar until pale and thick.
- Slowly pour the warm milk mixture into the yolks while whisking constantly.
- Return the mixture to the saucepan and cook over low heat, stirring constantly, until it thickens enough to coat the back of a spoon.
Tip:
If you run your finger across the back of the spoon and the line stays clear, the custard is ready.
Step 3: Add Vanilla and Chill
- Remove from heat and stir in the vanilla extract and salt.
- Strain the mixture through a fine mesh sieve into a clean bowl.
- Add the remaining cream and stir.
- Cover and refrigerate for at least 4 hours or overnight.
Chilling the base is essential because it allows the fat to solidify slightly, which helps the ice cream churn more smoothly.
Step 4: Churn the Ice Cream
- Once the base is cold, pour it into your ice cream maker.
- Churn according to the manufacturer’s instructions (usually 20–25 minutes).
- During the last 5 minutes of churning, add the chopped cherries and chocolate pieces.
Note:
If you add the mix-ins too early, they may sink to the bottom or break apart.
Step 5: Freeze and Serve
- Transfer the ice cream to a freezer-safe container.
- Freeze for at least 2 hours before serving.
- Scoop into bowls or cones and enjoy.
Nutritional Information
|
Nutrient |
Per Serving (½ cup) |
|---|---|
|
Calories |
260 |
|
Carbohydrates |
28g |
|
Sugar |
24g |
|
Fat |
15g |
|
Protein |
4g |
|
Sodium |
45mg |
This recipe makes about 1 quart, which serves 6–8 people.
|
Component |
Function |
|---|---|
|
Fat (Cream & Milk) |
Adds richness and smoothness. |
|
Sugar |
Lowers freezing point, keeping texture soft. |
|
Egg Yolks |
Emulsify and thicken the base. |
|
Air (Churning) |
Creates light, scoopable texture. |
Therefore, each ingredient plays a specific role. If we reduce sugar too much, the ice cream becomes icy. If we skip egg yolks, it may lack creaminess.
No-Churn Method
If you don’t have an ice cream maker, you can still make this recipe.
- Prepare the custard base as usual and chill completely.
- Whip 1 cup of heavy cream to soft peaks.
- Fold the whipped cream into the chilled base.
- Add cherries and chocolate.
- Pour into a container and freeze for 6–8 hours, stirring once halfway through.
The texture will be slightly denser but still delicious.
Common Mistakes and How to Avoid Them
|
Mistake |
Cause |
Solution |
|---|---|---|
|
Icy Texture |
Base not chilled enough. |
Chill for at least 4 hours. |
|
Eggy Flavor |
Overcooked custard. |
Cook on low heat and stir constantly. |
|
Too Soft |
Not enough churning or too much sugar. |
Follow churning time and measure sugar accurately. |
|
Mix-ins Sinking |
Added too early. |
Add during the last 5 minutes of churning. |
I once rushed the chilling step and ended up with icy ice cream. Since then, I always make sure the base is completely cold before churning.
Storage Tips
|
Storage Method |
Duration |
Tip |
|---|---|---|
|
Freezer (airtight container) |
Up to 2 weeks |
Press plastic wrap on surface to prevent ice crystals. |
|
Deep Freezer |
Up to 1 month |
Let soften before serving. |
Variations
Once you master the base recipe, you can experiment with different versions.
|
Variation |
Additions |
Flavor Profile |
|---|---|---|
|
Cherry Almond |
Add ½ teaspoon almond extract. |
Nutty and aromatic. |
|
Chocolate Cherry Swirl |
Add chocolate fudge ribbon. |
Rich and decadent. |
|
Cherry Cheesecake |
Add cream cheese and graham crumbs. |
Tangy and creamy. |
|
Vegan Cherry Garcia |
Use coconut milk and dairy-free chocolate. |
Light and tropical. |
I personally enjoy the cherry almond version because the almond extract enhances the fruit flavor without overpowering it.
Serving Ideas
|
Serving Style |
Description |
|---|---|
|
Classic Scoop |
Serve in bowls or cones. |
|
Ice Cream Sandwich |
Layer between chocolate cookies. |
|
Sundae |
Top with whipped cream and extra cherries. |
|
Milkshake |
Blend with milk for a creamy drink. |
Because this ice cream is rich, small servings are usually enough. However, it pairs beautifully with chocolate brownies or shortbread cookies.
The Role of Temperature
Temperature affects both texture and flavor.
|
Temperature (°F) |
Texture |
Best Use |
|---|---|---|
|
10–15°F |
Soft and scoopable |
Dessert bowls |
|
0–5°F |
Firm |
Ice cream sandwiches |
|
20°F+ |
Melty |
Sundaes or floats |
I prefer serving it slightly soft because it melts on the tongue and releases all the flavors.
My Experience
When I first made Cherry Garcia ice cream at home, I was surprised by how much better it tasted than the store-bought version.
The cherries were fresher, the chocolate richer, and the texture smoother. Because I could control the sweetness, it didn’t feel heavy.
Nonetheless, the process requires patience. The custard must be cooked slowly, chilled thoroughly, and churned properly. However, the result is worth every minute.
Troubleshooting
|
Problem |
Possible Cause |
Fix |
|---|---|---|
|
Grainy Texture |
Sugar not dissolved completely. |
Heat mixture until sugar melts. |
|
Too Hard |
Freezer too cold or low fat content. |
Let sit at room temperature for 5 minutes before scooping. |
|
Flavor Too Mild |
Not enough cherries or vanilla. |
Increase by small amounts next time. |
Pairing Suggestions
|
Dessert |
Why It Works |
|---|---|
|
Chocolate Brownies |
Adds richness and contrast. |
|
Shortbread Cookies |
Balances sweetness with buttery flavor. |
|
Fresh Berries |
Enhances fruit notes. |
|
Espresso |
Creates a refreshing affogato-style dessert. |
I often serve this ice cream with a shot of espresso poured over the top it melts slightly and creates a creamy coffee-cherry flavor.
Final Thoughts
Homemade Cherry Garcia ice cream is a dessert that combines simplicity with indulgence.
It’s creamy, fruity, and perfectly balanced with bits of chocolate. Making it at home allows us to appreciate the process and enjoy a fresher, more flavorful result.
I am always reminded that good ice cream doesn’t need complicated ingredients just care and patience.
Therefore, whether you’re making it for a family gathering or just because you love ice cream, this recipe will not disappoint.
So, gather your ingredients, chill your base, and start churning.
Once you taste that first spoonful, you’ll understand why homemade Cherry Garcia ice cream is worth every step.
Last modified: July 7, 2026
