

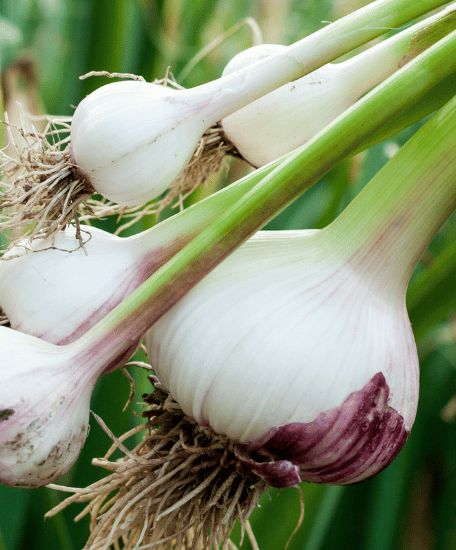
October is one of the best times to plant garlic in many parts of the United States. While the garden is slowing down, garlic is quietly establishing roots underground. A few minutes of preparation now can lead to fragrant, full bulbs ready for harvest the following summer.
Garlic is forgiving, compact, and easy to grow in a sunny garden bed, raised bed, or large container. The most important details are choosing healthy planting cloves, preparing loose soil, planting at the correct depth, and protecting the bed with mulch.
Planting dates vary by climate. In colder regions, garlic is commonly planted after the first killing frost. In milder areas, planting may continue through November. Local frost dates and soil conditions matter more than a strict calendar date. Growing garlic in home gardens
Why Plant Garlic in October?
Garlic benefits from a period of cool weather. Fall planting allows the cloves to develop a strong root system before winter. The plants remain mostly dormant during the coldest months, then resume growth as temperatures rise.
Planting in October also gives garlic a head start over spring-planted cloves. Spring planting can still work in some areas, but bulbs are often smaller because the plants have less time to grow before warm weather arrives.
Garlic can also make efficient use of garden space. It grows vertically, has shallow roots, and can be planted along the edges of vegetable beds. By the time many warm-season crops need the space, garlic is usually ready to harvest.
Choose the Right Garlic for Your Garden
How to Plant Garlic in October
There are two main types of garlic for home gardeners: hardneck and softneck.
Hardneck garlic
Hardneck varieties produce a central flowering stalk called a scape. They tend to have strong flavor and large, easy-to-peel cloves. Hardneck garlic is often a good choice for gardeners in areas with cold winters because it generally performs well after a period of chilling.
The scapes can be harvested in late spring and used in pesto, stir-fries, soups, and sauces.
Softneck garlic
Softneck varieties do not usually produce a hard central stalk. They are often preferred in mild climates and are known for good storage life. Softneck garlic can also be braided after curing.
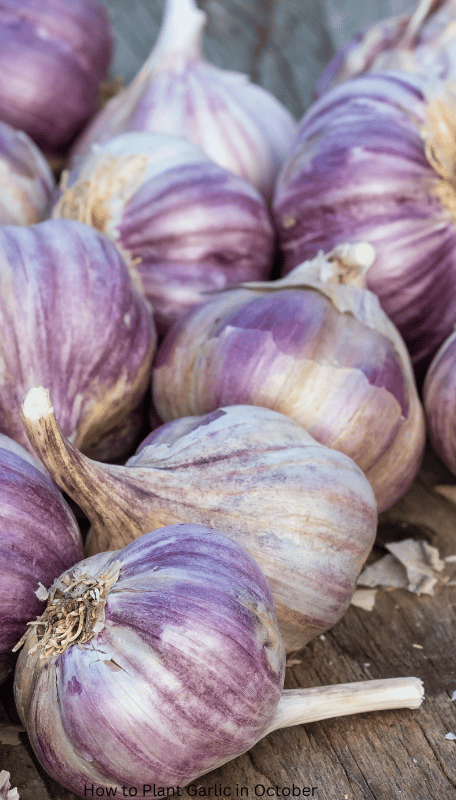
When possible, buy seed garlic from a reputable nursery, garden center, or seed supplier. Grocery-store garlic may be treated to discourage sprouting, and it may not be suited to your local climate.
Prepare the Soil Before Planting
Garlic grows best in full sun and loose, well-drained soil. Waterlogged soil can cause cloves to rot, especially during winter.
Before planting, remove weeds, old vegetable stems, and large stones. Loosen the top 8 to 10 inches of soil with a garden fork or broadfork. Avoid working the soil when it is saturated because wet soil can become compacted.
A soil test is useful before adding fertilizer or large amounts of amendments. Soil testing can reveal pH, nutrient levels, texture, and organic matter, helping you avoid adding materials your garden does not need. Promote healthy soil in your garden
Spread a moderate layer of finished compost over the bed and mix it into the upper soil. Compost can improve water and nutrient retention, particularly in lighter, sandy soils, but excessive amounts are not automatically better. Less is More: How to Apply Compost in Your Vegetable Garden
Garlic prefers soil with a pH around 6.0 to 7.0. If your soil test recommends lime or another amendment, apply it according to the test directions rather than guessing.
Separate the Garlic Cloves
Break the garlic bulb apart shortly before planting. Keep the papery skin on each clove and separate the cloves carefully so the flat root plate remains intact.
Choose the largest, healthiest cloves for planting. Larger cloves generally have more stored energy and can produce stronger plants and larger bulbs.
Do not plant cloves that are soft, moldy, shriveled, or damaged. Use the smaller cloves in the kitchen instead.
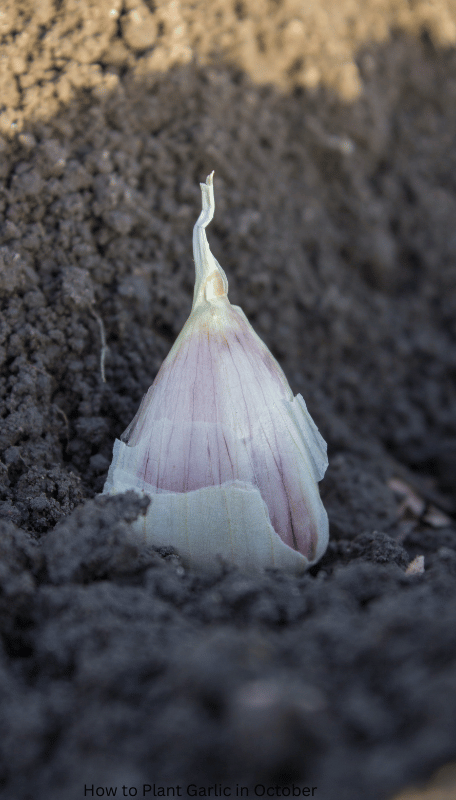
The pointed end is the top, and the flatter root plate is the bottom. Planting a clove upside down may not prevent it from growing, but it can slow emergence and cause a curved shoot.
How Deep to Plant Garlic in October
Plant garlic cloves approximately 2 to 3 inches deep, with the pointed end facing upward. Space cloves about 3 to 6 inches apart, depending on the variety and the size of bulbs you want. Rows can be spaced roughly 6 to 10 inches apart. How to Grow Garlic in Your Garden – Utah State University Extension
In very cold areas, planting slightly deeper and adding a protective mulch layer can help prevent repeated freezing and thawing from pushing cloves out of the soil.
A simple planting process looks like this:
- Mark straight rows in prepared soil.
- Make holes 2 to 3 inches deep.
- Place one clove in each hole with the pointed end up.
- Cover gently with soil.
- Water the bed thoroughly.
- Add mulch after the soil has cooled.
Avoid pressing down heavily over each clove. Loose soil allows roots and shoots to develop without unnecessary resistance.
Add Winter Mulch
After planting, cover the bed with approximately 3 to 6 inches of loose mulch. Clean straw is a popular choice because it insulates the soil while still allowing air and water to move through.
Shredded leaves can also work, especially when mixed with a coarser material so they do not form a dense, wet mat. Avoid using thick layers of whole leaves that may become compacted.
Mulch helps moderate soil temperature, reduce weed growth, and protect cloves from winter temperature swings. It is especially useful if garlic shoots emerge briefly before a hard freeze. Tips for garlic planting season
In spring, move some of the mulch aside if it remains thick and wet. You can leave a lighter layer around the plants to suppress weeds and conserve moisture.
Watering Garlic After Planting
Water the bed after planting so the soil settles around the cloves. After that, avoid keeping the area constantly wet.
Fall rainfall may provide enough moisture, but check the soil during dry periods. Garlic needs consistent moisture while actively growing, but poor drainage is more dangerous than occasional dryness during winter.
In spring, water deeply when the soil begins to dry. Morning watering is preferable because it allows foliage to dry during the day.
Reduce watering as the bulbs approach maturity. Excess moisture near harvest can increase the risk of rot and make curing more difficult.
Fertilizing Garlic
Garlic benefits from fertile soil, but fertilizer should be guided by a soil test whenever possible. Too much nitrogen can encourage lush leaves without producing well-formed bulbs.
If the soil is low in nutrients, incorporate a balanced fertilizer before planting according to the product label. In spring, some gardeners apply a light nitrogen side-dressing as growth resumes. Utah State University Extension notes that garlic may benefit from additional nitrogen during active spring growth. How to Grow Garlic in Your Garden – Utah State University Extension
Do not place concentrated fertilizer directly against the cloves. It can damage new roots.
Weed Control Is Essential
Garlic does not compete well with aggressive weeds. Weeds steal water, nutrients, and sunlight, especially during spring when garlic is producing leaves and building bulbs.
Keep the planting area clean before winter and inspect it regularly in spring. Pull small weeds by hand or remove them with a shallow hoe. Avoid deep cultivation near garlic because the bulbs and roots may be close to the surface.
A mulch layer makes this task easier, but it does not eliminate the need for occasional weeding.
When to Harvest Garlic
Garlic is usually ready in summer when the lower leaves turn yellow or brown and begin to fall over. Do not wait until every leaf has completely dried. Overmature bulbs may split open underground and store poorly. How to Grow Garlic in Your Garden | USU
Test one plant before harvesting the entire crop. Carefully loosen the soil with a garden fork and inspect the bulb. If the cloves are well formed and the skins are developed, harvest the rest.
Do not pull garlic forcefully by the leaves. Lift the bulbs gently to avoid bruising them.
How to Cure and Store Garlic
After harvesting, brush off loose soil without washing the bulbs. Place the plants in a dry, shaded, well-ventilated location. Keep the leaves attached while the bulbs cure.
Curing usually takes one to two weeks. The garlic is ready when the outer skin feels dry and papery, the roots are dry, and the neck has tightened. How to Grow Garlic in Your Garden | USU
Trim the roots and cut the stems after curing. Store garlic in a cool, dry, dark place with good air circulation. Do not store it in a sealed plastic bag because trapped moisture can encourage mold.
Save several of your largest, healthiest bulbs for planting again in October.
Common Garlic-Growing Mistakes
Planting cloves too shallow
Shallow cloves are more vulnerable to temperature changes and may be pushed upward by frost.
Using poor-quality cloves
Small, damaged, or diseased cloves are less likely to produce strong bulbs.
Overwatering
Garlic dislikes soggy soil. Improve drainage before planting rather than trying to correct a wet bed later.
Skipping mulch in cold regions
Without protection, repeated freezing and thawing can damage roots and expose cloves.
Letting weeds take over
Garlic needs a relatively clean bed throughout the growing season.
Conclusion
Planting garlic in October is a simple way to make next year’s garden more productive. Choose healthy seed garlic, prepare loose and well-drained soil, plant the cloves 2 to 3 inches deep with the pointed ends up, and cover the bed with mulch.
With regular spring watering, light feeding when needed, and steady weed control, your October planting can produce a flavorful summer harvest that stores for months.
Last modified: October 2, 2026
