How To Start Composting In A Bin?
Composting is like magic for the environment and your garden.
It’s an easy yet effective technique to cut waste, improve soil, and raise better plants. The best thing, though?
To get started, you don’t need a sizable backyard or a green thumb.
We’ll walk you through the process of composting in a bin in this in-depth manual.
Whether you’re new to gardening or an experienced pro, you’ll discover insightful information and helpful advice to get your composting adventure started.
What is Composting?

How To Start Composting
Composting is a natural process where organic materials break down into nutrient-rich humus, a dark, crumbly substance that resembles soil.
This “black gold” is a treasure for gardeners because it improves soil structure, fertility, and water retention.
Composting is essentially recycling organic waste, diverting it from landfills, and reducing methane emissions in the process.
Why Should You Compost in a Bin?
Composting in a bin offers several advantages, especially for beginners:
- Control: Bins provide a controlled environment, allowing you to manage variables like moisture, pests, and odor more easily.
- Space: Bins are space-efficient, making them ideal for small yards, balconies, and even indoor use.
- Aesthetics: They look neater and more organized compared to open compost piles.
- Speed: Bins often speed up the composting process due to the contained environment.
- Accessibility: Bins are easily accessible, making it convenient to add materials and check on your compost.
The Benefits of Composting
Composting is a win-win for you and the environment. Here’s why you should start composting today:
- Reduces Waste: Composting diverts organic waste from landfills, reducing greenhouse gas emissions and landfill space.
- Enriches Soil: Compost improves soil fertility, structure, and water-holding capacity, leading to healthier plants and higher yields.
- Saves Money: You’ll buy fewer bags of soil conditioners, fertilizers, and mulch when your garden is enriched with compost.
- Conserves Water: Compost-rich soil retains moisture better, reducing the need for frequent watering.
- Promotes Biodiversity: Healthy soil encourages beneficial soil organisms, which promote plant health.
- Cuts Chemical Usage: You’ll rely less on synthetic chemicals, which can harm the environment and your health.
- Teaches Sustainability: Composting is a simple way to engage with sustainable living and environmental conservation.
Now that you’re convinced about the merits of composting let’s move on to the practical aspects of starting your compost bin journey.
Choosing the Right Bin
Prior to beginning your composting project, pick the appropriate bin. There are several choices, each with its own pros and factors to take into account.
Types of Compost Bins
How To Start Composting In A Bin
- Tumbling Bins: These are cylindrical bins that you can rotate to aerate the compost. They’re great for small spaces and make turning the compost easier.
- Stationary Bins: These are non-rotating bins that sit in one spot. They come in various sizes and materials, such as plastic, wood, or metal.
- Worm Bins (Vermicomposting): These bins use worms to break down organic matter quickly. They’re perfect for indoors or small spaces.
- Bokashi Bins: Bokashi composting uses a special bin and bran mixture to ferment organic waste. It’s odor-free and can be done indoors.
Related Post: Best Fertilizer for Citrus
Factors to Consider when Selecting a Bin
When choosing a compost bin, consider the following factors:
- Space: How much space do you have? Is it a small balcony or a larger backyard?
- Aesthetics: Do you want a bin that blends in with your surroundings or one that’s hidden from view?
- Budget: Compost bins come in various price ranges. Consider your budget when making a choice.
- Convenience: How often do you want to turn the compost, and how much effort are you willing to put in?
- Climate: Consider your local climate. Some bins may insulate better in colder climates, while others may have better ventilation for hot ones.
DIY vs. Store-Bought Bins
You can either purchase a compost bin or create one yourself. DIY bins are often more cost-effective and allow for customization. You can repurpose old containers, build a wooden bin, or even use wire mesh. Store-bought bins, on the other hand, are designed for specific purposes and often come with features like aeration vents and easy-access doors.
In the end, the choice of bin should align with your preferences, space, and budget.
Setting Up Your Compost Bin
Location, Location, Location
Selecting the right location for your compost bin is crucial. Here are some tips:
- Sunlight: Choose a spot that receives partial sunlight. Too much sun can dry out your compost, while too little can slow down the process.
- Accessibility: Ensure that the bin is easily accessible year-round, especially in wet or snowy weather.
- Drainage: Make sure the bin is on a well-draining surface. You don’t want excess moisture pooling in the bottom.
- Airflow: Leave some space around the bin to allow for airflow, which helps with aeration.
Assembling and Preparing the Bin
- Assembly: If you’ve purchased a bin, follow the manufacturer’s instructions for assembly. For DIY bins, ensure that your container is sturdy and well-ventilated.
- Adding a Base: It’s a good idea to add a layer of coarse materials to the bottom of your bin, such as small branches or straw. This helps with drainage and aeration.
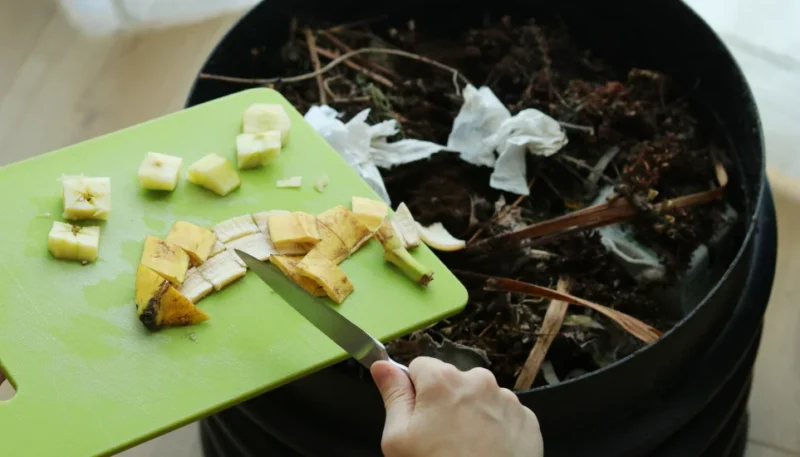
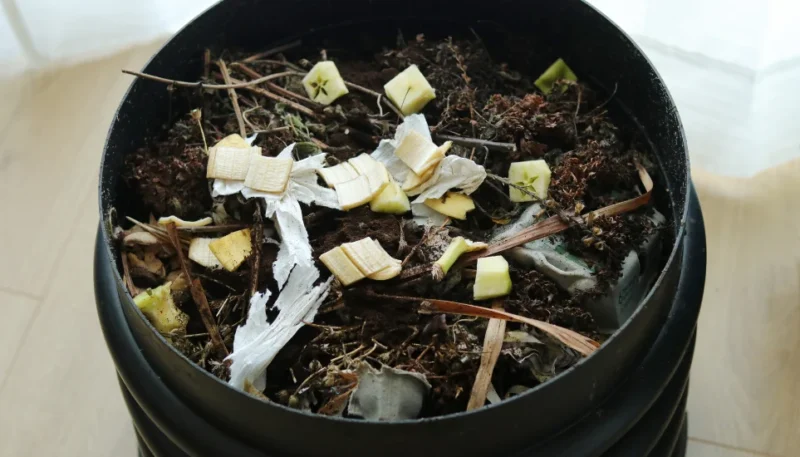
- First Layer: Start with a layer of “browns” (carbon-rich materials). This can include dried leaves, straw, or shredded newspaper. Aim for about 4-6 inches in depth.
- Second Layer: Add a layer of “greens” (nitrogen-rich materials). This includes kitchen scraps like fruit and vegetable peels, coffee grounds, and fresh yard waste. Again, aim for about 4-6 inches.
- Mixing: Mix the layers slightly to introduce some air and encourage decomposition.
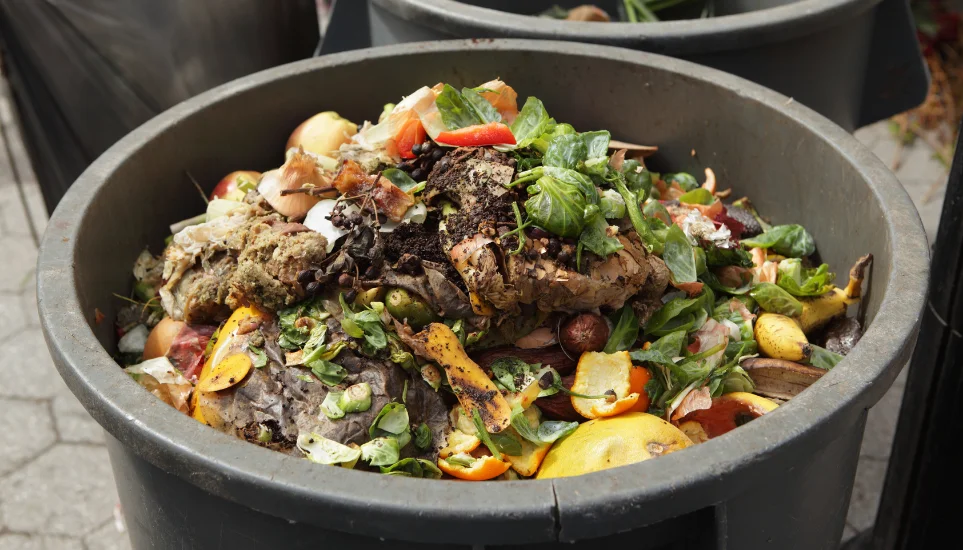
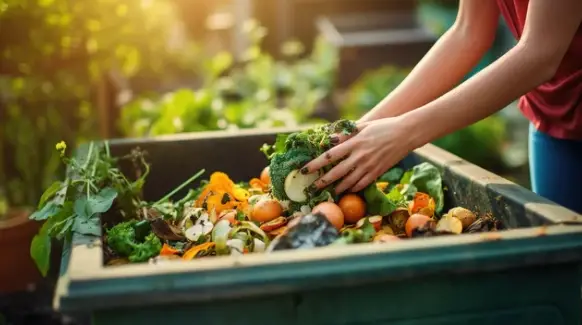
What Can and Can’t Go in Your Bin
Composting successfully depends on your knowledge of the ingredients that work best in your bin.
Green vs. Brown Materials
Compostable materials can be categorized as “greens” or “browns.”
- Greens: These are nitrogen-rich materials, often moist and green. Examples include kitchen scraps, grass clippings, and coffee grounds. Greens provide protein for the microorganisms that break down your compost.
- Browns: These are carbon-rich materials, typically dry and brown. Examples include dried leaves, straw, newspaper, and cardboard. Browns provide energy for the microorganisms.
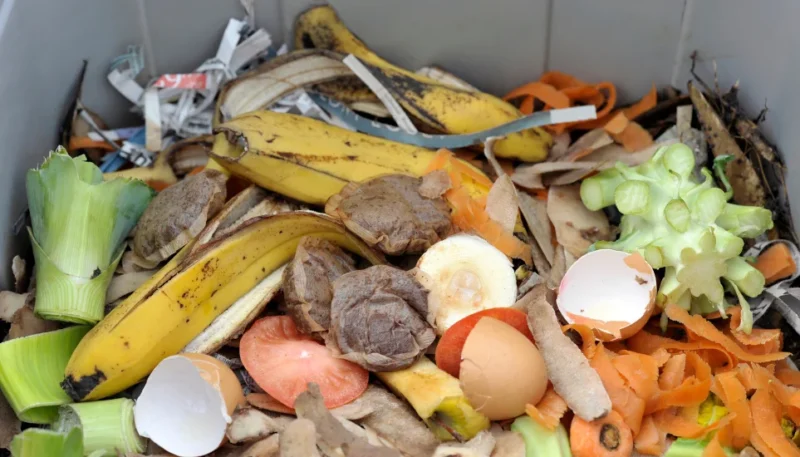
A List of Compostable Items
- Kitchen Scraps: Fruit and vegetable scraps, coffee grounds, tea bags (remove staples), eggshells, and nutshells.
- Yard Waste: Grass clippings, small branches, and leaves (preferably shredded).
- Paper Products: Newspaper (shredded), cardboard (cut into small pieces), and paper towels.
- Garden Trimmings: Non-diseased plant trimmings and spent flowers.
- Other Organic Materials: Hair, dryer lint, and wood ash (in moderation).
Items to Avoid
Some materials should never go in your compost bin. These include:
- Diseased Plants: These can introduce pathogens into your compost.
- Meat and Dairy: These can attract pests and create foul odors.
- Pet Waste: Pet feces can contain harmful pathogens.
- Invasive Weeds: Seeds from invasive plants may survive the composting process.
- Chemically Treated Wood: Treated wood can contain harmful chemicals.
Now that you are aware of what to put in your recycling bin, let’s discuss maintaining the ideal balance for composting success.
Balancing Your Compost
Creating the right environment for your compost is all about achieving the perfect balance between carbon-rich “browns” and nitrogen-rich “greens.”
Achieving the Right Carbon-to-Nitrogen Ratio (C/N Ratio)
The ideal C/N ratio for compost is roughly 25-30 parts carbon to 1 part nitrogen. This balance provides a steady diet for the microorganisms responsible for decomposition.
- Carbon-Rich Materials (Browns): These are your main source of carbon and include dried leaves, straw, and cardboard.
- Nitrogen-Rich Materials (Greens): These provide nitrogen and include kitchen scraps, grass clippings, and coffee grounds.
Layering Your Compost
Layering your compost is a popular technique for getting the ideal balance. Repeat starting with a coat of brown, then a layer of green. 2-4 inch thick layers are what you should aim for. Periodic layer mixing promotes equal decomposition and maintains aeration.
Turning and Aerating
Turning your compost frequently allows for aeration, which ensures that oxygen reaches the microbes. Every couple of weeks, turn the mound using a pitchfork or shovel. Try out your tumble bin if you have one.
Recall that composting is an art form rather than a precise science. Don’t worry too much about the ratios being accurate. Even while it does so at a slightly slower rate, your compost will still decompose.
Maintaining Your Compost Bin
Like any living system, compost bins require attention and care to thrive.
Managing Moisture Levels
Consistent moisture is essential for composting. Your compost should be as damp as a wrung-out sponge. Here’s how to maintain the right moisture levels:
- Add Water: If your compost is too dry, add water as needed when turning or layering.
- Cover It: If it’s too wet, cover your bin to protect it from rain. You can also add more brown materials to absorb excess moisture.
Dealing with Pests and Odor
Pests and odors can sometimes be an issue with compost bins. To address these challenges:
- Pests: Make sure you’re not adding meat, dairy, or fatty foods to your compost. Use a lid on your bin to deter pests. If necessary, consider using pest-repelling techniques or natural deterrents.
- Odor: Properly balanced compost bins should not smell bad. If you notice an unpleasant odor, it’s likely due to excess moisture or the wrong materials. Adjust your compost accordingly.
Troubleshooting Common Issues
- Slow Decomposition: If your compost is taking longer to break down, check the C/N ratio. You may need more greens or browns to balance it out.
- Pests and Rodents: Use a bin with a secure lid and consider placing a barrier underneath the bin to deter burrowing pests.
- Foul Odors: Adjust the moisture levels, turn your compost more frequently, and ensure proper aeration.
- Excessive Heat: In hot weather, compost bins can overheat. Add more browns to balance the greens and maintain proper aeration.
- Sticky or Clumpy Texture: This can result from excess moisture. Add dry materials and turn the pile to improve aeration.
The majority of frequent composting issues can be overcome with constant attention and adequate maintenance.
Harvesting Your Compost
One of the most rewarding moments in composting is when you get to harvest your “black gold.”
Signs That Your Compost is Ready
Compost is typically ready when it:
- Looks dark, crumbly, and earthy.
- Has no recognizable food or plant materials.
- Smells like fresh, damp earth (not like rotting food).
How to Harvest and Use Compost
- Stop Adding New Materials: About 2-4 weeks before you plan to harvest, stop adding fresh materials to your compost bin.
- Wait Patiently: Allow the compost to finish breaking down for a few weeks.
- Harvest the Finished Compost: You can scoop out the finished compost from the bottom of your bin. Use a screen or sifter to remove any large, uncomposted materials.
- Use Your Compost: Mix your compost into garden soil, potting mix, or use it as mulch. Your plants will thank you for the nutrient boost.
Leaving a Bit Behind for Your Next Batch
When you harvest your compost, consider leaving a small amount (about 10%) behind in the bin. This “starter” compost helps jumpstart the next batch by introducing beneficial microorganisms.
Advanced Composting Techniques
If you’re feeling adventurous and want to take your composting game to the next level, consider these advanced techniques.
Vermicomposting (Composting with Worms)
Vermicomposting uses special composting worms, typically red wigglers, to break down organic matter quickly. Worm bins are an excellent choice for those with limited space, like apartment dwellers.
Bokashi Composting
Bokashi composting is a Japanese method that uses a specialized bin and bran mixture to ferment organic waste. It’s a fantastic option for those with minimal outdoor space or those looking to compost meat and dairy.
Hot Composting
Hot composting is a more intense and rapid composting method that relies on careful layering and turning to generate high temperatures (above 140°F or 60°C). This process can break down materials in a matter of weeks.
Composting Tips and Tricks
Speeding Up the Composting Process
- Chop or shred materials into smaller pieces to accelerate decomposition.
- Maintain the right C/N ratio with a mix of greens and browns.
- Turn your compost regularly to introduce oxygen and speed up decomposition.
- Keep the compost moist but not soggy.
- Use compost activators like finished compost or commercial products to jumpstart the process.
Seasonal Considerations
- Adjust your composting practices to suit the changing seasons. Cold weather may slow down decomposition, while hot weather can speed it up.
- Consider insulating your compost bin in the winter to maintain a consistent temperature.
Common Misconceptions
- Composting doesn’t have to be complicated; simplicity often works best.
- You don’t need to worry too much about getting the C/N ratio exactly right; nature is forgiving.
- Compost should not smell bad; if it does, something is off-balance.
- Composting doesn’t have to be an unpleasant chore; it can be an enjoyable and educational experience.
Wrap Up
Congratulations! You’ve finished your bin-based crash course on composting.
With the information and know-how you now possess, you can transform your kitchen scraps and yard trash into nutrient-rich compost that will revitalize your garden and benefit the environment.
Keep in mind that composting is not simply a means to make your garden flourish; it’s also a way to get closer to nature, cut down on waste, and encourage sustainability.
Share your newfound information with your family and friends, and let’s work together to make the earth a little bit greener and healthier, one compost bin at a time. Cheers to composting!
References Source:
- United States Environmental Protection Agency (EPA). (n.d.). Composting at Home. https://www.epa.gov/recycle/composting-home
- University of Illinois Extension. (2020). Home Composting: Yard and Garden. https://extension.illinois.edu/homecomposting/index.cfm
- The National Gardening Association. (n.d.). Composting for the Home Gardener. https://www.gardeners.com/how-to/composting/5061.html
- University of California Division of Agriculture and Natural Resources. (2015). Composting