Pickles are a popular condiment and food that are eaten all over the world.
Bread & butter pickles stand out among the many pickle kinds for their sweet, acidic, and mildly spicy flavor combination.
Creating your own bread and butter pickles in cans at home is a satisfying task that enables you to enjoy this delectable treat all year long.
We’ll walk you through a step-by-step tutorial for making homemade canned bread and butter pickles in this blog post.
| For the Pickles: | For the Pickling Liquid: |
|---|---|
| – 4 pounds of cucumbers | – 2 cups white vinegar |
| (approximately 8-10 | – 2 cups granulated sugar |
| medium-sized cucumbers) | – 1 cup brown sugar |
| – 2 large onions, thinly | – 1 tablespoon mustard seeds |
| sliced | – 1 tablespoon celery seeds |
| – 1/4 cup pickling salt | – 1 teaspoon turmeric |
| – 1 teaspoon crushed red | – 1 teaspoon crushed red |
| pepper flakes | pepper flakes (adjust for |
| (adjust for desired | desired spiciness) |
| spiciness) |
Equipment:
- Large mixing bowl
- Glass canning jars with lids and bands (sterilized)
- Canning pot or large stockpot
- Canning rack or a clean kitchen towel
- Ladle
- Jar lifter
- Funnel
- Bubble remover tool
- Wooden spoon
- Measuring cups and spoons
- Sharp knife
- Cutting board
Ingredients:
You’ll need the following ingredients for this recipe:
For the Pickles:
- 4 pounds of cucumbers (approximately 8-10 medium-sized cucumbers)
- 2 large onions, thinly sliced
- 1/4 cup pickling salt
- 2 cups white vinegar
- 2 cups granulated sugar
- 1 cup brown sugar
- 1 tablespoon mustard seeds
- 1 tablespoon celery seeds
- 1 teaspoon turmeric
- 1 teaspoon crushed red pepper flakes (adjust for desired spiciness)
Equipment:
- Large mixing bowl
- Glass canning jars with lids and bands (sterilized)
- Canning pot or large stockpot
- Canning rack or a clean kitchen towel
- Ladle
- Jar lifter
- Funnel
- Bubble remover tool
- Wooden spoon
- Measuring cups and spoons
- Sharp knife
- Cutting board
Instructions:
Step 1: Prepare the Cucumbers
- Start by washing and scrubbing the cucumbers to remove any dirt or wax. Trim the ends and slice them into thin rounds, about 1/4-inch thick. You can also use a mandoline for uniform slices.
- In a large mixing bowl, combine the sliced cucumbers and thinly sliced onions. Sprinkle the pickling salt over the vegetables and toss to coat evenly. Let them sit for about 2 hours, stirring occasionally. This will help draw out excess moisture from the cucumbers.
Step 2: Prepare the Pickling Liquid
- In a separate pot, combine the white vinegar, granulated sugar, brown sugar, mustard seeds, celery seeds, turmeric, and crushed red pepper flakes. Bring the mixture to a boil over medium-high heat, stirring until the sugar is completely dissolved. Once boiling, reduce the heat and let it simmer for 5 minutes.
Step 3: Sterilize the Jars
- While the pickling liquid is simmering, sterilize your canning jars, lids, and bands. You can do this by submerging them in a large canning pot of boiling water for 10 minutes. Use a jar lifter to remove them and place them on a clean kitchen towel.
Step 4: Combine Ingredients
- After the cucumbers and onions have rested for 2 hours, drain them in a colander and rinse them thoroughly under cold running water to remove the excess salt. Drain well.
- Add the drained cucumber and onion mixture to the simmering pickling liquid. Stir gently and let it simmer for about 5 minutes, or until the vegetables are slightly softened.
Step 5: Fill and Seal the Jars
- Using a clean funnel, ladle the hot pickles and liquid into the sterilized jars, leaving about 1/2-inch of headspace at the top. Remove air bubbles by running a bubble remover tool or a wooden spoon along the inside of the jar.
- Wipe the rims of the jars with a clean, damp cloth to ensure they are clean and dry. Place a sterilized lid on each jar and screw on the band until it’s fingertip-tight (not too tight).
Step 6: Process the Jars
- Place the filled jars on a canning rack or a clean kitchen towel in your canning pot or large stockpot. Make sure the jars are covered with at least 1-2 inches of water. Bring the water to a boil and then process the jars in a boiling water bath for 10-15 minutes. The processing time may vary depending on your altitude, so consult a trusted source for specific guidance.
- After processing, carefully remove the jars using a jar lifter and place them on a clean kitchen towel or a wooden surface. Allow them to cool completely, undisturbed, for 12-24 hours.
Step 7: Check Seals and Store
- Once the jars have cooled, check the seals by pressing down on the center of each lid. If the lid doesn’t pop back, the jar is properly sealed. If it flexes or makes a popping sound when pressed, it’s not sealed, and you should refrigerate the jar and consume its contents within a few weeks.
- Store the properly sealed jars in a cool, dark, and dry place for up to a year. The flavors will continue to develop over time, making your homemade bread and butter pickles even more delicious.
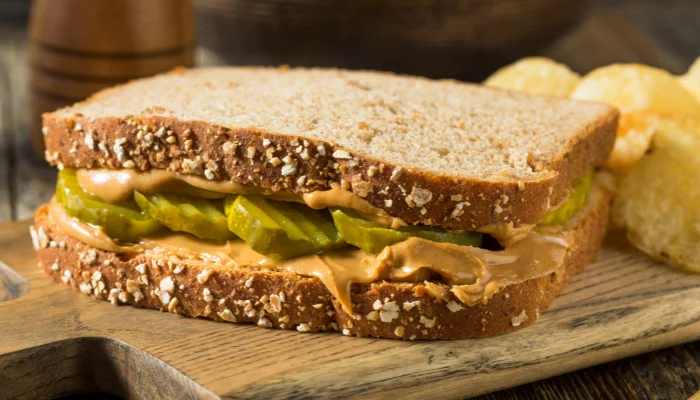
A delicious addition to your cupboard is homemade canned bread and butter pickles, which deliver a burst of sweet, acidic, and slightly spicy tastes that go great with salads, burgers, and sandwiches.
With the help of this detailed instruction manual, you can savour the satisfaction of preparing your own pickles and their delectableness all year long.
So put on your aprons, gather your ingredients, and go on a pickling expedition. Your palate will appreciate it!

