When is the Best Time to Repot Your ZZ Plant?
The ZZ plant, with its botanical name Zamioculcas zamiifolia, is a true low-maintenance plant that has gained immense popularity among plant enthusiasts and busy individuals alike.
Native to Eastern Africa, this sturdy plant can thrive in a wide range of conditions, making it a perfect choice for both experienced green thumbs and novice plant owners. However, even the most resilient plants require proper care, and one crucial aspect of caring for your ZZ plant is repotting it at the right time.
But when exactly is the right time to repot your ZZ plant? And how do you know when it’s time to upgrade its living quarters? Let’s dive into the details and explore the optimal timing and techniques for repotting this beloved houseplant.
The ZZ Plant’s Growth Cycle
Repot Your ZZ Plant
To determine the best time to repot your ZZ plant, it’s essential to understand its growth cycle. Like most plants, the ZZ plant experiences periods of active growth and dormancy. During the active growth phase, typically from early spring to late summer, the plant produces new shoots and leaves, utilizing the energy stored in its bulbous rhizomes.
Conversely, the dormant phase occurs during the winter months, when growth slows down or stops altogether. During this time, the plant conserves its energy and focuses on maintaining its existing foliage.
Repotting During Active Growth
The optimal time to repot your ZZ plant is during its active growth phase, typically in early spring or late summer. This period is ideal for several reasons:
1. Root Development: During active growth, the ZZ plant’s roots are actively expanding and seeking new nutrients and moisture. Repotting at this stage allows the plant to establish itself in fresh soil, providing it with the resources it needs to thrive.
2. Increased Nutrient Uptake: Fresh potting soil is rich in nutrients, which the plant can readily absorb during its active growth phase. This nutrient boost supports new growth and helps the plant recover quickly from the stress of repotting.
3. Resilience: Plants are generally more resilient during their active growth phase, making them better able to withstand the stress of repotting and transplant shock.
Repotting During Dormancy
While it’s generally advisable to repot your ZZ plant during its active growth phase, there may be circumstances where repotting during dormancy becomes necessary. For instance, if your plant has outgrown its current pot and is becoming rootbound, or if the potting mix has become severely compacted or depleted, repotting during the winter months may be unavoidable.
ZZ Plant
In such cases, it’s crucial to be extra gentle with the plant and minimize disturbance to the root system. Avoid excessive root pruning, as this can stress the plant further during its dormant phase. Additionally, ensure that the new potting mix is well-draining and provide slightly less water until the plant resumes active growth in the spring.
Signs Your ZZ Plant Needs Repotting
Even with the optimal timing in mind, it’s essential to watch for specific signs that indicate your ZZ plant is ready for a new home. Here are some telltale signs that it’s time to repot:
1. Rootbound Plant: If you notice roots emerging from the drainage holes or the plant is lifting out of the pot, it’s a clear indication that the roots have outgrown the current container.
2. Stunted Growth: If your ZZ plant has stopped producing new growth or its leaves are becoming smaller and discolored, it may be rootbound and in need of fresh soil and a larger pot.
3. Potting Mix Breakdown: Over time, potting mixes can break down and become compacted, limiting aeration and drainage. If the soil appears dense and water runs straight through without absorbing, it’s time for a refresh.
4. Pot Cracks or Damage: Inspect your pot regularly for cracks or damage, as these can impede proper drainage and potentially harm the plant’s roots.
Proper Repotting Techniques
Once you’ve determined that your ZZ plant is ready for a new home, it’s crucial to follow proper repotting techniques to minimize stress and ensure a smooth transition. Here’s a step-by-step guide:
1. Gather Your Supplies: You’ll need a new pot (ideally 2-4 inches wider than the current one), fresh well-draining potting mix, and a pair of clean pruners or scissors.
2. Prepare the New Pot: Clean the new pot thoroughly and ensure it has adequate drainage holes. You can also add a layer of gravel or clay pebbles at the bottom to improve drainage.
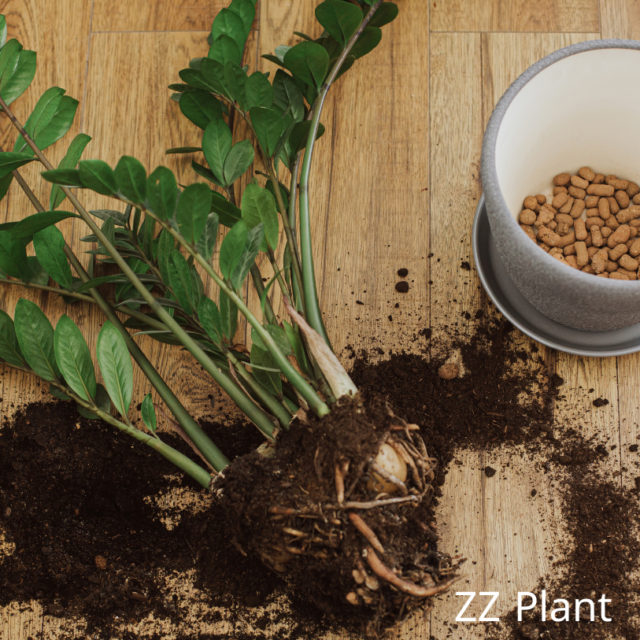
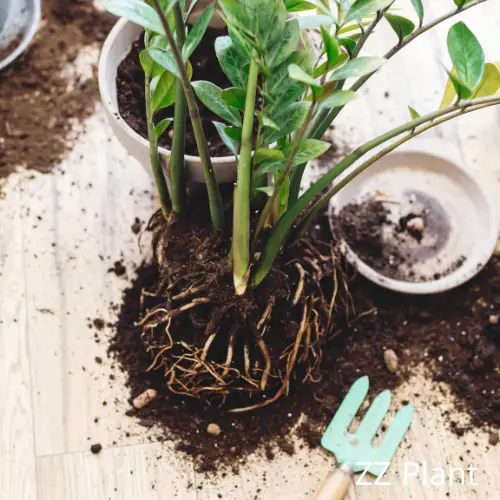
3. Remove the Plant: Gently remove the plant from its current pot by squeezing the sides or tipping it over and pulling it out carefully. Avoid pulling on the stems or leaves, as this can damage the plant.
4. Inspect the Roots: Once the plant is out, inspect the root system. If the roots are tightly bound or circling the root ball, use your fingers or pruners to gently loosen and untangle them.
5. Prune if Necessary: If you notice any damaged, discolored, or mushy roots, prune them away with clean pruners or scissors. However, avoid excessive root pruning, as this can shock the plant.
6. Prepare the New Potting Mix: Fill the new pot about one-third full with fresh, well-draining potting mix. You can also add a slow-release fertilizer or compost to provide additional nutrients.
7. Position the Plant: Gently place the ZZ plant in the new pot, ensuring that the root ball sits at the same depth as it was in the previous pot. Adjust the potting mix around the roots, gently firming them down.
8. Water and Settle: Once the plant is in its new home, water it thoroughly to help settle the potting mix and remove any air pockets. Allow the excess water to drain away fully.
9. Aftercare: Place your repotted ZZ plant in a location with bright, indirect light and maintain its regular watering schedule. Avoid overwatering or letting the soil dry out completely until the plant has adjusted to its new environment.
With proper timing and technique, repotting your ZZ plant can promote healthy growth, prevent rootbound conditions, and provide your plant with the fresh resources it needs to thrive for years to come.

