When I first started redesigning my backyard, I was shocked by the cost of new landscaping materials.
However, I discovered that using recycled materials for landscaping not only saved me hundreds of dollars but also gave my garden a unique character that store-bought items simply couldn’t match.
I’m excited to share what I’ve learned about transforming “trash” into garden treasures that are both eco-friendly and visually stunning.
In this guide, I’ll walk you through the environmental benefits, cost savings, and creative possibilities of sustainable landscaping.
You’ll discover how to repurpose everything from wooden pallets to glass bottles in ways that will make your neighbors ask, “Where did you get that?”
Let’s dive into the world of recycled landscaping and give your outdoor space the sustainable makeover it deserves!
Benefits of Using Recycled Materials for Landscaping
When I first considered using recycled materials for my garden, I was primarily motivated by saving money.
However, I quickly discovered there are numerous other advantages that make this approach truly worthwhile.
Environmental Impact
By reusing materials, I’m helping reduce the approximately 2 billion metric tons of waste that ends up in landfills globally each year.
The United States alone generates enough municipal solid waste to fill 96,000 Olympic-sized swimming pools annually!
When I repurpose items for my garden, I’m extending their lifecycle and supporting a circular economy.
Additionally, manufacturing new landscaping materials requires intensive energy processes that result in significant carbon emissions.
By choosing recycled options, I’m reducing my carbon footprint and helping combat climate change in my own small way.
Cost Savings
One of the most immediate benefits I’ve experienced is the financial savings.
Recycled materials are typically much cheaper than newly manufactured products and in many cases, they’re completely free!
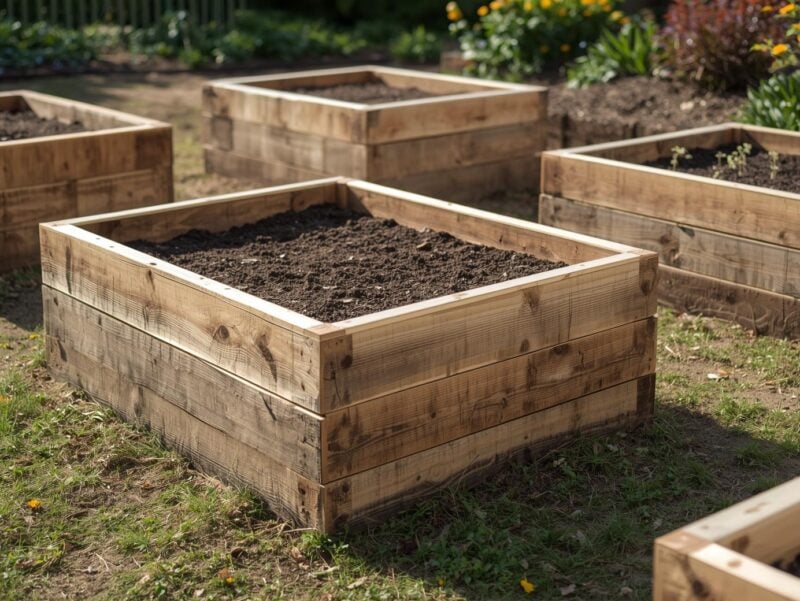
For example, when I built raised beds using reclaimed wood instead of purchasing new lumber, I saved approximately 70% on materials costs.
Local businesses are often happy to give away items like wooden pallets, which would otherwise cost them money to dispose of.
I’ve found that a friendly conversation with managers at grocery stores or hardware stores can yield a treasure trove of free materials.
Unique Aesthetic Appeal
Perhaps my favorite aspect of using recycled materials is the distinctive character they bring to my garden.
The weathered patina of reclaimed wood, the varied colors of recycled glass, and the vintage charm of old bricks create a visual appeal that simply can’t be replicated with mass-produced items.
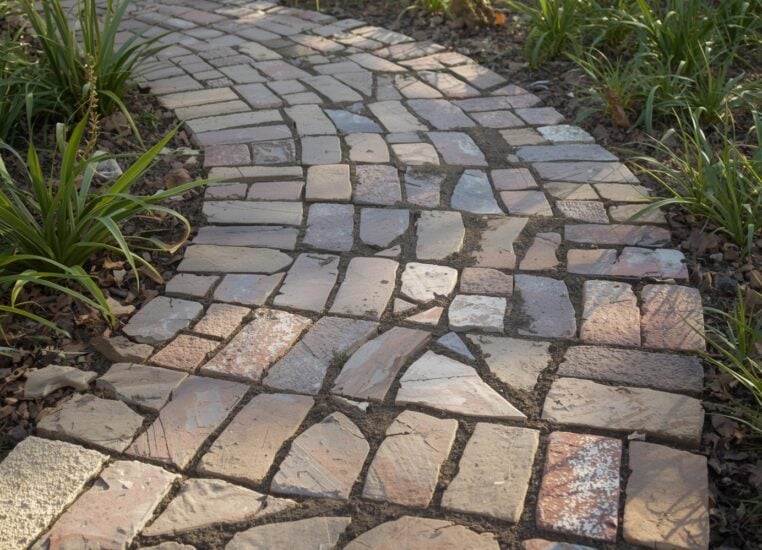
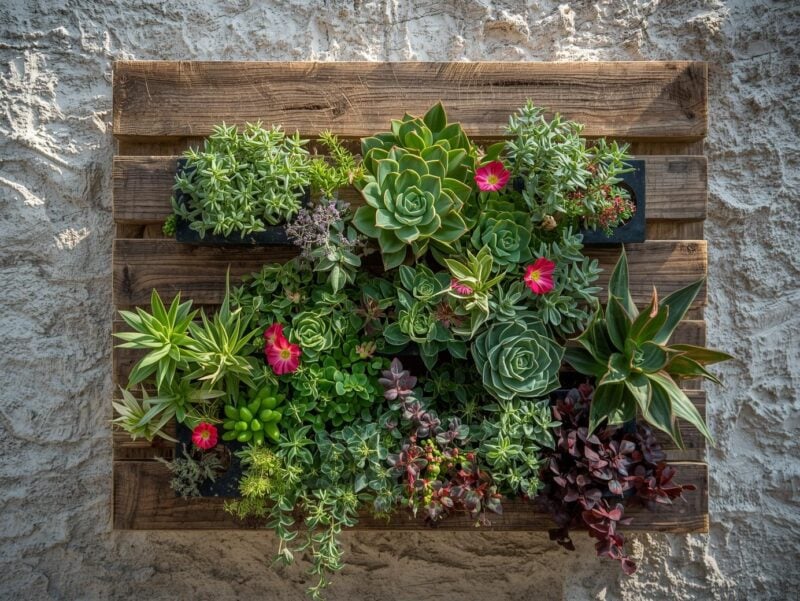
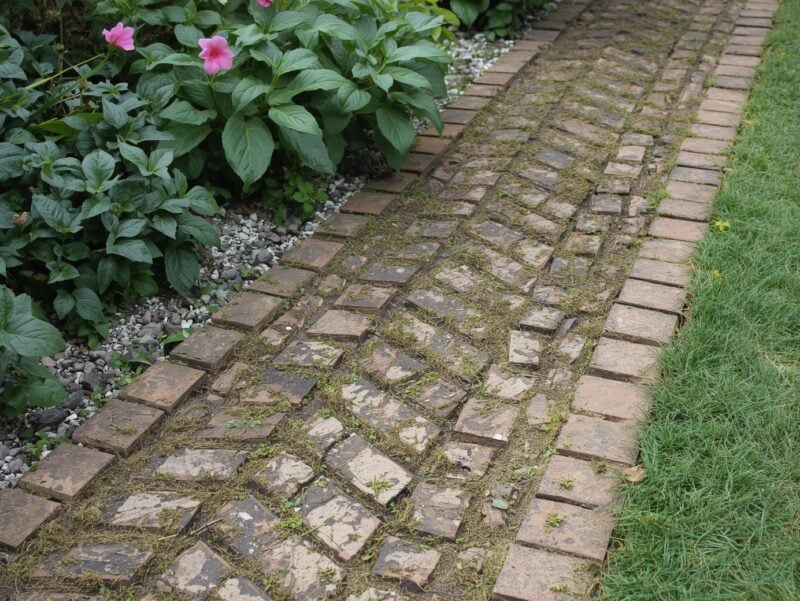
I’ve found that visitors to my garden are always curious about the stories behind different elements like the pathway made from bricks salvaged from a historic downtown building, or the vertical garden created from an old wooden pallet.
These conversations add another layer of enjoyment to my outdoor space.
Durability and Longevity
Contrary to what you might expect, many recycled materials are actually more durable than their new counterparts.
For instance, reclaimed bricks have already withstood decades of weathering and are likely to last much longer than freshly manufactured ones.
Similarly, recycled plastic lumber resists moisture, rot, and insects far better than traditional wood, extending the lifespan of structures like garden beds and borders.
This durability means less maintenance and fewer replacements over time, saving both money and resources.
Types of Recycled Materials for Your Landscape
I’ve experimented with numerous materials in my garden, and I’ve found that almost anything can be repurposed with a bit of creativity.
Here are my favorite recycled materials that have transformed my landscape:
| Material | Source | Best Uses | Durability | Cost Savings |
| Reclaimed Wood | Pallets, old fencing, demolition sites | Raised beds, furniture, trellises | Medium (3-7 years) | 70-100% |
| Recycled Bricks/Pavers | Demolition sites, renovation projects | Pathways, borders, patios | High (20+ years) | 50-80% |
| Glass Bottles | Home recycling, restaurants | Edging, decorative features | High (indefinite) | 90-100% |
| Recycled Concrete | Construction sites, driveway removals | Stepping stones, retaining walls | Very High (30+ years) | 60-90% |
| Recycled Plastic | Containers, bottles, old furniture | Planters, garden edging, mulch | High (15+ years) | 40-100% |
Reclaimed Wood
Wooden pallets have become my go-to resource for numerous garden projects.
They’re readily available for free from grocery stores, hardware stores, and garden centers that are typically happy to have you take them away.
I’ve transformed pallets into everything from vertical herb gardens to rustic furniture.
Beyond pallets, I’ve also salvaged wood from old fences, barns, and even shipping crates.
Old-growth wood from demolished buildings is particularly valuable because it’s fully seasoned, incredibly strong, and has a character that new lumber simply can’t match.
Try This: Before using wooden pallets, check for a stamp indicating “HT” (heat-treated) rather than “MB” (methyl bromide).
Heat-treated pallets are safer for garden use, especially for growing food, because they haven’t been treated with potentially harmful chemicals.
Recycled Bricks and Pavers
I’ve found that recycled bricks add instant character to any landscape.
Their weathered appearance brings a timeless quality that new materials simply can’t replicate.
When I was renovating my garden, I discovered a demolition site nearby and asked if I could take some of the old bricks they were removing.
The contractor was happy to let me haul away as many as I wanted saving them disposal costs while giving me free materials.
I’ve used these reclaimed bricks to create garden borders, stepping stone pathways, and even a small patio area.
The varied colors and slight imperfections create a charming, lived-in aesthetic that perfectly complements my cottage-style garden.
Glass Bottles and Jars

Glass bottles have become one of my favorite decorative elements in the garden.
I collect bottles in various colors blue, green, amber, and clear and use them to create stunning borders by burying them neck-down in the soil.
When sunlight hits them, they create a beautiful prism effect that adds unexpected sparkle to flower beds.
I’ve also used glass jars as lanterns by placing solar-powered tea lights inside them and hanging them from tree branches.
The effect at night is magical and costs virtually nothing to create.
For a more permanent installation, I embedded colorful bottles in a concrete garden wall, allowing light to filter through in a stained-glass effect.
Recycled Metal
Old metal items can be transformed into striking garden features.
I’ve repurposed everything from bicycle wheels to metal barrels in my landscape.
One of my favorite projects was turning an old metal headboard into a trellis for climbing roses it now serves as a beautiful focal point in my garden.
For smaller accents, I’ve used old silverware to create plant markers and wind chimes.
Local welding shops are often great sources for scrap metal pieces that have minor flaws but are perfect for garden projects.
Just remember to anchor larger metal structures securely to prevent them from becoming hazards during strong winds.
Recycled Plastic and Rubber
I’ve found countless ways to repurpose plastic in my garden.
Old plastic containers make excellent seed starters and small planters.
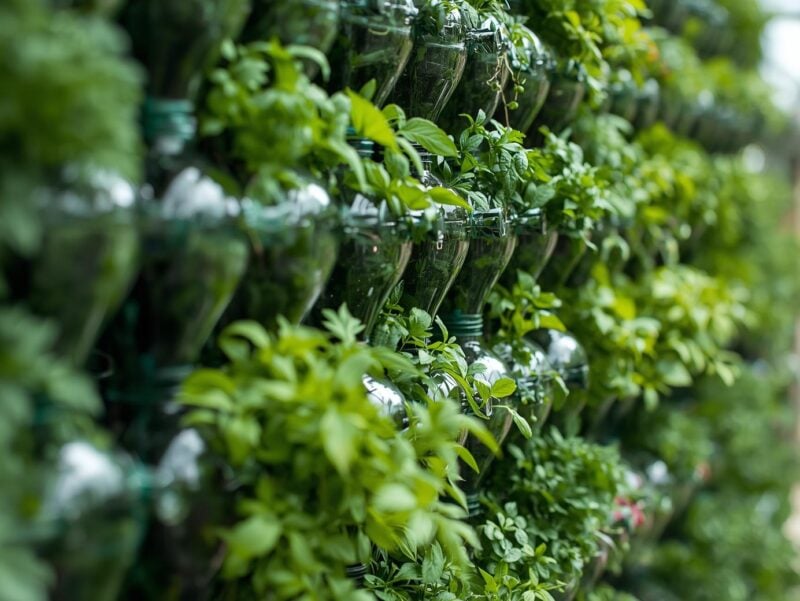
For a vertical herb garden, I cut plastic bottles in half, mounted them on a wooden frame, and filled them with soil and herb seedlings.
Recycled rubber, particularly from old tires, makes excellent mulch that deters weeds and retains moisture.
Unlike organic mulches that decompose and need regular replacement, rubber mulch lasts for years.
I’ve used it primarily in pathways and play areas rather than directly in planting beds.
DIY Projects Using Recycled Materials for Landscaping
Now that I’ve covered the materials, let me share some specific projects I’ve completed in my own garden.
These are all beginner-friendly and require minimal tools.
Pallet Vertical Garden
Materials Needed:
- 1 wooden pallet (heat-treated)
- Landscape fabric
- Hammer and nails
- Potting soil
- Small plants (herbs, succulents, or flowers)
- Sandpaper
- Optional: Exterior paint or stain
Step-by-Step Instructions:
- Sand the pallet to remove any splinters and rough edges.
- If desired, paint or stain the pallet and allow it to dry completely.
- Lay the pallet flat with the back side up (the side with wider spaces between slats).
- Cut landscape fabric to size and staple it to the back, bottom, and sides of the pallet, creating a pocket that will hold soil.
- Fill the pallet with potting soil through the slats on the front side.
- Plant your chosen plants through the front slats, starting from the bottom and working up.
- Keep the pallet flat for 1-2 weeks to allow plants to root firmly.
- Once plants are established, carefully stand the pallet upright and secure it to a wall or fence.
“My pallet garden has become the most commented-on feature in my backyard.
Visitors can’t believe it cost me nothing but a bag of soil and a few plant cuttings from friends.”
Glass Bottle Garden Border

Materials Needed:
- 15-20 glass bottles (wine, beer, or other)
- Garden spade
- String and stakes (for marking)
- Sand
- Level
Step-by-Step Instructions:
- Clean bottles thoroughly and remove all labels.
- Use string and stakes to mark the border line where bottles will be placed.
- Dig a trench along the marked line, approximately 6-8 inches deep.
- Add 2 inches of sand to the bottom of the trench for drainage.
- Place bottles upside down in the trench, nestling them into the sand.
- Use a level to ensure all bottles are at the same height.
- Fill in around the bottles with soil, packing it firmly to hold them in place.
- Water the area to help settle the soil around the bottles.
Pro Tip: For a more colorful effect, I like to group bottles of the same color together in sections rather than randomly mixing them. This creates a more intentional, designed look rather than appearing haphazard.
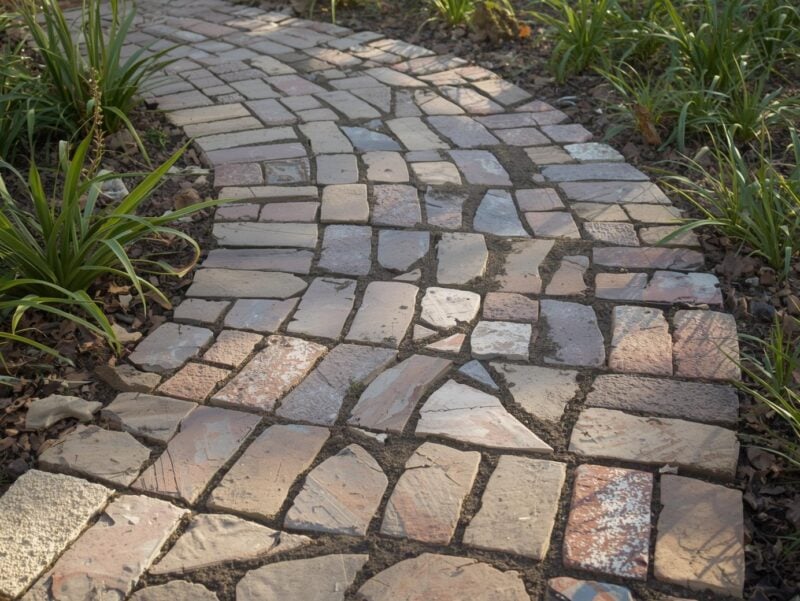
Recycled Brick Pathway
Materials Needed:
- Reclaimed bricks (quantity depends on path size)
- Sand
- Gravel
- Landscape fabric
- Garden spade
- Rubber mallet
- Level
- Broom
Step-by-Step Instructions:
- Mark the outline of your pathway using string or garden hose.
- Dig out the path to a depth of about 6 inches.
- Lay landscape fabric along the bottom to prevent weed growth.
- Add 2-3 inches of gravel and compact it.
- Add 1 inch of sand and level it.
- Arrange bricks in your desired pattern (herringbone creates the strongest path).
- Use a rubber mallet to tap bricks into place.
- Check frequently with a level to ensure the path remains even.
- Spread sand over the completed path and sweep it into the cracks between bricks.
- Spray lightly with water to help settle the sand.
Maintaining Your Recycled Landscape
While using recycled materials for landscaping is environmentally friendly and cost-effective, there are some maintenance considerations to keep in mind.
I’ve learned through experience that a little preventative care goes a long way in extending the life of these repurposed treasures.
Protecting Wood Elements
Reclamed wood, while often more durable than new lumber, still requires protection from the elements.
I apply a non-toxic sealant to all wooden elements in my garden every 1-2 years.
For items that come in contact with soil, like raised beds, I line the inside with landscape fabric to prevent direct soil contact, which can accelerate rot.
Maintaining Metal Features
To prevent rust on metal garden elements, I apply a clear outdoor polyurethane coating.
For decorative pieces where a rusty patina is desirable, I skip this step and allow nature to take its course.
However, I still check regularly for structural integrity, as excessive rust can weaken metal over time.
Caring for Glass Elements
Glass bottle borders and features require occasional cleaning to maintain their sparkle. I use a simple solution of vinegar and water to remove mineral deposits and dirt.
It’s also important to check periodically for any cracked bottles that might create sharp edges, replacing them as needed.
Safety Note: Always wear gloves when handling recycled materials, especially glass and metal, to prevent cuts and injuries. Check wooden items carefully for protruding nails or splinters before installation.
Start Your Sustainable Landscaping Journey Today
Using recycled materials for landscaping has transformed not only my garden but also my approach to sustainability.
What started as a cost-saving measure has become a creative passion that connects me more deeply to my environment.
I’ve discovered that limitations often spark the most innovative solutions, and some of my favorite garden features were born from items others considered trash.
I encourage you to look around your home, neighborhood, and local businesses with fresh eyes.
That pile of bricks from a neighbor’s renovation, the collection of wine bottles from your last gathering, or the wooden pallets behind the grocery store all have the potential to become beautiful, functional elements in your landscape.
Remember that sustainable landscaping is a journey, not a destination.
Start with small projects, learn as you go, and don’t be afraid to experiment. Your garden will evolve into a unique reflection of your creativity and values, all while contributing to a healthier planet.
FAQs
Are there any recycled materials I should avoid using in my garden?
Yes, avoid using materials treated with toxic chemicals, such as railroad ties (which contain creosote) or pressure-treated lumber manufactured before 2004 (which may contain arsenic). Also be cautious with tires in food gardens, as they can leach chemicals over time. For food-growing areas, stick with natural materials like untreated wood, stone, or clay.
How can I make sure my recycled garden doesn’t look like a junkyard?
The key is intentional design and cohesion. Choose a color scheme or theme and stick with it. Group similar materials together rather than scattering different elements randomly. Regular maintenance is also crucial—keep everything clean and in good repair. Finally, incorporate plenty of plants to soften the hardscape elements and create a balanced look.
Where are the best places to find free recycled materials?
Check construction sites and demolition projects (always ask permission first), local recycling centers, online marketplaces like Facebook Marketplace or Freecycle, and businesses that receive shipments on pallets (grocery stores, garden centers, hardware stores). Don’t forget to ask friends and neighbors who might be renovating or cleaning out their garages—one person’s trash is truly another’s garden treasure!