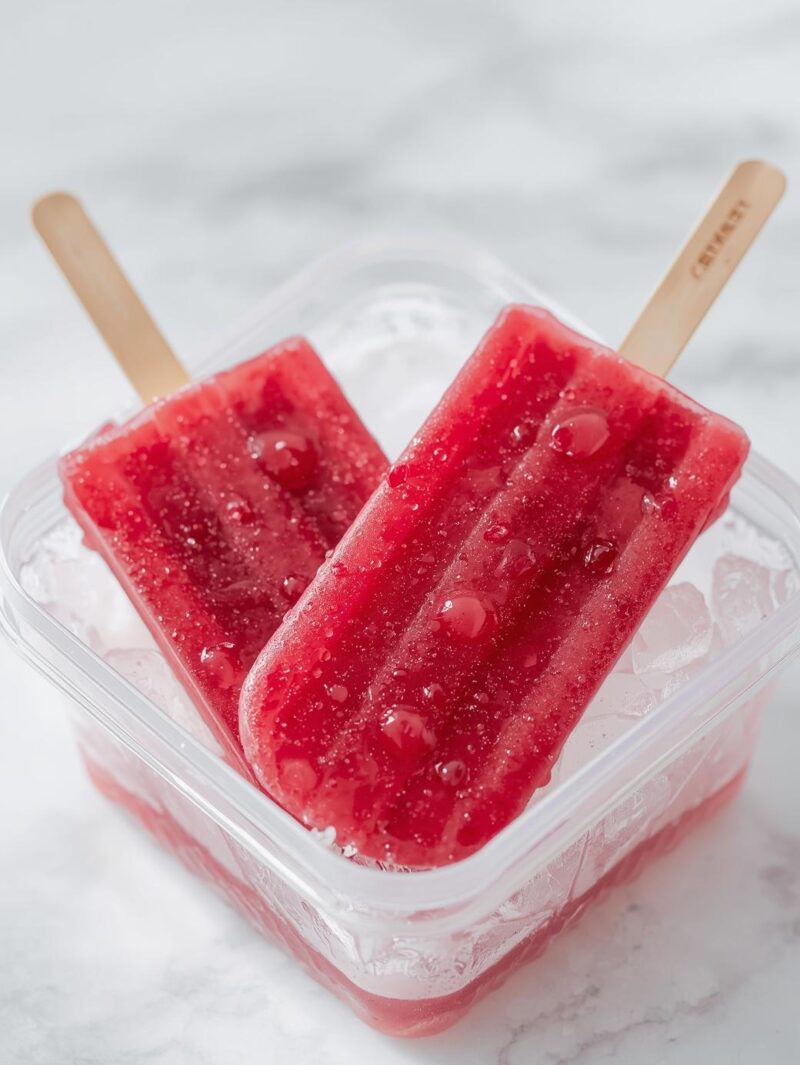
Looking for a cool summer treat? Try these cherry popsicles.
They are perfect for hot sunny days. Made with fresh cherries and a touch of sweetness, they’re easy to make and super tasty. This recipe captures summer’s essence in a frozen treat.
You will be proud of yourself when you make this cold, juicy popsicle that tastes like a ripe cherry. It’s a delightful experience!
With just a few ingredients, you can make a refreshing dessert for everyone.These popsicles are great for using up extra cherries. Plus, they look amazing when served.
Homemade Cherry Popsicles
Chill out this summer with delightful cherry popsicles.
They capture the season’s spirit perfectly.
These popsicles are not just a refreshing dessert; they embody the joy of summer days spent outdoors.
Making cherry popsicles is a simple process.
It’s fun for people of all ages.
With fresh cherries at the forefront, these frozen delights showcase the natural sweetness and vibrant color of the fruit.
The mix of tart and sweet flavors is sure to bring a smile on a hot, sunny day.
Ingredients
To make these cherry popsicles, you need just a few things.
You will need fresh cherries, sugar, and water or cherry juice.
Don’t forget a bit of lemon juice to balance the sweetness.
This mix lets you adjust the popsicles to your liking.
You can make them sweeter or a bit tart, depending on what you prefer.
Getting these ingredients is easy and fun.
It makes your kitchen a place of freshness and flavor.
The bright red cherries blend into a vibrant mix. This mix promises a burst of fruity goodness in every bite.
Preparing the Popsicle Mixture
Start by washing and pitting the cherries, then halving them to release their juicy essence.
This simple step brings out the fruit’s flavor and enhances the popsicle’s texture.
Next, blend the halved cherries together with sugar, water or cherry juice, and lemon juice until smooth.
This mixture is not just refreshing but also a visual delight with its rich color.
Once prepared, it’s ready to be poured into molds, setting the stage for your soon-to-be favorite summer treat.
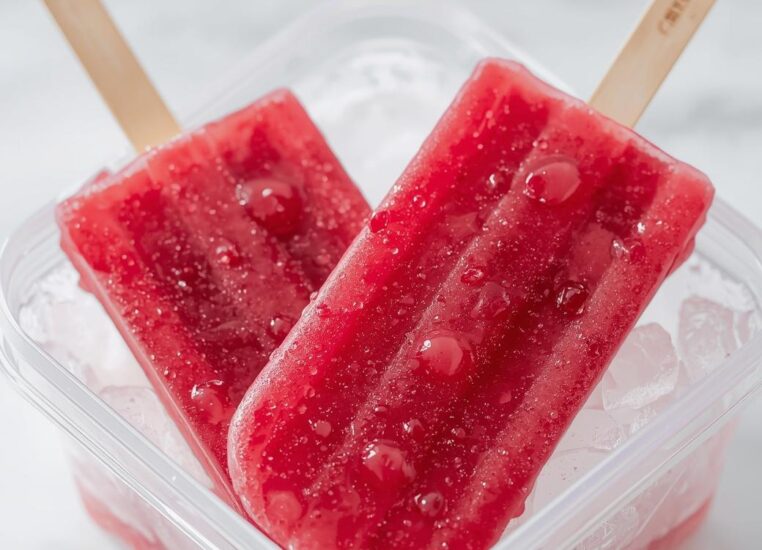
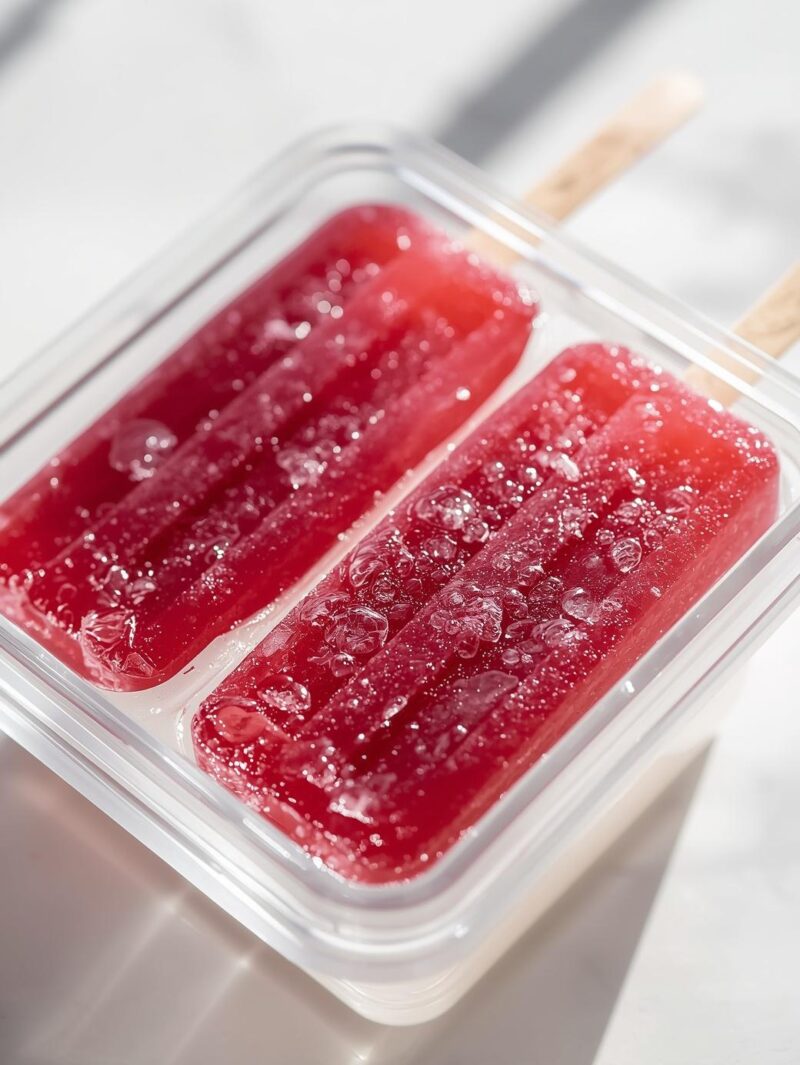
Freezing for Perfection
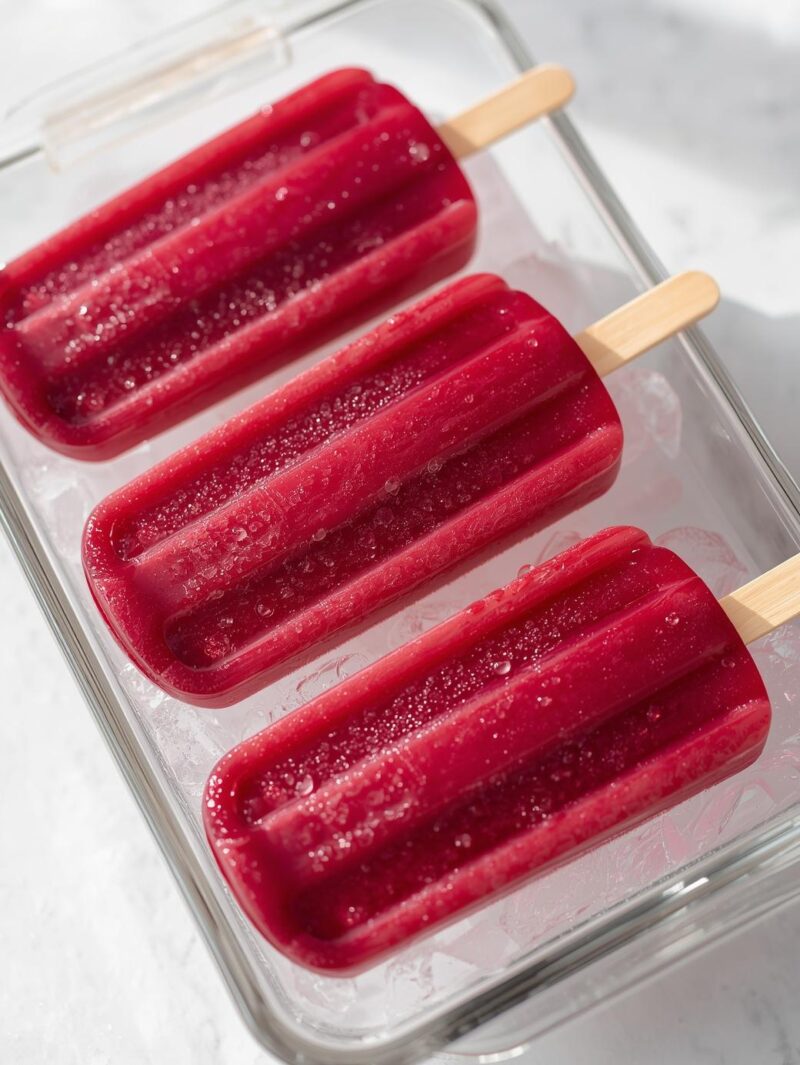
Pour the cherry mixture into popsicle molds, ensuring to leave a little room at the top for expansion during freezing. This small detail can make a significant difference in the final popsicle’s texture.
Insert popsicle sticks into the center of each mold and place them in the freezer for at least 4-6 hours.
This waiting period is crucial, allowing the popsicles to solidify and achieve that perfect icy texture.
The anticipation builds as you imagine the refreshing bites to come!
Serving Your Cherry Popsicles
Once fully frozen, removing the popsicles from their molds can be done easily by running warm water over the outside for a few seconds.
This method helps release them without any fuss.
Serve these cherry popsicles immediately for a delightful treat or store them in a freezer bag for later enjoyment.
Their vibrant color and refreshing taste make them an ideal dessert for gatherings, picnics, or simply a moment of indulgence on a sunny day.
The Joy of Cherry Popsicles
These cherry popsicles are more than just a frozen dessert; they represent the essence of summer and the joy of fresh fruit.
Each bite is a reminder of sun-soaked days and the carefree spirit of the outdoors.
Whether you’re a cherry lover or just seeking a refreshing treat, this cherry popsicle recipe is sure to delight. you
Don’t miss out on the chance to create a batch and share it with friends and family; it’s a wonderful way to celebrate the season!
Homemade Cherry Popsicles Recipe
Ingredients
- 2 cups fresh cherries, pitted and halved
- 1/2 cup sugar (adjust to taste)
- 1 cup water or cherry juice
- 1 tablespoon lemon juice
Instructions
- Prepare the Cherries: Wash and pit the cherries, then halve them. Set aside.
- Make the Cherry Mixture: In a blender, combine the halved cherries, sugar, water (or cherry juice), and lemon juice. Blend until smooth.
- Pour into Molds: Pour the cherry mixture into popsicle molds, leaving a little space at the top for expansion.
- Insert Sticks: Place popsicle sticks in the center of each mold and freeze for at least 4-6 hours or until completely solid.
- Remove and Enjoy: To remove the popsicles, run warm water over the outside of the molds for a few seconds. Gently pull the popsicles out and serve immediately or store in a freezer bag.
Cook and Prep Times
- Prep Time: 15 minutes
- Freeze Time: 6 hours
- Total Time: 6 hours 15 minutes
Nutrition Information
- Servings: 6 popsicles
- Calories: 70kcal
- Fat: 0g
- Protein: 0g
- Carbohydrates: 17g
Recipe Tables
Ingredients
| Ingredient | Quantity |
|---|---|
| Fresh cherries | 2 cups (pitted & halved) |
| Sugar | 1/2 cup (adjust to taste) |
| Water or cherry juice | 1 cup |
| Lemon juice | 1 tablespoon |
Instructions
| Step | Details |
|---|---|
| Prepare the Cherries | Wash, pit, and halve the cherries. |
| Make the Cherry Mixture | Blend cherries, sugar, water (or cherry juice), and lemon juice until smooth. |
| Pour into Molds | Pour the mixture into popsicle molds, leaving space at the top. |
| Insert Sticks | Place popsicle sticks in the center of each mold. |
| Freeze | Freeze for 4-6 hours or until solid. |
| Remove and Enjoy | Run warm water over the molds to release the popsicles. Serve immediately. |
Nutrition Information
| Nutrient | Per Serving (1 popsicle) |
|---|---|
| Calories | 70 kcal |
| Fat | 0g |
| Protein | 0g |
| Carbohydrates | 17g |
Note
These homemade cherry popsicles are the perfect summer treat.
They offer a refreshing and fruity escape from the heat.
Their vibrant color, natural sweetness, and tangy undertones make them a delightful way to enjoy the season.
Whether you’re hosting a summer gathering, looking for a healthy snack, or craving a cool dessert, these popsicles are ideal.
They’re incredibly easy to make with just a handful of ingredients.
So, grab your popsicle molds, whip up a batch, and savor the taste of summer in every bite!
Share this recipe with your friends and on social media. I would love to hear your feedback in the comments section. Enjoy. 🙂