

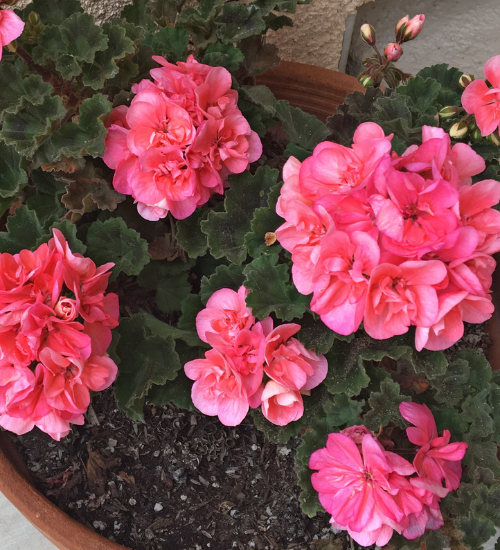
Geraniums are among the most satisfying flowering plants to propagate. A healthy plant can provide several cuttings, and each successful cutting can become a new flowering plant for a container, windowsill, porch, or garden bed.
If you are learning how to propagate geraniums from cuttings, the process is easier than many beginners expect. You need a healthy parent plant, clean scissors, a small container, and a light rooting medium.
The botanical name for common garden geraniums is Pelargonium. They are not the same plants as hardy cranesbill geraniums, which are usually propagated by division or seed. This guide focuses on the tender flowering pelargoniums commonly grown in containers and as annual bedding plants.
Geraniums are widely regarded as easy to propagate from stem cuttings. Extension guidance recommends using healthy stem sections and a lightweight medium such as peat, sand, perlite, or vermiculite. Growing geraniums as annual flowers in Minnesota
When to Take Geranium Cuttings
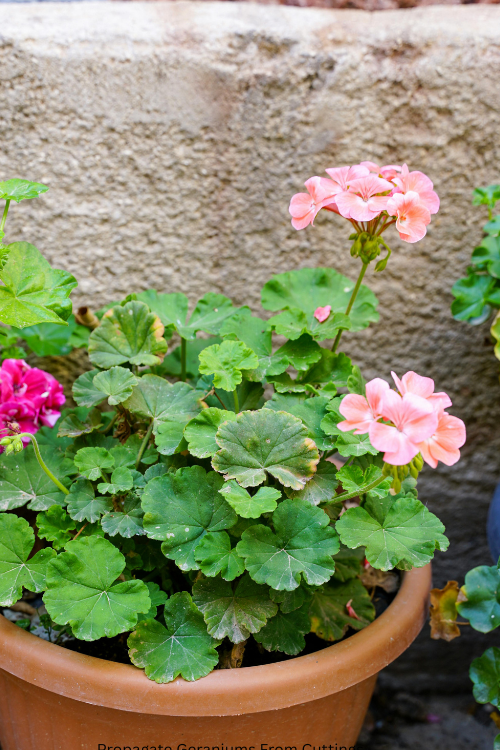
How to Propagate Geraniums From Cuttings
The best time to take cuttings is when the parent plant is actively growing. In many climates, late spring through summer works well. Cuttings can also be taken indoors when the plant has access to good light.
Choose a time when:
- The parent plant is healthy.
- New growth is firm but not extremely soft.
- The plant is well hydrated.
- Temperatures are mild.
- You can provide bright, indirect light.
Avoid taking cuttings from a plant that is wilted, diseased, heavily infested, or recently exposed to severe heat.
Water the parent plant a day before taking cuttings. A hydrated plant usually provides stronger material.
What You Need
Gather:
- Clean pruning shears or a sharp knife
- A healthy geranium
- Small pots or cell trays
- Fresh rooting mix
- A clear plastic bag or humidity cover
- A label
- Water
- Optional rooting hormone
A simple rooting mix can contain perlite, vermiculite, coarse sand, or a seed-starting mix. The medium should hold the cutting upright while allowing air around the developing roots.
Avoid using heavy garden soil. It can stay too wet around a small cutting and may contain organisms that encourage rot.
Choose the Right Stem
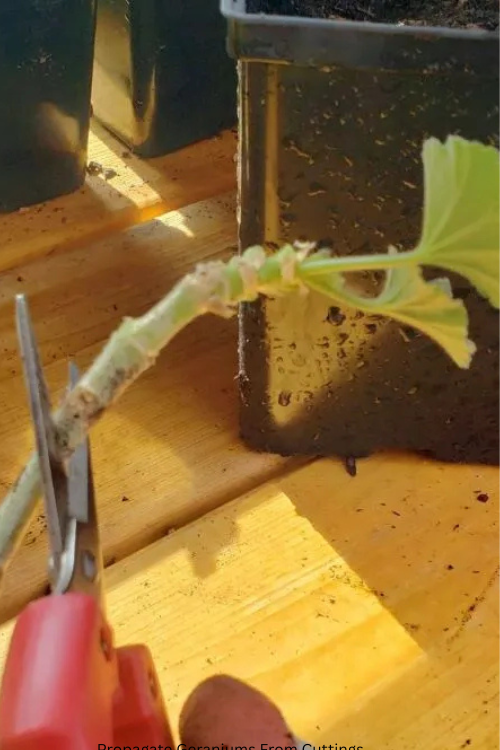
Select a healthy stem with active growth near the tip. A cutting about 3 to 4 inches long is a practical size.
Look for:
- A firm, green stem
- Several healthy leaves
- No signs of insects or disease
- At least one or two nodes
- No flower head at the tip
A node is the point where a leaf joins the stem. Roots can form from this area, so at least one node should be placed below the surface when using a rooting medium.
Avoid stems that are:
- Soft and floppy
- Completely woody
- Blackened
- Damaged
- Covered in pests
- Carrying open flowers
How to Propagate Geraniums From Cuttings in Soil
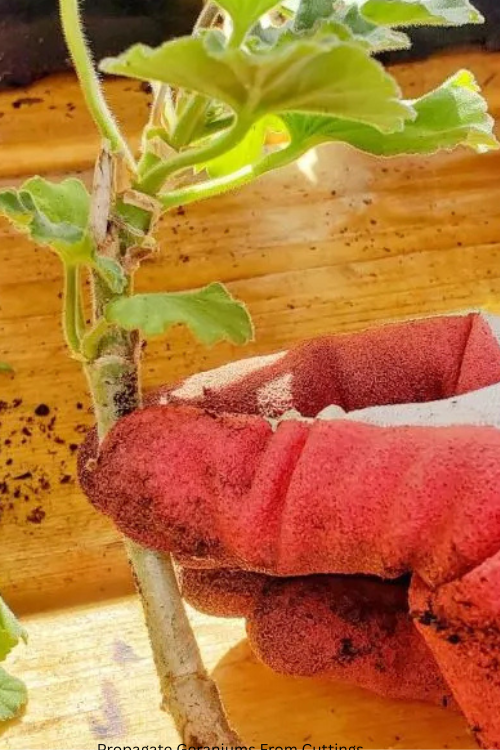
Follow these steps:
- Fill a small pot with lightly moistened rooting mix.
- Make sure the container has drainage holes.
- Cut a 3- to 4-inch stem just below a node.
- Remove the lower leaves.
- Remove flower buds or blooms.
- Leave one or two leaves near the top.
- Dip the base in rooting hormone if desired.
- Make a hole in the rooting mix.
- Insert the lower node into the hole.
- Firm the mix gently around the stem.
- Place the pot in bright, indirect light.
- Keep the mix lightly moist, never saturated.
Removing flowers matters because blooms consume energy. A cutting without flowers can direct more energy toward forming roots.
Do not bury all the leaves. Leaves covered by moist mix may rot quickly.
Should You Use Rooting Hormone?
Rooting hormone is optional. Geraniums can root without it under suitable conditions.
If you use rooting hormone:
- Dip only the lower portion of the cutting.
- Shake off excess powder.
- Do not return unused powder to the original container.
- Keep the product away from children and pets.
- Follow the label directions.
Good cutting material, clean tools, proper moisture, and bright indirect light are usually more important than rooting hormone.
Rooting Geranium Cuttings in Water
Water propagation is easy to observe and can be useful for beginners.
To root in water:
- Take a healthy cutting.
- Remove lower leaves.
- Place the stem in a clean glass.
- Keep at least one node below the water.
- Keep leaves above the waterline.
- Place the glass in bright, filtered light.
- Change the water regularly.
- Transfer the cutting once roots are established.
The water should remain fresh. If it becomes cloudy or smells unpleasant, rinse the glass and replace the water.
Water-grown roots can be more delicate than roots formed directly in a potting medium. When transferring the cutting, handle the roots gently and keep the new soil evenly moist while the plant adapts.
Light and Temperature
Place cuttings in bright, indirect light. Direct midday sunlight can overheat the cutting and cause excessive water loss before roots form.
A warm room is generally helpful, but excessive heat can encourage wilting and rot. Avoid placing cuttings directly above a radiator, heating vent, or hot appliance.
The cutting should receive enough light to remain firm and green. If it stretches dramatically, move it closer to a bright window or provide suitable supplemental light.
Humidity Without Excess Moisture
A loose plastic bag over the pot can increase humidity, but it should not touch the leaves. Leave some ventilation so condensation does not remain excessive.
High humidity is not a substitute for healthy roots. A cutting sealed in a wet, poorly ventilated container may rot.
Open the cover periodically and inspect the stem. If the cutting remains firm, green, and upright, conditions are probably reasonable.
How Long Do Geranium Cuttings Take to Root?
Rooting time depends on temperature, light, plant health, and the cutting method. Some cuttings show roots within a couple of weeks, while others take longer.
Do not pull on the cutting every few days to check for roots. This can damage developing root initials.
Instead, look for signs such as:
- New leaf growth
- A firm, upright cutting
- Resistance when gently tugged
- Roots visible through drainage holes
- The cutting using water more quickly
Once the cutting has a small but established root system, transplant it into a regular potting mix.
Potting Up Rooted Cuttings

Choose a small container with drainage holes. Fill it with a quality potting mix and plant the rooted cutting at the same depth it occupied in the rooting medium.
Water thoroughly once, then allow excess water to drain. Keep the plant in bright, indirect light for several days before gradually increasing light exposure.
Do not move a newly rooted cutting directly into harsh afternoon sun. Its roots are still limited, and the leaves may lose moisture faster than the plant can replace it.
Common Problems and Solutions
The cutting turns black
A black or mushy stem usually indicates rot. Remove the damaged section and check whether a firm, healthy node remains. If not, discard the cutting and start again with fresh material.
Leaves wilt immediately
Some initial wilting is normal, but severe or continuing wilt may result from excessive leaf area, dry mix, heat, or insufficient humidity. Remove one additional lower leaf if necessary and move the cutting into gentler light.
The leaves turn yellow
Yellowing may result from excess moisture, poor light, or natural stress. Check the rooting mix before watering again.
No roots appear
Make sure the cutting includes a node, the medium is not compacted, and the plant is receiving enough indirect light. Also check whether the parent plant was healthy.
Mold forms on the surface
Mold is often encouraged by excessive moisture and poor air movement. Remove affected surface material, reduce watering, and improve ventilation.
The cutting flowers instead of rooting
Remove the flower or bud. Blooming uses energy that the cutting needs for root development.
How Many Cuttings Should You Take?
Take several cuttings rather than relying on one. Propagation is a biological process, and not every cutting will root successfully.
Do not remove too many stems from a small parent plant. Leave enough healthy foliage for the original geranium to continue growing.
A practical approach is to take two or three cuttings from different healthy stems. Label them with the date so you can monitor progress without disturbing them.
Caring for the New Geranium
Once established, the young plant needs:
- Bright light
- Well-drained potting mix
- Moderate watering
- Good air circulation
- Occasional balanced fertilizer
- A container suited to its root size
Allow the surface of the mix to dry slightly between waterings, especially for plants grown in containers. Avoid keeping the roots constantly wet.
Pinching the growing tip after the plant is established can encourage branching and create a fuller shape. Do not pinch immediately after rooting if the plant is still recovering.
Final Propagation Checklist
Before starting, confirm that:
- The parent geranium is healthy.
- Your scissors are clean and sharp.
- The cutting is 3 to 4 inches long.
- At least one node will be below the rooting medium.
- Lower leaves and flowers are removed.
- The rooting mix drains well.
- Light is bright but indirect.
- Moisture is consistent but not excessive.
- The cutting is checked without being constantly disturbed.
Learning how to propagate geraniums from cuttings lets you create new plants from a favorite parent plant without waiting for seeds. Start with healthy material, keep the cutting clean and lightly moist, and give it time to form roots before moving it into stronger light or a larger pot.
Last modified: October 18, 2026
