I’ve always believed that one of the most authentic ways to experience a culture is through its food.
After spending nearly five years traveling across Asia, I’ve fallen in love with the incredible diversity of flavors, cooking techniques, and cultural traditions that make Asian cuisine so special.
From the fiery street food stalls of Bangkok to the refined teahouses of Kyoto, each dish tells a story about the people who created it.
What I love most about Asian food is how it balances flavors in ways that Western cuisine often doesn’t.
The interplay of sweet, sour, salty, spicy, and umami creates dishes that are complex and deeply satisfying.
However, I know that Asian cooking can sometimes feel intimidating if you’re not familiar with the ingredients or techniques.
That’s why I’ve put together this collection of 15 must-try Asian dishes that you can actually make at home.
Each recipe includes my personal tips, ingredient substitutions for hard-to-find items, and the cultural context that makes these dishes so special.
So grab your wok, sharpen your cleaver, and join me on this culinary journey across Asia!
Jump to Your Favorite Asian Dishes
1. Japanese Ramen: The Soul-Warming Noodle Soup
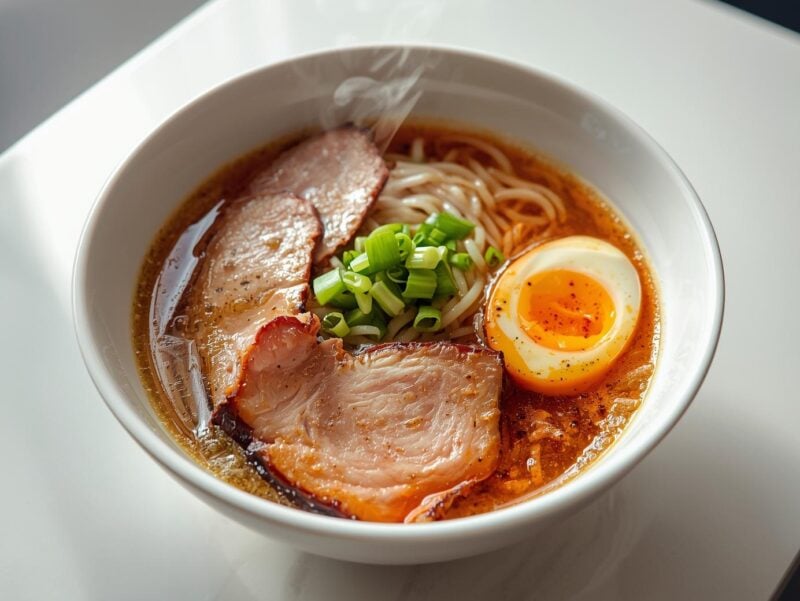
Ramen has become one of the most beloved Asian dishes worldwide, and for good reason.
I still remember my first authentic bowl in a tiny shop in Tokyo the rich, complex broth that had been simmering for hours, the perfectly chewy noodles, and those melt-in-your-mouth slices of chashu pork.
It was a revelation that bore little resemblance to the instant packets I’d eaten in college.
What makes ramen special is the incredible depth of flavor in the broth.
Traditional ramen broths fall into several categories: shoyu (soy sauce), shio (salt), miso (fermented soybean paste), and my personal favorite, tonkotsu (pork bone).
The tonkotsu broth simmers for 12+ hours, extracting every bit of flavor from the pork bones and creating a rich, creamy texture without adding any dairy.
While authentic ramen takes time, I’ve developed this simplified version that captures the essence of a great bowl without requiring an entire day of cooking.
The key is using high-quality ingredients and not rushing the process.
Trust me, the results are worth it!
Homemade Tonkotsu Ramen Recipe
| Ingredients for Broth | Ingredients for Toppings | Ingredients for Serving |
| 2 lbs pork bones (neck bones work well) | 1 lb pork belly | 1 lb fresh ramen noodles (or good quality dried) |
| 1 onion, halved | 4 eggs | 4 green onions, thinly sliced |
| 2 carrots, roughly chopped | ¼ cup soy sauce | 2 sheets nori, cut into quarters |
| 4 cloves garlic, smashed | ¼ cup mirin | Bean sprouts (optional) |
| 1-inch piece ginger, sliced | 2 tbsp sugar | Corn kernels (optional) |
| 2 tbsp sesame oil | 2 cloves garlic, minced | La-yu (Japanese chili oil) |
| ¼ cup soy sauce | 1-inch piece ginger, sliced |
Instructions:
- Start by blanching the pork bones. Add them to a large pot of water, bring to a boil, and cook for 5-10 minutes. Drain and rinse thoroughly under cold water. This removes impurities and results in a cleaner-tasting broth.
- Return the cleaned bones to a large pot with 4 quarts of water. Add onion, carrots, garlic, and ginger. Bring to a boil, then reduce to a simmer.
- Simmer uncovered for at least 4 hours (preferably 6-8 hours), occasionally skimming off any foam that rises to the surface. Add more water if needed to keep the bones submerged.
- While the broth simmers, prepare the chashu pork: Combine soy sauce, mirin, sugar, garlic, and ginger in a small pot. Add the pork belly and bring to a simmer. Cover and cook on low for 2-3 hours until tender.
- For the marinated eggs: Soft boil the eggs (6½ minutes in boiling water), then plunge into ice water. Peel and marinate in some of the chashu cooking liquid for at least 2 hours.
- When the broth is ready, strain through a fine-mesh sieve. Add sesame oil and soy sauce to taste.
- Cook the ramen noodles according to package directions.
- To serve: Place cooked noodles in bowls, ladle hot broth over them, and top with sliced chashu pork, halved marinated eggs, green onions, nori, and any other desired toppings.
The key to great ramen is patience. Don’t rush the broth, and taste as you go. The depth of flavor should develop over time, becoming richer and more complex with each passing hour.
2. Thai Pad Thai: The Perfect Balance of Sweet, Sour, and Savory
Pad Thai might be the most famous Thai dish internationally, and it’s often the first Thai dish many people try.
However, I’ve found that the versions served in many Western restaurants barely resemble the vibrant, complex dish you’ll find at street food stalls throughout Thailand.
Authentic Pad Thai is a masterclass in balance sweet, sour, salty, and umami flavors dancing together in perfect harmony.
What I love about Pad Thai is how the dish represents Thailand’s culinary philosophy.
The tamarind provides sourness, palm sugar adds sweetness, fish sauce contributes saltiness, and dried shrimp brings umami.
The textures are equally important chewy rice noodles, crunchy bean sprouts and peanuts, soft scrambled egg, and tender protein. It’s a complete meal in one dish.
The secret to great Pad Thai is preparing all your ingredients before you start cooking.
Once you heat that wok, the cooking process happens incredibly quickly.
I’ve learned this lesson the hard way after burning my noodles while frantically trying to chop ingredients!
Authentic Pad Thai Recipe
| Ingredients for Sauce | Ingredients for Stir-Fry | Ingredients for Garnish |
| 3 tbsp tamarind paste | 8 oz rice noodles (medium width) | 1 cup bean sprouts |
| 3 tbsp palm sugar (or brown sugar) | 2 tbsp vegetable oil | ¼ cup roasted peanuts, crushed |
| 2 tbsp fish sauce | 2 cloves garlic, minced | 2 green onions, sliced |
| 1 tbsp soy sauce | 8 oz protein (shrimp, chicken, or tofu) | ¼ cup cilantro, chopped |
| 1 tsp sriracha (optional) | 2 eggs, lightly beaten | Lime wedges |
| 2 tbsp preserved radish (optional) | Red chili flakes | |
| 2 tbsp dried shrimp (optional) |
Instructions:
- Soak the rice noodles in warm water for 30 minutes until pliable but still firm. Drain well.
- While the noodles soak, prepare the sauce by combining tamarind paste, palm sugar, fish sauce, soy sauce, and sriracha in a small bowl. Stir until the sugar dissolves.
- Prepare all your stir-fry ingredients and have them ready beside your wok or large skillet.
- Heat oil in a wok over high heat. Add garlic and stir-fry for 10 seconds until fragrant.
- Add your protein and cook until nearly done (about 2 minutes for chicken or tofu, 1 minute for shrimp).
- Push everything to one side of the wok and pour in the beaten eggs. Scramble quickly until just set.
- Add the drained noodles and sauce. Toss everything together, keeping the noodles moving constantly to prevent sticking.
- If using, add preserved radish and dried shrimp. Continue stir-frying until the noodles absorb the sauce and become tender but still chewy (2-3 minutes).
- Toss in half the bean sprouts and cook for another 30 seconds.
- Transfer to serving plates and garnish with remaining bean sprouts, crushed peanuts, green onions, cilantro, and lime wedges.
- Serve immediately with extra chili flakes on the side for those who want more heat.
Tip: Can’t find tamarind paste? Mix 2 tablespoons of lime juice with 1 tablespoon of brown sugar as a substitute. It won’t be exactly the same, but it will give you that essential sour-sweet flavor that defines Pad Thai.
3. Korean Bibimbap: A Colorful Bowl of Balanced Nutrition
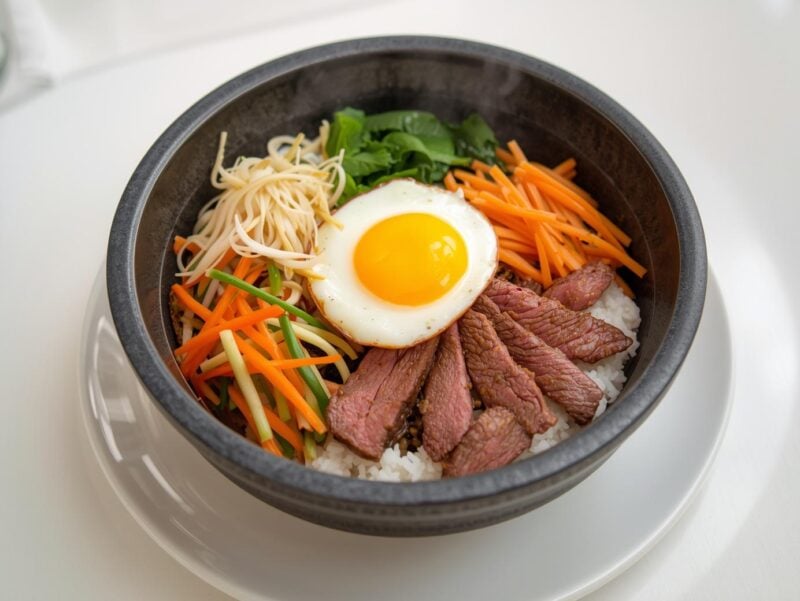
Bibimbap (which literally means “mixed rice”) is the ultimate Korean comfort food and one of my absolute favorite dishes to make at home.
I first tried it during a winter trip to Seoul, where the hot stone bowl (dolsot) kept the dish sizzling throughout the meal, creating delicious crispy rice at the bottom.
What I love about bibimbap is that it’s both beautiful and practical a colorful arrangement of vegetables, protein, and egg over rice that you mix together just before eating.
The beauty of bibimbap is its versatility.
While there are traditional components, you can adapt it based on what vegetables you have available.
The key is creating a balance of colors, textures, and flavors.
Each component is seasoned separately, allowing you to experience distinct flavors that then meld together when mixed with gochujang (Korean chili paste).
Bibimbap is also a great way to use up leftover vegetables and rice.
I often make it at the end of the week as a “clean out the fridge” meal.
The result is always satisfying and nutritionally complete protein, carbs, vegetables, and that wonderful runny egg yolk that coats everything when mixed.
Colorful Bibimbap Recipe
| Rice Base | Protein Options | Vegetable Components | Seasonings |
| 3 cups cooked short-grain rice | ½ lb ground beef or thinly sliced beef | 2 cups spinach, blanched | 4 tbsp gochujang (Korean chili paste) |
| 2 tbsp sesame oil (for crispy bottom) | 2 tbsp soy sauce | 1 cup bean sprouts, blanched | 2 tbsp sesame oil |
| 1 tbsp sugar | 1 carrot, julienned | 2 tbsp toasted sesame seeds | |
| 1 tbsp minced garlic | 1 zucchini, julienned | Salt to taste | |
| 4 eggs | 1 cup mushrooms, sliced | Garlic (minced) for vegetables | |
| ½ cup kimchi |
Instructions:
- Prepare the beef: Mix ground beef with soy sauce, sugar, and minced garlic. Cook in a pan until browned and set aside.
- Prepare the vegetables (each separately):
- Blanch spinach for 30 seconds, drain, squeeze out excess water, and season with 1 tsp sesame oil, pinch of salt, and minced garlic.
- Blanch bean sprouts for 2 minutes, drain, and season with 1 tsp sesame oil and salt.
- Sauté carrots with a pinch of salt until slightly softened.
- Sauté zucchini with a pinch of salt until slightly softened.
- Sauté mushrooms with a pinch of salt until browned.
- If using stone bowls (dolsot): Heat the bowls over medium heat, add 1/2 tbsp sesame oil to each, then add rice, pressing it slightly against the sides.
- If using regular bowls: Simply place warm rice in each bowl.
- Arrange the vegetables and beef on top of the rice in separate sections, creating a colorful display.
- In a separate pan, fry eggs sunny-side up, keeping the yolks runny.
- Place an egg on top of each bibimbap bowl.
- Serve immediately with gochujang on the side. Before eating, add desired amount of gochujang and mix everything together thoroughly.
The beauty of bibimbap lies in its initial presentation – a harmonious arrangement of colors – followed by the chaotic mixing that brings all flavors together. It’s a metaphor for life itself: order and chaos, working together to create something wonderful.
Love These Asian Recipes?
Get my exclusive guide to essential Asian pantry ingredients! I’ll show you exactly what to buy and where to find it, plus how to store everything properly for maximum freshness.
4. Vietnamese Pho: The Aromatic Noodle Soup That Heals

There’s something almost magical about a good bowl of pho.
I’ll never forget my first experience with this iconic Vietnamese dish, sitting on a tiny plastic stool at a street-side stall in Hanoi at 6 AM.
The vendor had been simmering her broth since the previous evening, and the complex aroma of star anise, cinnamon, and beef bones filled the air.
One spoonful, and I understood why people line up every morning for their pho fix.
What makes pho special is the clear but deeply flavored broth.
Unlike many Western soups that rely on thickeners or cream, pho broth gets its richness solely from long-simmered bones and aromatics.
The result is a clean, bright flavor that’s simultaneously light and satisfying.
The fresh herbs and garnishes added at the table bring another dimension, allowing each person to customize their bowl.
While traditional pho takes hours to make, I’ve developed this weeknight-friendly version that captures the essence of a good pho in less time.
The key is charring the onions and ginger before adding them to the broth this simple step adds incredible depth of flavor.
Weeknight Beef Pho Recipe
| Broth Ingredients | For Serving | Garnishes |
| 2 large onions, halved | 8 oz dried rice noodles (banh pho) | 2 cups bean sprouts |
| 4-inch piece ginger, halved lengthwise | 1 lb beef sirloin, very thinly sliced | 1 bunch Thai basil |
| 5 star anise pods | 1 bunch cilantro | |
| 4 whole cloves | 1 bunch mint | |
| 1 cinnamon stick | 2 limes, cut into wedges | |
| 1 tbsp coriander seeds | 2 jalapeños, sliced | |
| 8 cups beef stock | Hoisin sauce | |
| 2 tbsp fish sauce | Sriracha sauce | |
| 1 tbsp sugar |
Instructions:
- Char the onions and ginger: Place onion halves and ginger cut-side down in a dry skillet over medium-high heat. Cook until blackened, about 5 minutes, then flip and char the other side.
- Toast the spices: In a dry skillet, toast star anise, cloves, cinnamon, and coriander seeds until fragrant, about 2-3 minutes.
- Make the broth: In a large pot, combine charred onions, ginger, toasted spices, beef stock, fish sauce, and sugar. Bring to a boil, then reduce heat and simmer, partially covered, for at least 30 minutes (longer if you have time).
- Prepare the noodles: Soak rice noodles in hot water according to package directions until just pliable. Drain and set aside.
- Strain the broth: Remove solids from the broth using a fine-mesh strainer. Return broth to a simmer.
- Prepare garnish plate: Arrange bean sprouts, herbs, lime wedges, and jalapeños on a plate.
- Assemble the pho: Divide noodles among bowls. Top with raw beef slices (they’ll cook in the hot broth). Ladle hot broth over the beef and noodles.
- Serve immediately: Let each person add their desired garnishes, hoisin, and sriracha to taste.
Pro Tip: For easier slicing, freeze the beef sirloin for about 30 minutes before cutting. This firms it up just enough to allow for paper-thin slices, which is essential for the beef to cook properly in the hot broth.
5. Chinese Dumplings: Delicate Parcels of Joy
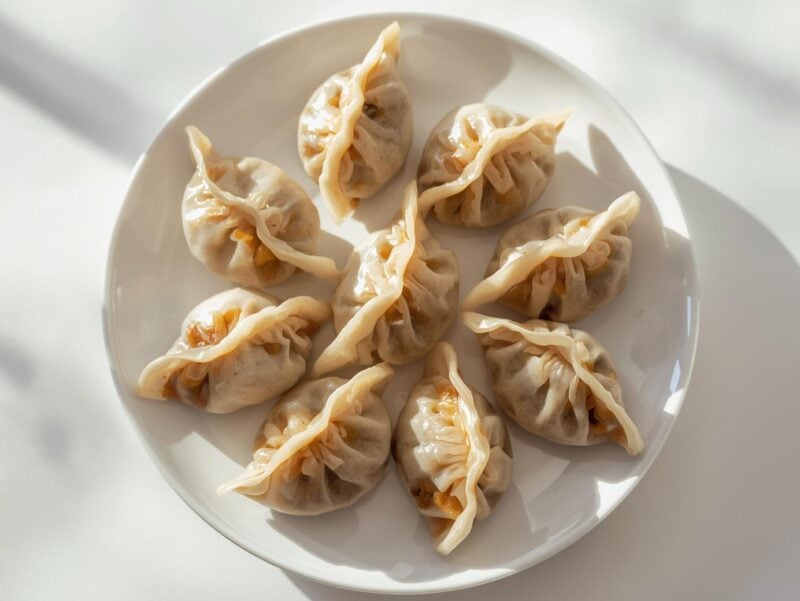
Making dumplings from scratch might seem intimidating, but I’ve found it to be one of the most rewarding cooking experiences.
There’s something deeply satisfying about the rhythmic process of filling and folding each dumpling by hand.
In many Chinese families, dumpling making is a communal activity, with everyone gathered around the table, chatting and folding together.
I’ve adopted this tradition with my friends, hosting dumpling parties where everyone helps prepare the meal.
What I love about dumplings is their versatility.
The filling possibilities are endless pork and chive is traditional, but you can use chicken, beef, shrimp, or make them vegetarian with mushrooms and cabbage.
You can also cook them different ways: boiled (shuijiao), steamed (zhengjiao), or my personal favorite, pan-fried (guotie, also known as potstickers).
The key to great dumplings is the balance of flavors and textures in the filling.
You want it to be juicy but not watery, flavorful but not overwhelming.
The wrapper should be thin enough to cook quickly but sturdy enough not to break.
It takes practice, but even imperfect dumplings are delicious!
Classic Pork and Chive Dumplings Recipe
| Wrapper Ingredients | Filling Ingredients | Dipping Sauce Ingredients |
| 2 cups all-purpose flour | 1 lb ground pork | ¼ cup soy sauce |
| ¾ cup warm water | 1 cup Chinese chives, finely chopped | 2 tbsp rice vinegar |
| ½ tsp salt | 3 green onions, finely chopped | 1 tbsp chili oil |
| 2 cloves garlic, minced | 1 tsp sesame oil | |
| 1-inch piece ginger, grated | 1 tsp sugar | |
| 2 tbsp soy sauce | 1 green onion, finely sliced | |
| 1 tbsp sesame oil | ||
| 1 tbsp Shaoxing wine (or dry sherry) | ||
| ½ tsp white pepper | ||
| 1 tsp salt |
Instructions:
- Make the dough: Mix flour and salt in a bowl. Slowly add warm water while stirring until a dough forms. Knead for 5 minutes until smooth. Cover with a damp cloth and rest for 30 minutes.
- Prepare the filling: Combine all filling ingredients in a large bowl. Mix in one direction until well combined and slightly sticky. Cover and refrigerate for 30 minutes to allow flavors to meld.
- Make the dipping sauce: Combine all sauce ingredients in a small bowl and set aside.
- Roll the wrappers: Divide the dough into 4 pieces. Working with one piece at a time (keep others covered), roll into a long rope and cut into 8-10 pieces. Roll each piece into a 3-inch circle, keeping the center slightly thicker than the edges.
- Fill the dumplings: Place 1 tablespoon of filling in the center of each wrapper. Fold in half and pinch the center together. Working from the center outward, create pleats along the edge to seal.
- Cook the dumplings (choose one method):
- For potstickers (pan-fried): Heat 2 tablespoons oil in a non-stick pan. Arrange dumplings in a single layer and cook until bottoms are golden (2-3 minutes). Add ⅓ cup water, cover immediately, and cook until water evaporates (about 5 minutes).
- For boiled dumplings: Bring a large pot of water to a boil. Add dumplings and stir gently to prevent sticking. When water returns to a boil, add ½ cup cold water. Repeat this process twice more. When dumplings float to the surface, they’re done.
- For steamed dumplings: Line a steamer with cabbage leaves or parchment paper. Arrange dumplings with space between them. Steam over boiling water for 10 minutes.
- Serve immediately with dipping sauce.

6. Indian Butter Chicken: Creamy Tomato Curry Perfection
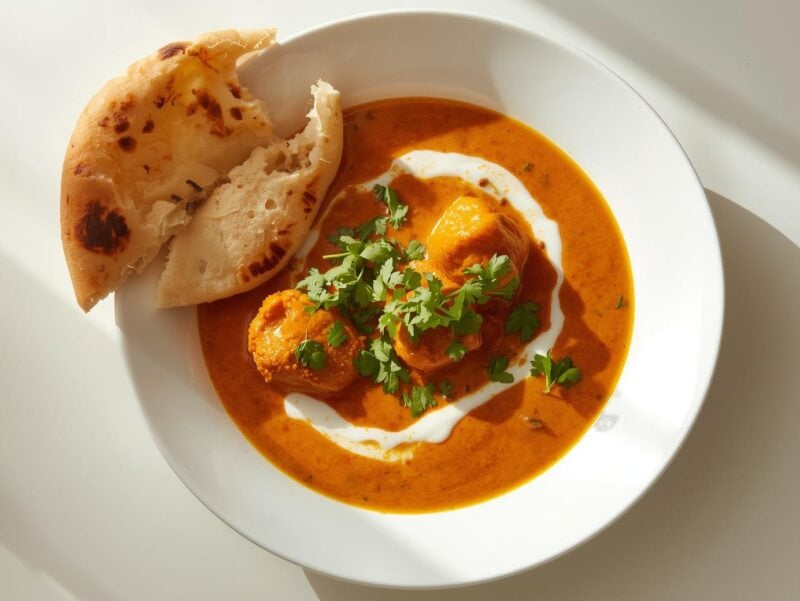
Butter chicken (murgh makhani) is often the gateway dish that introduces people to the wonders of Indian cuisine, and it’s easy to see why.
The combination of tender chicken in a velvety, aromatic tomato-cream sauce is irresistible.
I still remember the first time I made this dish at home the incredible aroma of spices filled my kitchen, and I couldn’t believe I’d created something that tasted like it came from my favorite Indian restaurant.
What many people don’t know is that butter chicken has a fascinating origin story.
It was reportedly created in the 1950s at the Moti Mahal restaurant in Delhi when the chef mixed leftover tandoori chicken with a buttery tomato gravy to keep it from drying out.
This improvised solution became one of India’s most beloved culinary exports.
The key to great butter chicken is layering flavors. First, marinating the chicken in yogurt and spices tenderizes it and infuses it with flavor.
Then, building a complex sauce with multiple spices, each added at the right time.
Finally, finishing with cream and butter creates that signature rich texture.
It’s a process that rewards patience, but I promise the results are worth it.
Restaurant-Style Butter Chicken Recipe
| Chicken Marinade | Sauce Ingredients | For Finishing |
| 2 lbs boneless chicken thighs, cut into chunks | 2 tbsp ghee (or butter) | ½ cup heavy cream |
| 1 cup plain yogurt | 1 large onion, finely chopped | 2 tbsp butter |
| 2 tbsp lemon juice | 2 tbsp ginger-garlic paste | 2 tbsp finely chopped cilantro |
| 2 tsp turmeric | 1 cinnamon stick | 1 tbsp dried fenugreek leaves (kasoori methi) |
| 2 tsp garam masala | 4 green cardamom pods | |
| 2 tsp cumin | 2 tsp cumin seeds | |
| 2 tsp red chili powder | 14 oz canned tomato puree | |
| 2 tbsp ginger-garlic paste | 1 tbsp red chili powder | |
| 1 tsp salt | 1 tsp garam masala | |
| 1 tbsp sugar | ||
| Salt to taste |
Instructions:
- Marinate the chicken: Combine all marinade ingredients in a bowl. Add chicken, coat thoroughly, cover, and refrigerate for at least 4 hours (overnight is better).
- Cook the marinated chicken: Preheat oven to 425°F. Place marinated chicken on a baking sheet and cook for 15 minutes until slightly charred but not fully cooked through. Alternatively, you can grill the chicken or cook it in a pan.
- Prepare the sauce: Heat ghee in a large pot over medium heat. Add cumin seeds and let them sizzle for 30 seconds. Add cinnamon stick and cardamom pods, stir for another 30 seconds.
- Add onions and sauté until golden brown, about 8-10 minutes. Add ginger-garlic paste and cook for 2 minutes until fragrant.
- Add tomato puree, red chili powder, salt, and sugar. Cook for 10-15 minutes until the sauce thickens and oil begins to separate at the edges.
- Add the partially cooked chicken pieces to the sauce. Simmer for 10-15 minutes until chicken is fully cooked and tender.
- Finish the dish: Reduce heat to low. Stir in heavy cream, butter, and crushed fenugreek leaves. Simmer for 5 minutes.
- Taste and adjust seasoning. Garnish with cilantro and a swirl of cream.
- Serve hot with naan bread and basmati rice.
Authentic Touch: Dried fenugreek leaves (kasoori methi) might seem like an optional ingredient, but they add that distinctive restaurant-style flavor that’s hard to replicate. You can find them at Indian grocery stores or online. Crush them between your palms before adding to release their aroma.
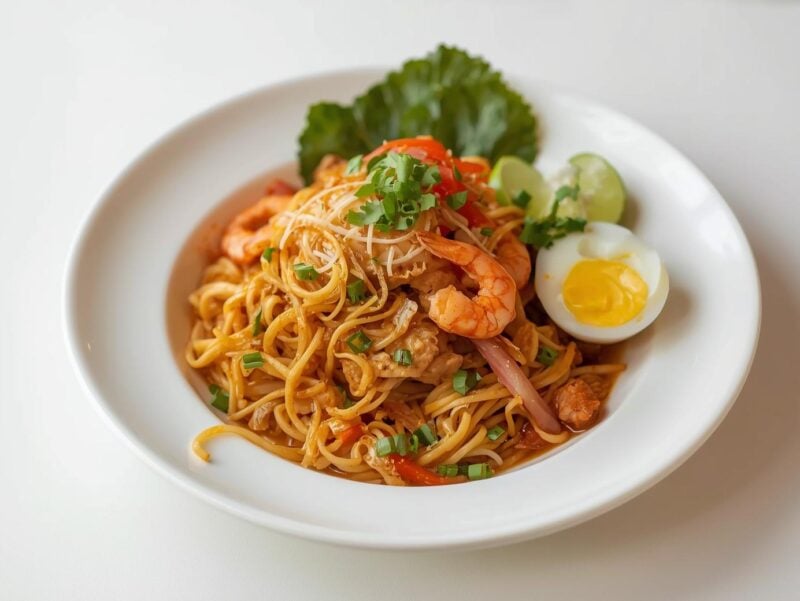
7. Malaysian Laksa: A Spicy Coconut Noodle Soup That Packs a Punch
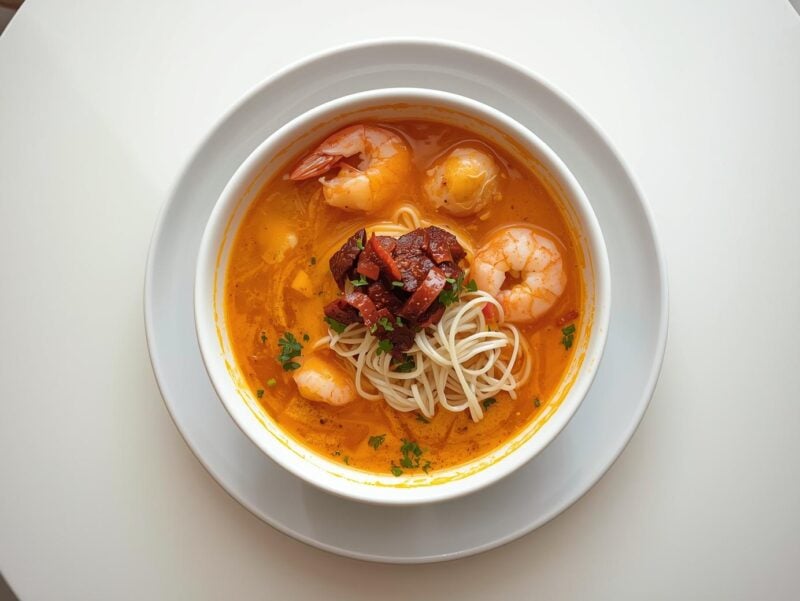
Laksa is one of those dishes that hits every flavor note possible spicy, sour, sweet, savory, and aromatic all at once.
I first encountered this Malaysian specialty during a rainy afternoon in Penang, and it was love at first spoonful.
The combination of the rich coconut broth, chewy noodles, and fresh seafood created a symphony of flavors that I couldn’t get enough of.
What makes laksa special is its fusion nature.
It represents the blending of Chinese and Malay culinary traditions, with influences from other Southeast Asian cuisines as well.
There are many regional variations, but the two main types are curry laksa (with coconut milk) and asam laksa (with a sour tamarind base).
I’m partial to curry laksa for its luxurious richness, though both are incredible.
The heart of a good laksa is its spice paste, or rempah.
This aromatic blend of lemongrass, galangal, chilies, and other ingredients forms the foundation of the soup’s flavor.
While making rempah from scratch takes some effort, the depth of flavor it creates is unmatched by any shortcut. However, I’ve included a time-saving option in the recipe for busy weeknights.
Curry Laksa with Prawns Recipe
| Laksa Paste Ingredients | Soup Ingredients | For Serving |
| 6 dried red chilies, soaked and deseeded | 2 tbsp vegetable oil | 1 lb rice vermicelli noodles |
| 3 fresh red chilies | 2 cups chicken stock | ½ lb prawns, peeled and deveined |
| 3 stalks lemongrass (white part only) | 2 cups water | 8 tofu puffs, halved |
| 1-inch piece galangal | 2 cans (14 oz each) coconut milk | 2 cups bean sprouts |
| 1-inch piece ginger | 2 tbsp fish sauce | ½ cup Vietnamese mint leaves |
| 5 candlenuts (or macadamia nuts) | 1 tbsp palm sugar (or brown sugar) | ½ cup cilantro leaves |
| 5 shallots | Salt to taste | 2 limes, cut into wedges |
| 5 garlic cloves | Sambal oelek (chili paste) | |
| 2 tsp ground coriander | ||
| 1 tsp ground turmeric | ||
| 1 tsp shrimp paste (belacan) |
Instructions:
- Make the laksa paste: Combine all paste ingredients in a food processor or blender. Process until a smooth paste forms. (Time-saving option: Use 4-5 tablespoons of store-bought laksa paste instead.)
- Cook the paste: Heat oil in a large pot over medium heat. Add the laksa paste and cook, stirring constantly, for 10-15 minutes until fragrant and the oil separates.
- Make the soup: Add chicken stock and water to the pot. Bring to a boil, then reduce heat and simmer for 10 minutes.
- Add coconut milk, fish sauce, and palm sugar. Simmer for another 5 minutes. Taste and adjust seasoning with salt if needed.
- Prepare the noodles: Cook rice vermicelli according to package instructions. Drain and rinse with cold water.
- Cook the prawns: Add prawns and tofu puffs to the simmering broth. Cook for 2-3 minutes until prawns are pink and cooked through.
- Assemble the laksa: Divide noodles among serving bowls. Ladle the hot soup over the noodles, making sure each bowl gets prawns and tofu puffs.
- Garnish with bean sprouts, herbs, and lime wedges. Serve with sambal oelek on the side for those who want extra heat.
Laksa is the perfect representation of Malaysia itself – a harmonious blend of different cultures and traditions, coming together to create something greater than the sum of its parts.
8. Taiwanese Beef Noodle Soup: A Bowl of Comfort
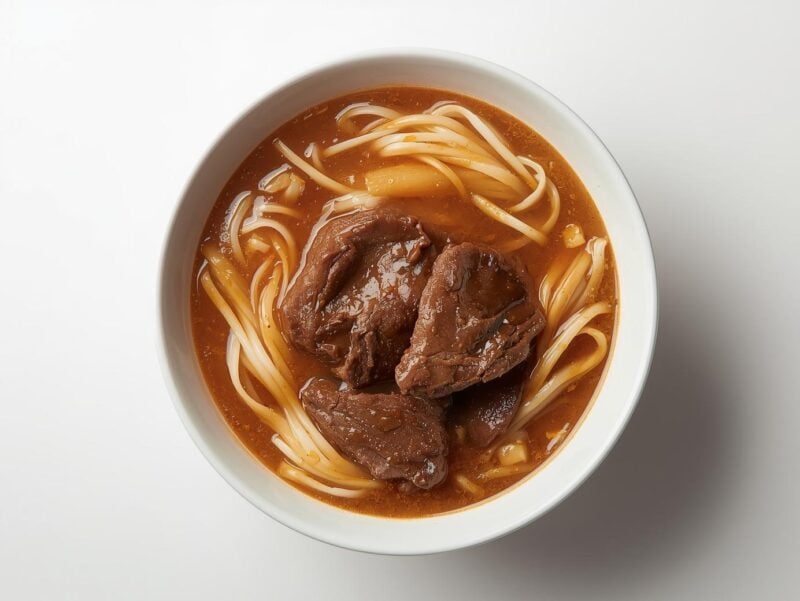
Taiwanese beef noodle soup holds a special place in my heart.
During a winter trip to Taipei, I found myself returning to the same small noodle shop every day, drawn by the rich, aromatic broth and tender chunks of beef that seemed to melt in my mouth.
The owner eventually recognized me and would nod in approval as I slurped down every last drop of the soup, a sign of appreciation in many Asian cultures.
What makes Taiwanese beef noodle soup (牛肉麵, niú ròu miàn) unique is its depth of flavor.
The broth is simmered for hours with a combination of soy sauce, tomatoes, and aromatic spices like star anise and cinnamon, creating a complex flavor that’s both savory and slightly sweet.
The beef, typically shank or brisket, is braised until it’s fork-tender, absorbing all those wonderful flavors.
This dish is so beloved in Taiwan that there’s an annual festival dedicated to it in Taipei, where restaurants compete for the title of best beef noodle soup.
While my version might not win any competitions, it captures the essence of this comforting dish that has become Taiwan’s unofficial national food.
Taiwanese Beef Noodle Soup Recipe
| Beef and Marinade | Broth Ingredients | For Serving |
| 2 lbs beef shank or brisket, cut into 2-inch chunks | 2 tbsp vegetable oil | 1 lb wheat noodles (thick) |
| 2 tbsp soy sauce | 1 onion, roughly chopped | 4 baby bok choy, halved |
| 1 tbsp Shaoxing wine | 4 cloves garlic, smashed | 4 green onions, sliced |
| 1 tsp five-spice powder | 2-inch piece ginger, sliced | Pickled mustard greens, chopped |
| 2 tomatoes, quartered | Chili oil | |
| 2 star anise pods | ||
| 1 cinnamon stick | ||
| 1 tbsp Sichuan peppercorns | ||
| ¼ cup soy sauce | ||
| 2 tbsp doubanjiang (spicy bean paste) | ||
| 2 tbsp rock sugar (or brown sugar) | ||
| 8 cups water | ||
| Salt to taste |
Instructions:
- Marinate the beef: Combine beef chunks with soy sauce, Shaoxing wine, and five-spice powder. Mix well and let marinate for 30 minutes.
- Blanch the beef: Bring a large pot of water to a boil. Add beef chunks and boil for 5 minutes. Drain and rinse under cold water to remove impurities.
- Prepare the broth: Heat oil in a large pot over medium-high heat. Add onion, garlic, and ginger. Sauté until fragrant, about 2 minutes.
- Add tomatoes, star anise, cinnamon stick, and Sichuan peppercorns. Cook for another 2 minutes.
- Add blanched beef, soy sauce, doubanjiang, rock sugar, and water. Bring to a boil, then reduce heat to low.
- Simmer, partially covered, for 2-3 hours until beef is tender. Skim off any foam that rises to the surface.
- Taste and adjust seasoning with salt if needed.
- Cook the noodles: Bring a large pot of water to a boil. Cook noodles according to package instructions. In the last minute of cooking, add bok choy to blanch. Drain well.
- Assemble the soup: Divide noodles and bok choy among serving bowls. Add beef chunks and ladle hot broth over everything.
- Garnish with green onions and pickled mustard greens. Serve with chili oil on the side.
Regional Variation: There are two main styles of Taiwanese beef noodle soup: the clear broth (清燉, qīng dùn) and the red braised (紅燒, hóng shāo). This recipe is for the more common red braised version, which gets its color from soy sauce and doubanjiang. For the clear version, omit the soy sauce and doubanjiang, and use more ginger and scallions.
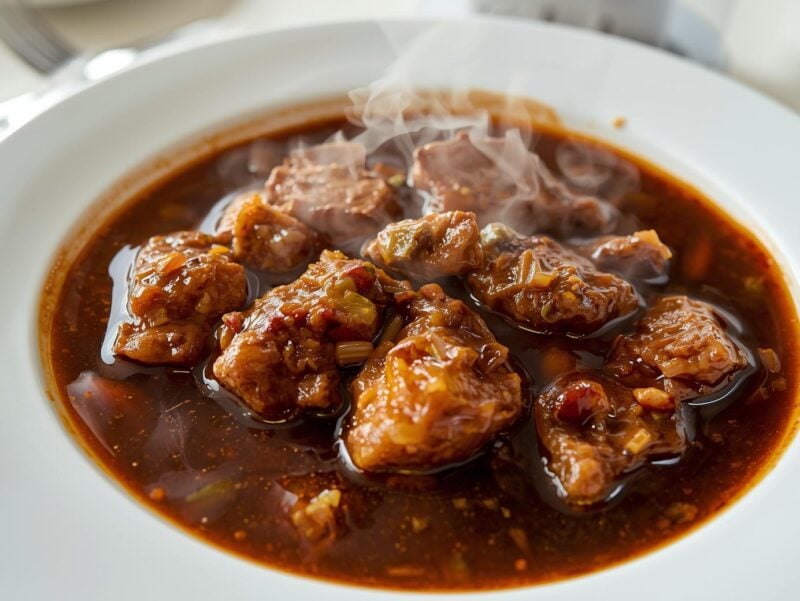
9. Indonesian Rendang: The World’s Most Delicious Dish

When CNN polled readers about the world’s most delicious foods, Indonesian rendang claimed the top spot and after making it at home, I completely understand why.
This incredible beef dish from West Sumatra is unlike any other curry I’ve tried.
The meat is slowly simmered in coconut milk and a blend of aromatic spices until the liquid completely evaporates, leaving behind intensely flavored, tender beef with a concentrated sauce that clings to each piece.
What makes rendang special is the cooking process.
It starts as a soupy curry but transforms over hours of cooking as the coconut milk reduces and the meat absorbs the flavors.
The final stage, when the remaining liquid caramelizes around the meat, creates complex flavors that simply can’t be rushed.
In fact, rendang tastes even better the next day, after the spices have had time to meld.
Traditional rendang uses water buffalo meat, but beef (particularly chuck or brisket) works perfectly.
The key is choosing a cut with enough fat and connective tissue to withstand the long cooking time.
While authentic rendang requires some specialty ingredients, I’ve included substitutions that make this accessible without sacrificing too much flavor.
Beef Rendang Recipe
| Spice Paste Ingredients | Main Ingredients | Aromatics |
| 8 shallots (or 2 medium onions) | 2 lbs beef chuck, cut into 2-inch cubes | 3 kaffir lime leaves |
| 5 cloves garlic | 2 cans (14 oz each) coconut milk | 2 stalks lemongrass, bruised and tied in knots |
| 1-inch piece ginger | 1 cup water | 1 turmeric leaf (optional) |
| 1-inch piece galangal (or extra ginger) | 2 tbsp tamarind paste | 2 tbsp toasted coconut (kerisik) |
| 5 red chilies (adjust to taste) | 2 tbsp palm sugar (or brown sugar) | |
| 2 tsp ground coriander | Salt to taste | |
| 1 tsp ground cumin | ||
| 1 tsp ground turmeric | ||
| ½ tsp ground cinnamon |
Instructions:
- Make the spice paste: Combine all spice paste ingredients in a food processor. Blend until smooth, adding a little water if needed to help it process.
- Heat a large, heavy-bottomed pot or Dutch oven over medium heat. Add the spice paste (no oil needed) and cook, stirring constantly, for 5-7 minutes until fragrant and the raw smell disappears.
- Add beef cubes and stir to coat with the spice paste. Cook for 5 minutes, stirring occasionally.
- Add coconut milk, water, tamarind paste, kaffir lime leaves, lemongrass, and turmeric leaf (if using). Stir well and bring to a boil.
- Reduce heat to low, cover partially, and simmer for 2 hours, stirring occasionally to prevent sticking.
- After 2 hours, add palm sugar and salt to taste. Continue cooking uncovered, stirring more frequently as the sauce reduces.
- Cook for another 1-2 hours until the meat is tender and the sauce has reduced to a thick, caramelized coating around the beef. The oil from the coconut milk will separate and the color will darken to a rich brown.
- In the last 15 minutes of cooking, add the toasted coconut and stir well.
- Remove lemongrass stalks and turmeric leaf before serving.
- Serve with steamed rice. Rendang tastes even better after resting for a day, allowing the flavors to develop further.
Make Ahead: Rendang is traditionally made in large batches and kept for days or even weeks (in the refrigerator). The complex flavors actually improve with time, making this a perfect make-ahead dish for entertaining. Simply reheat gently before serving.
10. Northern Thai Khao Soi: The Curry Noodle Soup You Need to Try

Khao Soi holds a special place among the 15 must-try Asian dishes on my list.
I discovered this northern Thai curry noodle soup during a trip to Chiang Mai, and it was a revelation.
The combination of a rich, coconut curry broth with both soft and crispy egg noodles creates a textural experience unlike anything else.
Add tender chicken or beef, a variety of condiments, and you have what might be Thailand’s most underrated dish internationally.
What makes khao soi unique is its fusion heritage.
It shows clear influences from Burmese and Chinese Muslim cuisines, adapted to Thai tastes with the addition of coconut milk and Thai curry paste.
The dish is believed to have traveled with Chinese Muslim traders along the ancient trade routes through Myanmar into northern Thailand.
This cross-cultural history is reflected in its complex flavor profile.
The magic of khao soi lies in the contrast between the creamy, spiced broth and the variety of textures from the two types of noodles.
The same egg noodles are used both in the soup and as a crispy topping.
Then there are the essential condiments pickled mustard greens, shallots, lime, and chili paste which allow each person to adjust the flavor to their preference.
Northern Thai Khao Soi Recipe
| Curry Paste Ingredients | Soup Ingredients | For Serving |
| 5 dried red chilies, soaked and deseeded | 2 tbsp vegetable oil | 1 lb fresh egg noodles, divided |
| 1 tsp coriander seeds, toasted | 2 tbsp curry powder | ¼ cup pickled mustard greens, chopped |
| ½ tsp cumin seeds, toasted | 1 tbsp turmeric powder | ¼ cup shallots, thinly sliced |
| 3 shallots | 4 chicken legs or thighs | ¼ cup cilantro, chopped |
| 5 cloves garlic | 2 cans (14 oz each) coconut milk | 2 limes, cut into wedges |
| 1-inch piece ginger | 2 cups chicken stock | Chili oil or paste |
| 1 stalk lemongrass (white part only) | 2 tbsp fish sauce | |
| 1 tsp shrimp paste (optional) | 1 tbsp palm sugar (or brown sugar) | |
| ½ tsp turmeric powder | Salt to taste | |
| ½ tsp salt |
Instructions:
- Make the curry paste: Grind coriander and cumin seeds in a mortar and pestle or spice grinder. Add all other curry paste ingredients and pound or process until a smooth paste forms. (Time-saving option: Use 4 tablespoons of store-bought red curry paste mixed with 1 tablespoon of curry powder.)
- Prepare the crispy noodles: Set aside about ¼ of the egg noodles. Heat 2 inches of oil in a small pot to 375°F. Fry the reserved noodles in small batches until golden and crispy, about 30 seconds. Drain on paper towels.
- Make the curry: Heat 2 tablespoons oil in a large pot over medium heat. Add the curry paste, curry powder, and turmeric powder. Stir-fry for 2-3 minutes until fragrant.
- Add chicken pieces and stir to coat with the curry paste. Cook for 2-3 minutes.
- Add coconut milk and chicken stock. Bring to a simmer, then reduce heat to low. Cook, partially covered, for 30-40 minutes until chicken is tender.
- Season with fish sauce, palm sugar, and salt to taste.
- Cook the remaining egg noodles according to package instructions. Drain well.
- Assemble the khao soi: Divide cooked noodles among serving bowls. Ladle the curry soup and chicken over the noodles.
- Top each bowl with crispy fried noodles.
- Serve with small dishes of pickled mustard greens, shallots, cilantro, lime wedges, and chili oil, allowing each person to add condiments to taste.
Khao soi is the perfect introduction to northern Thai cuisine. It’s familiar enough with its curry base and noodles, yet distinct enough to show you that Thai food goes far beyond pad thai and green curry.
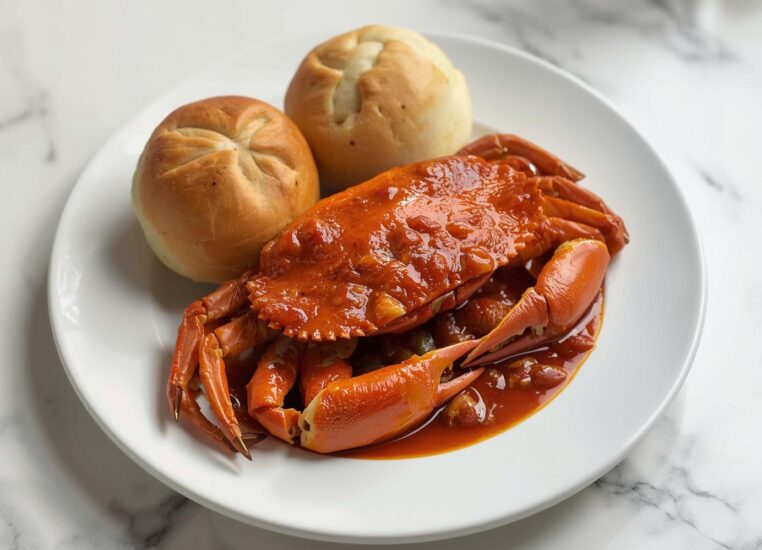
11. Singaporean Chili Crab: Messy but Worth It
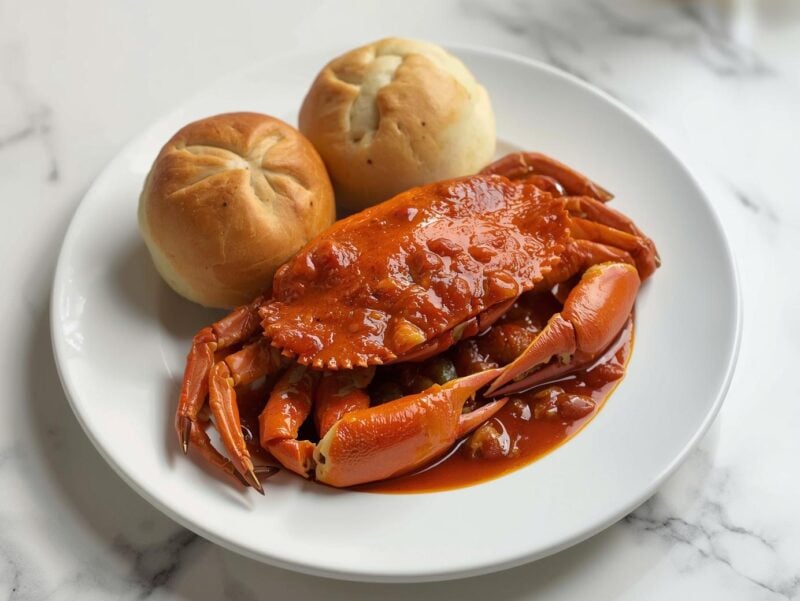
Singapore’s national dish is a glorious mess that’s worth getting your hands dirty for.
I’ll never forget my first experience with chili crab at a seafood restaurant along Singapore’s East Coast Park.
The waiter tied a plastic bib around my neck (a sure sign of a good meal ahead), and brought out a massive crab swimming in a thick, sweet-spicy tomato-based sauce.
It was a full-contact dining experience cracking shells, sucking out meat, and sopping up that incredible sauce with fried mantou buns.
What makes chili crab special is that despite its name, it’s not overwhelmingly spicy.
Instead, the sauce is a perfect balance of sweet, savory, and tangy with just enough heat to keep things interesting.
The slightly thickened sauce clings to the crab, and the egg swirled in at the end creates silky ribbons throughout.
And those fried mantou buns are non-negotiable they’re the perfect vehicle for enjoying every last bit of sauce.
While mud crabs are traditional in Singapore, I’ve adapted this recipe to work with whatever large crab is available in your area.
The most important thing is to use fresh, live crabs for the best flavor and texture.
Yes, it’s a bit of work, but the results are spectacular for a special occasion meal.
Singaporean Chili Crab Recipe
| Crab Ingredients | Sauce Ingredients | For Serving |
| 2 large mud crabs (about 2 lbs each) | ¼ cup vegetable oil | 8 mantou buns |
| 8 cloves garlic, minced | Oil for deep frying | |
| 2-inch piece ginger, grated | Cilantro leaves for garnish | |
| 4 red chilies, deseeded and chopped | ||
| 2 tbsp sambal oelek (chili paste) | ||
| ¼ cup tomato paste | ||
| ¼ cup ketchup | ||
| 1 cup chicken stock | ||
| 2 tbsp sugar | ||
| 1 tbsp soy sauce | ||
| 1 tbsp rice vinegar | ||
| 2 tbsp cornstarch mixed with 2 tbsp water | ||
| 2 eggs, lightly beaten | ||
| 4 green onions, sliced |
Instructions:
- Prepare the crabs: Clean the crabs by removing the top shell, gills, and viscera. Rinse well. Cut each crab into quarters, and crack the claws slightly with a mallet to help the sauce penetrate.
- Make the sauce: Heat oil in a large wok or deep skillet over medium-high heat. Add garlic, ginger, and chilies. Stir-fry for 1-2 minutes until fragrant.
- Add sambal oelek, tomato paste, and ketchup. Stir-fry for another minute.
- Add chicken stock, sugar, soy sauce, and rice vinegar. Bring to a simmer.
- Add the crab pieces and toss to coat with sauce. Cover and cook for 8-10 minutes, turning occasionally, until the crab is cooked through and shells turn bright red.
- Stir in the cornstarch slurry and simmer until the sauce thickens slightly.
- Slowly pour in the beaten eggs in a thin stream while stirring gently to create egg ribbons throughout the sauce.
- Stir in most of the green onions, reserving some for garnish.
- Prepare the mantou: Heat oil for deep frying to 350°F. Fry the mantou buns until golden brown and crispy on the outside, about 2-3 minutes. Drain on paper towels.
- Transfer the chili crab to a large serving dish. Garnish with remaining green onions and cilantro leaves.
- Serve immediately with fried mantou buns for dipping in the sauce.
Messy Eating Ahead: Chili crab is meant to be eaten with your hands! Provide finger bowls with warm water and lemon, plenty of napkins, and maybe even bibs for a truly authentic experience. The messier you get, the more fun you’re having!
12. Japanese Okonomiyaki

Okonomiyaki holds a special place among the 15 must-try Asian dishes because it’s both incredibly delicious and fun to make.
I first tried this “Japanese pizza” (as it’s sometimes called) at a small restaurant in Osaka where customers cook their own okonomiyaki on hot griddles built into the tables.
The name literally means “grilled as you like it,” and true to its name, there are endless variations depending on region and personal preference.
What makes okonomiyaki special is its contrast of textures and flavors.
The batter is studded with shredded cabbage, giving it a wonderful crunch, while the toppings especially the dancing bonito flakes add visual drama.
The combination of sweet-savory okonomiyaki sauce, creamy Japanese mayonnaise, and umami-rich bonito creates a flavor profile that’s uniquely Japanese.
While there are regional variations (Osaka/Kansai style is mixed together, while Hiroshima style is layered), I’m sharing the Osaka version as it’s easier for home cooks.
Don’t worry if your first one isn’t perfect part of the charm of okonomiyaki is its rustic, homemade appearance.
Osaka-Style Okonomiyaki Recipe
| Batter Ingredients | Mix-ins and Toppings | Sauce Ingredients |
| 1 cup all-purpose flour | 4 cups cabbage, finely shredded | ¼ cup ketchup |
| ¼ cup dashi stock (or water) | 4 green onions, thinly sliced | ¼ cup Worcestershire sauce |
| 4 eggs | ½ cup tempura scraps (tenkasu) (optional) | 2 tbsp oyster sauce |
| ¼ tsp salt | ½ cup cooked protein (bacon, shrimp, or squid) | 1 tbsp honey |
| 1 tsp baking powder | Japanese mayonnaise | |
| Bonito flakes (katsuobushi) | ||
| Aonori (seaweed flakes) | ||
| Pickled ginger (beni shoga) (optional) |
Instructions:
- Make the okonomiyaki sauce: Combine ketchup, Worcestershire sauce, oyster sauce, and honey in a small bowl. Mix well and set aside.
- Prepare the batter: In a large bowl, whisk together flour, dashi, eggs, salt, and baking powder until smooth.
- Add the cabbage, green onions, tempura scraps (if using), and your choice of protein to the batter. Mix gently until everything is coated with batter.
- Heat a large non-stick skillet or griddle over medium heat. Add a tablespoon of oil.
- Pour half the batter mixture into the pan and shape into a circle about ½-inch thick. Cook for 5 minutes until the bottom is golden brown.
- Flip the okonomiyaki carefully using two spatulas. Press down gently and cook for another 5 minutes until both sides are golden brown and the inside is cooked through.
- Transfer to a plate. Brush the top generously with okonomiyaki sauce.
- Squeeze Japanese mayonnaise in a zigzag pattern over the top.
- Sprinkle with aonori and a generous amount of bonito flakes (they will “dance” from the heat).
- Add pickled ginger on the side if desired.
- Repeat with the remaining batter to make a second okonomiyaki.
- Serve hot, cutting into wedges with a spatula.
Fun Fact: In Osaka, there’s a popular style of okonomiyaki restaurant called “okonomiyaki-ya” where customers sit around a large iron griddle (teppan) and cook their own okonomiyaki.
It’s a social dining experience, with everyone participating in the cooking process while enjoying drinks and conversation.
13. Korean Fried Chicken: Twice-Fried Crispy Perfection

Korean fried chicken has taken the world by storm, and for good reason.
The first time I tried it at a late-night spot in Seoul’s Hongdae district, I was blown away by how different it was from American-style fried chicken.
The impossibly crispy exterior that somehow stays crunchy even after being coated in sauce, the juicy interior, and that perfect balance of sweet, spicy, and savory flavors it was a revelation that made me rethink everything I knew about fried chicken.
What makes Korean fried chicken special is the double-frying technique.
The chicken is fried once at a lower temperature to cook it through, then again at a higher temperature to create that signature shattering crispness.
The thin coating doesn’t absorb much oil, resulting in chicken that’s lighter and crunchier than its American counterpart.
And then there’s the sauce typically either a sticky, spicy gochujang-based sauce or a sweet garlic-soy version.
In Korea, fried chicken is often enjoyed as “chimaek” chicken and beer a combination so perfect it deserves its own word.
It’s a social food, meant to be shared with friends over cold drinks.
I’ve adapted this recipe for home cooks, and while it takes a bit of time, the results are absolutely worth it for a special treat.
Korean Fried Chicken Recipe
| Chicken Ingredients | Coating Ingredients | Sauce Ingredients |
| 2 lbs chicken wings or boneless thighs | 1 cup potato starch (or cornstarch) | 3 tbsp gochujang (Korean chili paste) |
| 1 tsp salt | ½ tsp salt | 3 tbsp ketchup |
| ½ tsp black pepper | ½ tsp baking powder | 2 tbsp honey |
| 1 tbsp ginger, grated | ¼ tsp black pepper | 2 tbsp brown sugar |
| 2 cloves garlic, minced | Oil for deep frying | 1 tbsp soy sauce |
| 1 tbsp rice vinegar | ||
| 3 cloves garlic, minced | ||
| 1 tbsp sesame oil | ||
| 1 tbsp toasted sesame seeds | ||
| 2 green onions, thinly sliced |
Instructions:
- Prepare the chicken: If using wings, separate them at the joints and remove the tips. If using thighs, cut into 2-inch pieces. Pat dry with paper towels.
- Season the chicken with salt, pepper, ginger, and garlic. Let marinate for at least 30 minutes (or up to overnight in the refrigerator).
- Prepare the coating: In a large bowl, mix potato starch, salt, baking powder, and black pepper.
- Heat oil in a large, heavy-bottomed pot to 325°F. Use enough oil to submerge the chicken pieces.
- Dredge the chicken pieces in the potato starch mixture, shaking off excess.
- First fry: Working in batches, fry the chicken for 5-6 minutes until lightly golden but not browned. Remove and drain on a wire rack. Let rest for 2 minutes.
- Increase oil temperature to 375°F.
- Second fry: Return the chicken to the hot oil and fry for another 2-3 minutes until deeply golden and very crispy. Drain on a wire rack.
- Make the sauce: While the chicken is resting, combine gochujang, ketchup, honey, brown sugar, soy sauce, rice vinegar, and minced garlic in a small saucepan. Bring to a simmer over medium heat, stirring constantly, until slightly thickened (about 3-4 minutes).
- Remove from heat and stir in sesame oil.
- Toss the fried chicken in the warm sauce until well coated. (For extra crispiness, you can serve the sauce on the side for dipping instead.)
- Sprinkle with sesame seeds and green onions before serving.
- Serve immediately with pickled radish (danmuji) on the side and cold beer for an authentic Korean experience.
Variation: For a non-spicy alternative, try the garlic-soy version (yangnyeom-tongdak). Replace the gochujang-based sauce with a mixture of 3 tablespoons soy sauce, 2 tablespoons brown sugar, 1 tablespoon rice vinegar, 6 cloves minced garlic, and 1 tablespoon honey. Simmer until slightly thickened, then toss with the fried chicken.
14. Filipino Adobo: The National Dish of the Philippines
Filipino adobo is one of those dishes that proves the best food often comes from the simplest ingredients.
During my travels through the Philippines, I discovered that nearly every family has their own version of adobo, with fierce debates about what constitutes the “authentic” recipe.
Some use chicken, others pork, some a combination of both. Some add coconut milk, others swear by a dry finish.
But the core elements meat braised in vinegar, soy sauce, garlic, and bay leaves remain constant.
What makes adobo special is its perfect balance of sour, savory, and slightly sweet flavors, along with its practicality.
The vinegar and garlic originally served as preservatives in the tropical Philippine climate before refrigeration was common.
The dish actually improves with age, tasting even better the next day as the flavors deepen.
This made it ideal for preserving food and for feeding large gatherings.
I’m sharing a classic chicken adobo recipe, but feel free to substitute pork or use a combination.
The beauty of adobo is its flexibility you can adjust the ratio of vinegar to soy sauce based on your preference for more sour or more savory.
Just don’t skimp on the garlic it’s essential to the dish’s character.
Classic Filipino Chicken Adobo Recipe
| Main Ingredients | Sauce Ingredients | For Serving |
| 2 lbs chicken thighs and drumsticks | ½ cup white vinegar | Steamed white rice |
| 1 head garlic, cloves separated and crushed | ¼ cup soy sauce | Sliced green onions |
| 2 bay leaves | ¼ cup water | |
| 1 tbsp whole black peppercorns | 1 tbsp brown sugar | |
| 1 small onion, sliced | ||
| 2 tbsp vegetable oil |
Instructions:
- Combine chicken, garlic, bay leaves, peppercorns, and onion in a large pot or Dutch oven.
- Add vinegar, soy sauce, water, and brown sugar. Stir to combine.
- Bring to a boil over high heat, then reduce heat to low. Cover and simmer for 30 minutes, turning the chicken occasionally.
- After 30 minutes, remove the lid and increase heat to medium. Continue cooking for another 15-20 minutes, until the sauce reduces and thickens slightly.
- Optional step for more flavor: Remove the chicken pieces and set aside. Continue reducing the sauce until it thickens further, then return the chicken to the pot and toss to coat.
- For a caramelized finish: Heat oil in a large skillet over medium-high heat. Remove chicken from the sauce and brown in the skillet for 2-3 minutes per side until crispy. Pour some of the reduced sauce over the chicken.
- Serve hot with steamed white rice, spooning additional sauce over the chicken and rice.
- Garnish with sliced green onions if desired.
Adobo isn’t just a dish; it’s a cooking process, a preservation method, and a way of thinking about food. It represents Filipino ingenuity – taking simple ingredients and transforming them into something extraordinary through patience and balance.
15. Balinese Babi Guling: Succulent Roast Suckling Pig

Babi guling, or Balinese suckling pig, is one of the most memorable dishes among the 15 must-try Asian dishes I’ve experienced.
I’ll never forget my first taste at a small warung (family-owned restaurant) in Ubud.
The owner proudly explained how they prepare the pig each morning, stuffing it with a complex spice paste before slow-roasting it on a hand-turned spit over an open fire.
The result was transcendent impossibly crispy skin giving way to tender, aromatic meat infused with lemongrass, turmeric, and other spices.
What makes babi guling special is the contrast between the shatteringly crisp skin and the succulent meat, along with the complex spice paste (basa gede) that permeates every bite.
This dish is a cornerstone of Balinese ceremonial and religious events, but it’s also available at specialized warungs throughout the island.
In Bali, nothing goes to waste a complete babi guling meal includes not just the meat and skin, but also blood sausage, fried internal organs, and a spicy vegetable salad called lawar.
While traditional babi guling requires a whole suckling pig and outdoor cooking equipment, I’ve adapted this recipe for home cooks using pork belly, which provides both the meat and skin components.
The spice paste is authentic, though, and captures the essence of this iconic Balinese dish.
Balinese-Style Roast Pork Belly Recipe
| Spice Paste Ingredients | Pork and Cooking | For Serving |
| 8 shallots | 3 lbs pork belly, skin-on | Steamed white rice |
| 6 cloves garlic | 1 tbsp vegetable oil | Sambal matah (Balinese raw shallot relish) |
| 4 candlenuts (or macadamia nuts) | 1 tbsp salt | Cucumber slices |
| 2-inch piece ginger | Tomato slices | |
| 2-inch piece galangal (or more ginger) | ||
| 2-inch piece turmeric (or 2 tsp powder) | ||
| 5 red chilies, deseeded | ||
| 2 stalks lemongrass (white part only) | ||
| 5 kaffir lime leaves | ||
| 1 tsp black peppercorns | ||
| 1 tsp coriander seeds | ||
| ½ tsp cumin seeds | ||
| 1 tsp shrimp paste (terasi) |
Instructions:
- Prepare the pork: Score the skin of the pork belly in a crosshatch pattern, being careful not to cut into the meat. Rub salt all over the skin and let sit uncovered in the refrigerator for at least 4 hours or overnight. This helps dry out the skin for maximum crispiness.
- Make the spice paste: Toast coriander seeds, cumin seeds, and black peppercorns in a dry pan until fragrant. Grind to a powder using a spice grinder or mortar and pestle.
- Combine ground spices with all other spice paste ingredients in a food processor. Blend until a smooth paste forms, adding a little water if necessary to help it process.
- Prepare the pork for roasting: Preheat oven to 325°F. Remove pork from refrigerator and pat the skin dry with paper towels.
- Turn the pork belly over so the skin side is down. Spread the spice paste evenly over the meat side (not the skin), pressing it into any crevices.
- Roll the pork belly up tightly, with the skin on the outside. Tie securely with kitchen twine at 1-inch intervals. (Alternatively, you can leave it flat if you prefer.)
- Place the pork on a rack in a roasting pan, skin side up. Rub the skin with oil and sprinkle with additional salt.
- Roast for 2½ hours until the meat is tender and cooked through.
- Increase oven temperature to 450°F and roast for another 20-30 minutes until the skin is crispy and golden brown. Watch carefully to prevent burning.
- Let rest for 15 minutes before slicing.
- Serve with steamed rice, sambal matah, cucumber, and tomato slices.
Sambal Matah Recipe: To make this traditional Balinese condiment, finely slice 8 shallots, 4 lemongrass stalks (white part only), 4 kaffir lime leaves, and 4 red chilies. Mix with 1 teaspoon shrimp paste, 1 tablespoon lime juice, and 2 tablespoons coconut oil. Season with salt to taste. This fresh, spicy relish perfectly complements the rich pork.
Bringing the Flavors of Asia to Your Kitchen
After exploring these 15 must-try Asian dishes, I hope you’re feeling inspired to bring some of these incredible flavors into your own kitchen.
What I love most about Asian cuisin
e is how it transforms simple ingredients into complex, balanced dishes through technique and patience.
Whether it’s the slow-simmered broths of ramen and pho, the perfectly balanced sweet-sour-salty-spicy harmony of pad thai, or the aromatic spice pastes of rendang and khao soi, these dishes reward those willing to invest a little time and care.
I’ve found that cooking Asian food at home has expanded my culinary horizons and given me a deeper appreciation for the cultures behind these dishes.
Each recipe tells a story about the people who created it, the environment they lived in, and the values they held.
Food is truly one of the most accessible ways to experience another culture.
Don’t be intimidated by ingredients you’re unfamiliar with or techniques you haven’t tried before.
Start with whichever dish appeals to you most, and remember that cooking is a journey.
Your first attempt might not be perfect, but it will still be delicious, and you’ll get better with each try.
I encourage you to visit Asian grocery stores in your area, where you’ll find most of the specialty ingredients mentioned in these recipes, often at prices much lower than regular supermarkets.
Most importantly, have fun with the process! Invite friends over for a dumpling-making party, gather family for a Korean barbecue night, or simply treat yourself to a comforting bowl of laksa after a long day.
Food tastes better when it’s shared, after all.
Which of these 15 must-try Asian dishes will you make first?
I’d love to hear about your cooking adventures and any adaptations you make to suit your taste. Happy cooking!